Your coupon for will be reflected when you check out!
✖
Your coupon for
✖
Hello!
You're visiting the PartSelect site in U.S.
Would you like to shop on the Canadian site?
Stay on this site
Go to Canadian site
✖
Model Number Locations
1Select Category Type
Select Category Type
2Select Product Type
Select Product Type
3Select {MODEL} Type
Select {MODEL} Type
Sample Model Number Tags
Model numbers can be made up of numbers (1005400, for example) or a combination of letters and numbers (LAT1000AAE). The model number will most likely appear on either a paper sticker or a metal plate. Your appliance's model number tag may look similar to the sample model number tags shown here (model number highlighted in yellow):
Model has been saved to My Models. If you're not signed in, your lists are available on this device and will expire within 30 days.
Model has been saved to My Models.
Here's a part you may need: the GE Transmission Pulley. This essential piece helps your appliance work at peak performance smoothly and efficiently. Produced by the trustworthy GE brand, it's a durabl...
The GE Oven Door Window Pack Assembly is a genuine OEM part that fits select GE ranges and ovens. It includes a heat-resistant inner glass panel, frame, and seals, providing insulation and clear visib...
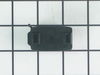
This part provides a way of connecting individual electrical wires and offers protection of the device from electrical surges (voltages and/or currents).
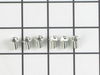
This part is a replacement screw for your oven. It is made of black metal and is sold individually. This screw is approximately 1/4 inch in diameter and about 1/2 inch in length. It is designed to con...
The existing terminal block on my Ge oven/Range had melted due to a loose wire causing sparking and starting the plastic casing of the terminal block on fire and melting it, Part select made the part easy to find and had it at my house in 2 days. All I had to do was remove six screws to take the back sheet metal cover off of the oven. U
... Read morenscrew the terminal connections remove two mounting screws that held the terminal on to the oven body. This was a little trickier than it should have been because the melted plastic had reformed making it very hard to access the mounting screws. i then mounted the new piece and plugged the oven in, it took 15 minutes and was very easy. definitely saved me at-least a $100 for the service call i would have made if finding the part wasn't so convenient
This door required a lot more screws to be removed in order to remove the inside window assembly. I counted a total of 19 screws. That is why the estimated time is 30-60 minutes.
- remove door from range following the basic guide to removing any range door. - place door on work surface with the outside facing down.
... Read more- remove three 1/4 socket screws from bottom and two star screws on top. - Flip door over, remove outer door panel and set aside. - There will be a separate pane of glass that needs to be removed. Remove 1/4 socket screws holding glass and set aside. - Slide door over your work surface edge so you can remove the star screws holding the door hinges (from underneath). You could flip the door over but the door would have to be flipped back once the hinges were removed. - Remove the remaining 1/4 screws holding the aluminum shielding. - Remove the shielding being careful not to disturb the insulation around the window. - Remove the damaged window. Take note of the writing and orientation on the aluminum window frame. (upper right if hinges were on the bottom) - Set the new window in its place. - Reverse the process by replacing the aluminum shield, hinges, than internal glass pane. - Set outer door on top and holding everything together, flip door. - Tighten the two star screws on top and the three 1/4 socket screws on the bottom. - Replace door. Don't forget to lift up those hinge tabs before trying to close the door. All done. Pat yourself on the back for a job well done.