Your coupon for will be reflected when you check out!
✖
Your coupon for
✖
Hello!
You're visiting the PartSelect site in U.S.
Would you like to shop on the Canadian site?
Stay on this site
Go to Canadian site
✖
Model Number Locations
1Select Category Type
Select Category Type
2Select Product Type
Select Product Type
3Select {MODEL} Type
Select {MODEL} Type
Sample Model Number Tags
Model numbers can be made up of numbers (1005400, for example) or a combination of letters and numbers (LAT1000AAE). The model number will most likely appear on either a paper sticker or a metal plate. Your appliance's model number tag may look similar to the sample model number tags shown here (model number highlighted in yellow):
PFE28RSHCSS General Electric Refrigerator - Overview
Save your modelModel Saved!
Save your model for later to make things easier.
Model has been saved to My Models. If you're not signed in, your lists are available on this device and will expire within 30 days.
Model has been saved to My Models.
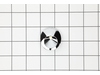
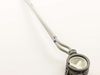
This sensor (Temperature Sensor, Thermistor, Refrigerator Temperature Sensor) sends the temperature reading of the compartment to the control board. If you notice your refrigerator is too warm, too co...
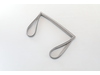
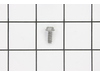
This is a door handle fastener to secure the handle to your refrigerator drawer. It is also known and a mounting bolt or screw. It is approximately 1 inch in total length, and is made of metal.
This OEM-compatible screw is designed for use with many GE dishwashers. Measuring 8-16 HXW and 1/2" in length, this stainless steel screw secures the middle spray arm hub to the upper rack assembly, e...
This replacement vegetable pan glass is designed to restore the functionality and appearance of your refrigerator’s crisper drawer. It provides a sturdy, transparent surface for storing produce while ...
Designed for use in the fresh food section of compatible refrigerators, this LED light and cover assembly offers reliable, energy-efficient lighting using advanced LED technology. The clear, impact-re...
This is a door gasket for the freezer compartment of your refrigerator. Door gaskets are made of rubber and plastic and are designed to seal the cold interior of the freezer compartment from the ambie...
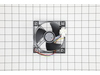
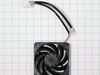
Need a reliable solution to improve your appliance's airflow? Meet the GE Dark Dorian Vent Grille. This part is more than just a vent grille; it's your key to getting your appliance running at peak pe...
This is a water filter bypass plug for various refrigerators. This part is used to bypass a missing water filter in your fridge, so you can continue to dispense water and ice from it. If your current ...
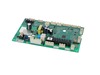
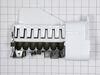
The main board assembly, also known as an electronic control board, is an authentic OEM replacement part used in refrigerators. It has dimensions of approximately 10 inches in by 6 inches. It controls...
I went to a GE repair center to explain my problem, the service center reccomended that I have a techinician come out o look at it. $75.00 for the visit and what ever labor and materials wuld cost.
I went on line to see if there were others having this same problem and found that there were many with the same problem.
... Read more />After reading some of the ways that people found out what was wrong ...it became a matter of three components, the timer, heater or thermostat.
I tried the most common component and the less expensive one first , the thermostat switch I installed it very easily snipping two wires and attaching the news using wire nuts I used the diagram on this website to pinpoint the component and there has not been a problem since.
went to your website and viewed exploded view to find the sensor( there are two I just picked one to replace for now), pried the cover off carfully and pulled out the sensor. I snipped the wire in the middle leaving plenty to work with. I shortened the wire on the new piece, spliced the wires together and with some 3M rubberized, tape wr
... Read moreapped them up, replaced the sensor back into the cover and snapped in place.


 – Part Number: WR14X36194")