Your coupon for will be reflected when you check out!
✖
Your coupon for
✖
Hello!
You're visiting the PartSelect site in U.S.
Would you like to shop on the Canadian site?
Stay on this site
Go to Canadian site
✖
Model Number Locations
1Select Category Type
Select Category Type
2Select Product Type
Select Product Type
3Select {MODEL} Type
Select {MODEL} Type
Sample Model Number Tags
Model numbers can be made up of numbers (1005400, for example) or a combination of letters and numbers (LAT1000AAE). The model number will most likely appear on either a paper sticker or a metal plate. Your appliance's model number tag may look similar to the sample model number tags shown here (model number highlighted in yellow):
Model has been saved to My Models. If you're not signed in, your lists are available on this device and will expire within 30 days.
Model has been saved to My Models.
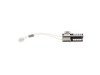
This is an oven burner igniter made for use with Samsung ovens. This oven burner igniter is designed to ignite the gas that flows into it, to produce heat. However, over time and with further frequent...
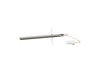
This is a range temperature sensor, used to detect the interior temperature of your oven when it is baking or cooking. If you notice your oven is baking unevenly or at inconsistent temperatures, will ...
This rubber cushion is supplied by the original manufacturer and has a shaft approximately 1 inch long. The cushion acts as a layer of protection between the oven door and oven frame/cavity. It preven...
Enjoy the precision and durability of Samsung with this high-quality Left Rear Burner Cap. Known as the "surface burner cap", this essential component is designed to cover the surface burner of your S...
This oven cavity floor coating or bottom floor panel is an authentic OEM part supplied by Samsung to ensure compatibility with various models of Samsung ranges. It is a protective layer that sits on t...
This stainless steel wire rack is a sturdy platform for baking or roasting food, making sure heat circulates evenly. It measures approximately 7/16 inches by 24 3/4 inches and is usually found inside ...
The Samsung Burner Head (Aux) is a top-notch enhancement for your Samsung range. Specifically designed to endure high temperatures, this quality part, crafted from sturdy metal, ensures durability and...
Enhance your Samsung range with this durable burner side grate, crafted in resilient porcelain enamel to resist chipping and scratching. Measuring 6 inches in width and 19.75 inches in length, this Sa...
The bake igniter is responsible for igniting the gas to light the bake burner within the range. Ensure safety precautions such as shutting off the house circuit breaker and gas supply. Tools Required:...
Introducing the robust Samsung Right Burner Head, a full-length surface burner designed especially for Samsung ranges. Manufactured from hard-wearing metal, this genuine OEM item ensures exceptional d...
We're sorry, but our Q&A experts are temporarily unavailable.
Please check back later if you still haven't found the answer you need.
2 questions answered by our experts.
Sort by:
< Prev
1
Next >
Search filter:
Clear Filter
Your search term must have 3 or more characters.
Keep searches simple. Use keywords, e.g. "leaking", "pump", "broken" or "fit".
Sorry, we couldn't find any existing answers that matched.Try using some different or simpler keywords, or submit your new question by using the "Ask a Question" button above!
STEPHEN
December 18, 2019
Where is this thermistor dg3200002b located ?? cant read your schematis .
For model number NX58H9500WS
Hello Stephen, thank you for your question.This part is located in the oven on the back wall. I hope this helps.
Did this question help you?
Thank you for voting!
Jane
August 26, 2023
Looking for rubber pads/feet for the gas range grates. The small bumper that goes into grate bottom to protect range top. Samsung does not selll them. Grates are in great condition need the little black rubber feet. Thank you
For model number NX58H9500WS
Hi Jane, thank you for writing in. Our research has found that part number PS11770098 is the Grate Feet that you need, they are sold individually. You will also need part number PS11728058 the Adhesive. We hope this helps.
My barely 4 year old Samsung range/oven began not heating consistently. Even though it said 350, for example, we had to increase to 465 to get it to bake. Thought it was the temperature sensor. Ordered and installed new one easily. That didn't solve the problem. So, rather than throw more money at parts that may not have resolved the
... Read moreissue, I got a new Amana range. Samsung appliances go to my 'do not buy' list along with LG!
The Samsung stove I have has had the igniter replaced several times. It seems to wear out over a couple years time. I did the repair with a Philips #2 screw driver. Open the oven door, remove the grates. unscrew the bottom cover and expose the heat shield. Unscrew the heat shield. This exposes the burner. Unscrew the burner from the c
... Read moreenter of the plate/lower heat shield. Unscrew the burner from the front and back of the oven. Carefully lift up the burner to expose the igniter and clip. Unscrew the igniter from the burner and set the burner aside. Unclip the igniter from the power cable. If it falls below, it won't go far just reach in a lift it back up to fasten the new igniter to the power clip. Refasten to the burner with new clips and screws provided. Re-insert the burner to the gas jet that is below the bottom plate which will not be visible to you unless you place your head towards the rear of the stove and look down. Once the Jet is back into the hole of the burner, re fasten it to the middle back and front of the stove. Replace the covers and grates. Close the oven and test it. A new igniter does wonders. You can remove the stove door for a less intrusive install, but I found it unnecessary to do so and saved a step and time. I was done well under 30 minutes.
I initially thought I needed a new touch control panel but after a bit of research on the web and numerous videos and articles on replacing the control panel, I found an obscure video and forum where they mentioned that this thermostat fuse has been known to overheat and shut down the oven (touch controls) for safety reason. By the way,
... Read moremy unit is 3 years old and the warranty expired one month ago! I took the top off, found the fuse and tested it with a Multi-meter (again, thanks to some very helpful youtube videos out there). Dead. I figured it was worth a try and ordered the $20 part as opposed to the much more expensive control.
> remove all of the gas burners on the stove (a total of about a dozen screws) > then remove the top back vent and the screws that hold the top metal piece in place > you will see the thermostat fuse towards the back in the middle. > loosen one screw and replace > put back together in reverse order.
*** You do NOT have to remove the front piece as some videos and articles mention. The total time should be about 20 minutes. With a little patience and pre-homework, it's easy and you'll save a couple hundred in labor costs.