


NWSR483GB1WW Hotpoint Dryer - Overview
Sections of the NWSR483GB1WW
[Viewing 5 of 5]


Keep searches simple, eg. "belt" or "pump".

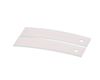
DRYER FRONT BEARING WHITE 2PK
PartSelect #: PS17137205
Manufacturer #: WE03X37318
This authentic, white Drum Bearing Slide, also known as the bearing drum slide, glide, or pad, is a plastic, easy-to-install part for your dryer. It replaces the dryer's front drum slide to allow for ...
$17.15
In Stock

Rotary Start Switch
PartSelect #: PS3487203
Manufacturer #: WE4M519
This replacement start switch is a genuine OEM part for your dryer. If your dryer will not start or shut off, you may need to replace this part. For this repair you will need a number 2 Phillips screw...
$27.36
In Stock

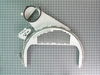
Door Handle - White
PartSelect #: PS9494490
Manufacturer #: WE01X20419
This part is on the outer door of the dryer.
$34.98
In Stock

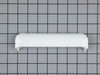
Dryer Lint Chute Assembly
PartSelect #: PS11763093
Manufacturer #: WE14X25080
This lint chute assembly is a genuine replacement component designed for GE and Hotpoint dryers. It plays a critical role in directing exhaust airflow from the dryer drum to the blower wheel, ensuring...
$82.97
In Stock

Drum Bearing Sleeve
PartSelect #: PS266777
Manufacturer #: WE1M462
This rear drum bearing sleeve is a critical support component located at the back of the dryer drum, designed to reduce friction and ensure smooth rotation during operation. As the drum spins, the sle...
$30.53
In Stock

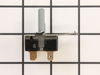
Door Switch
PartSelect #: PS2344321
Manufacturer #: WE4M415
A door switch is a simple on/off mechanism that prohibits the dryer from operating when the door is open.
$39.46
In Stock

Retainer O-Ring
PartSelect #: PS266776
Manufacturer #: WE1M461
This authentic OEM rear bearing O-ring is designed for use with GE dryers. It helps secure the drum rear bearing onto the drum shaft, playing a key role in maintaining smooth and quiet dryer operation...
$17.28
In Stock

Natural Gas to Liquid Propane Conversion Kit
PartSelect #: PS267591
Manufacturer #: WE25X217
This conversion kit changes the dryer from natural gas to liquid propane. Installation instructions are included.
$72.00
In Stock

Refrigerator Plug Door Rvsbl
PartSelect #: PS11701216
Manufacturer #: WR01X21159
Sold individually.
$16.05
In Stock

Knob and Clip
PartSelect #: PS268524
Manufacturer #: WH01X10141
This knob and clip assembly is a manufacturer-approved replacement part for your dryer. This timer knob sets the correct time on your dryer. If the shaft becomes damaged, the timer may no longer work....
No Longer Available

Cycling Thermostat
PartSelect #: PS267949
Manufacturer #: WE4M216
This thermostat is located on the blower wheel.
$88.47
In Stock

Screw
PartSelect #: PS258453
Manufacturer #: WD02X10057
This screw is sold individually. Size: 10-16x1/2
$16.05
In Stock
Questions And Answers for NWSR483GB1WW
We're sorry, but our Q&A experts are temporarily unavailable.
Please check back later if you still haven't found the answer you need.
Common Symptoms of the NWSR483GB1WW
[Viewing 6 of 6]Noisy
Fixed by
these parts
these parts


Show All
Marks left on clothes
Fixed by
these parts
these parts
Show All
Won’t Start
Fixed by
these parts
these parts

Show All
Door won’t close
Fixed by
these parts
these parts
Show All
Will Not Start
Fixed by
these parts
these parts
Show All
Drum Not Spinning
Fixed by
these parts
these parts
Show All


Keep searches simple. Use keywords, e.g. "leaking", "pump", "broken" or "fit".
The dryer door handle broke off.
I pried out the remaining pieces of the handle out of the door with a screwdriver. When the new part arrived, I snapped it into place and it was done. It fit perfectly.
Parts Used:
-
Jim from North Richland Hills, TX
-
Difficulty Level:Really Easy
-
Total Repair Time:Less than 15 mins
-
Tools:Screw drivers
93 of 113 people
found this instruction helpful.
Was this instruction helpful to you?
Thank you for voting!
Start switch was stuck in the on position always leaving dryer running until you moved timer switch to off or opened door
Just removed the screws at the top of the control panel cover and flipped it down. The switch was then in plain view and simply slid out ( after taking off knob)..placed wire terminals on new switch as I took them off old switch. Slid new switch back in place to lock it in then put control panel cover back into place and replaced screws.
... Read more
Your good to go.
Read less
Parts Used:
-
Stan from Yorkville, IL
-
Difficulty Level:Really Easy
-
Total Repair Time:Less than 15 mins
-
Tools:Screw drivers
85 of 100 people
found this instruction helpful.
Was this instruction helpful to you?
Thank you for voting!
Dryer would not start
The end repair was very simple and took minimal effort. The time and difficulty was all in the testing. I disassembled the dryer and removed the drum and then hard wired each thermo-fuse to determine where the fault was. After test all of those I was stumped. When I opened the door the light would not come on so I assumed it was a pow
... Read more
er fault closer to the source. However after all of my testing I couldn't find anything wrong. I then removed the light bulb and realized it was burned out which led me to the door switch being the fault. I removed the switch and soldered the three wire together and the dryer started right up! All I had to do was order a new $15 part, unsolder the wires and plug them in. Would have been so much simpler if that light bulb hadn't of been burned out causing me to over think my diagnosis. This was my first major appliance repair and I did it with only the help of the parts diagram provided on the website.
Read less
Parts Used:
-
Joshua from Dallas, TX
-
Difficulty Level:A Bit Difficult
-
Total Repair Time:1- 2 hours
-
Tools:Pliers, Screw drivers, Socket set
92 of 140 people
found this instruction helpful.
Was this instruction helpful to you?
Thank you for voting!