


MGD8100DC0 Whirlpool Dryer - Overview
Sections of the MGD8100DC0
[Viewing 1 of 1]
Keep searches simple, eg. "belt" or "pump".

Liquid Propane Gas Converter
PartSelect #: PS16875225
Manufacturer #: W11581317
This gas conversion kit is used to convert natural gas burners to liquid propane in dryers. If your dryer will not start, heat, or there is an unusual smell, replacing this part can be a solution to t...
$58.42
In Stock

Stacking Kit
PartSelect #: PS888067
Manufacturer #: 8541503
This kit comes with 2 adhesive pads, 2 brackets and 4 screws. This is for stacking the appliances vertically - dryer over washer.
$46.34
In Stock

SEAL
PartSelect #: PS12711436
Manufacturer #: W11310035
Enhance the efficiency of your clothes dryer with this genuine OEM Whirlpool Dryer Door Seal. Specifically designed for Whirlpool clothes dryers, this durable, high-quality seal also works effortlessl...
$62.60
In Stock

Drying Rack
PartSelect #: PS346849
Manufacturer #: 3406839
Need to dry shoes or sweaters without the tumble? This handy drying rack makes it easy. It fits right into the back of your dryer—no tools needed—and stays still while the drum spins, so your items ge...
$56.33
In Stock


Side and Bottom Vent Kit
PartSelect #: PS3633049
Manufacturer #: W10470674
This kit is used for the bottom and side exhaust. The kit includes both the straight and elbow vent.
$72.00
In Stock

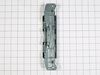
Hinge
PartSelect #: PS11775346
Manufacturer #: W11051465
The dryer door hinge assembly is an essential part of your clothes dryer, providing the support needed for the door to open and close smoothly. This hinge assembly is installed on the front panel of t...
$80.82
In Stock

RACK-DRY
PartSelect #: PS1487158
Manufacturer #: 8212450A
Maximize the efficiency of your Whirlpool 27 inch dryer with this genuine OEM drying rack. It's specifically designed for dryers with lint screens located inside the front door opening. What makes thi...
$72.00
In Stock

Stack Kit
PartSelect #: PS12069913
Manufacturer #: W10869845
Explore the convenience of saving space in your laundry room with the Whirlpool long vent dryer stack kit. Specifically designed to fit a selection of Whirlpool, KitchenAid, Maytag, Jenn-Air, Amana, I...
$67.82
In Stock

Stacking Kit
PartSelect #: PS990537
Manufacturer #: 8572546
This kit allows you to stack your washer and dryer to maximize your laundry space.
$43.18
In Stock

SEAL
PartSelect #: PS12348893
Manufacturer #: W11193479
This seal prevents leaks. Replace if moisture appears. This part is designed to keep your appliance operating reliably and efficiently. Replacing a worn or failing component helps prevent further issu...
$17.15
In Stock

Wiring Harness
PartSelect #: PS11752344
Manufacturer #: WPW10298258
Presenting the Whirlpool Dryer Wire Harness, a genuine OEM part that ensures the proper functioning of selected Whirlpool, KitchenAid, Maytag, Jenn-Air, Amana, Inglis, and Magic Chef clothes dryers. K...
$11.77
In Stock
Questions And Answers for MGD8100DC0
We're sorry, but our Q&A experts are temporarily unavailable.
Please check back later if you still haven't found the answer you need.
Common Symptoms of the MGD8100DC0
[Viewing 3 of 3]Door won’t close
Fixed by
these parts
these parts
Show All
Noisy
Fixed by
these parts
these parts


Show All
Door Sags
Fixed by
these parts
these parts
Show All
Keep searches simple. Use keywords, e.g. "leaking", "pump", "broken" or "fit".
converting to LP gas
First I removed the front panel which allowed access to the burner assembly. Then I removed the gas connector and elbow from the back of the dryer. Then I removed 2 screws that hold burner assembly in place and 2 screws that hold an angle brace for the burner assembly. Had to loosen the screw that clamps around the gas pipe holding it in
... Read more
place clear in the back inside dryer housing. Unplugged all wiring connectors, then I removed the burner assembly and removed the 2 screws holding the burner tube to the valve. Remove the orifice and replaced with the proper size for LP gas. Then removed the blocking pin and replaced with one for LP gas. Then reassembled in reverse order. Actually pretty easy.
Read less
Parts Used:
-
Robert from Tenino, WA
-
Difficulty Level:Easy
-
Total Repair Time:15 - 30 mins
-
Tools:Socket set, Wrench (Adjustable)
30 of 37 people
found this instruction helpful.
Was this instruction helpful to you?
Thank you for voting!
Needed to change rear exhaust to the side to fit dryer into my closet.
First, I opened up the front of the dryer and then unscrewed the entire back piece. I assembled the new exhaust piece from the kit. Next, I took out the old straight rear exhaust and then replaced it with the elbow shaped left eshaust from the kit. Lastly, reattache the back and front pieces of the dryer.
Parts Used:
-
Mark from San Diego, CA
-
Difficulty Level:Really Easy
-
Total Repair Time:30 - 60 mins
-
Tools:Screw drivers, Wrench (Adjustable)
44 of 91 people
found this instruction helpful.
Was this instruction helpful to you?
Thank you for voting!
Placing Dryer on Top of Washing Machine with Stack Kit
I purchased a stack kit from "Part select.com". The item was just what I needed to do the job. The delivery of the part was made the next morning. WOW! Excellent service! The process was completed in less than 24 hours, start to finish. Very impressed!
Parts Used:
-
Randy from Brentwood, CA
-
Difficulty Level:Really Easy
-
Total Repair Time:15 - 30 mins
-
Tools:Wrench set
25 of 46 people
found this instruction helpful.
Was this instruction helpful to you?
Thank you for voting!