Your coupon for will be reflected when you check out!
✖
Your coupon for
✖
Hello!
You're visiting the PartSelect site in U.S.
Would you like to shop on the Canadian site?
Stay on this site
Go to Canadian site
✖
Model Number Locations
1Select Category Type
Select Category Type
2Select Product Type
Select Product Type
3Select {MODEL} Type
Select {MODEL} Type
Sample Model Number Tags
Model numbers can be made up of numbers (1005400, for example) or a combination of letters and numbers (LAT1000AAE). The model number will most likely appear on either a paper sticker or a metal plate. Your appliance's model number tag may look similar to the sample model number tags shown here (model number highlighted in yellow):
Model has been saved to My Models. If you're not signed in, your lists are available on this device and will expire within 30 days.
Model has been saved to My Models.
This water tube, or plastic tube, is used in refrigerators and freezers. The tube ensures water is directed to parts of the refrigerator that need it, such as the water dispenser and ice maker. If you...
Refrigerator door bin AAP73252202 is an original equipment manufacturer (OEM) part that fits some Kenmore Elite bottom-freezer refrigerators in the following series: 7957204, 7957205, 7957209, 7957218...
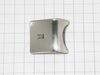
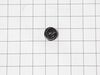
This handle screw, also known as a mounting bolt, is a mounting screw to help secure the door handle to your refrigerator door. If your handle is loose, you may just need to tighten the screw. If your...
This door basket assembly is supplied by the original manufacturer to provide storage for various food items in refrigerators. It consists of a white plastic base and a transparent shield, measuring 1...
Refrigerator Air Filters are a key component for neutralizing odors and ensuring a fresh stream of air into your refrigerator. Swapping your old filter out for a fresh one isn’t difficult and should t...
This ice maker assembly kit is designed to restore reliable ice production in select LG refrigerators by replacing worn or malfunctioning components. The kit includes essential parts such as the ice m...
The Water filter reduces contaminants such a s lead, iron, and chlorine from drinking water. Replace every 6 months or 200 gallons for best performance.
This water dispenser button is a genuine OEM part designed for LG refrigerators. When you push the button, a valve is activated inside the refrigerator, which releases water from the internal water su...
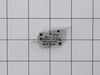
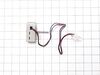
This is a micro switch for various models of LG refrigerators. This switch is responsible for turning the ice dispenser on and off within the freezer compartment of the fridge. If this switch is damag...
This part must be installed by a licensed and trained LG technician that is able to perform a software update, which is required for the installation of this compressor. Part number CJT30000002 is nee...
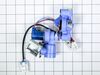
This water inlet valve in your refrigerator, also called a solenoid valve or water control valve, regulates water flow to the icemaker and dispenser. It is found at the rear of the appliance, where it...
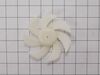
This fan assembly circulates air through the appliance to support proper temperature control and ventilation. Designed for quiet and efficient airflow, it is replaced when airflow weakens, noise incre...
$23.60
In Stock
Order now and your part arrives by Jun 28
Questions And Answers for LMXC23746S
Ask our experts a question about this model and we'll get back to you as soon as possible!
5 questions answered by our experts.
Sort by:
< Prev
1
Next >
Search filter:
Clear Filter
Your search term must have 3 or more characters.
Keep searches simple. Use keywords, e.g. "leaking", "pump", "broken" or "fit".
Sorry, we couldn't find any existing answers that matched.Try using some different or simpler keywords, or submit your new question by using the "Ask a Question" button above!
Tom
January 19, 2020
Lights on front left door panel were starting to go in and out and now have gone completely blank with no function for ice, water or temp controls. Refrigerator interior lights all seem to be working and cooling.
For model number LMXC23746S
Hello and thank you for writing.
It certainly sounds like it could be a faulty dispenser control board PS8751268 and/or possibly a faulty main control board PS11710897, you should check for signs of damage, and replace as necessary. We hope this helps. Please contact us anytime if you require further assistance.
Looks Like water has gotten underneath the panel next to the ice dispenser and it is blocking out all the icons and turning black… What is this piece called and what can I do to replace it?
For model number LMXC23746S
Hello Peggy, thank you for your question. We have researched the model you have provided, and we would suggest the PCB Assembly, part number PS11761185. If you need help placing an order, our customer service is open 7 days a week. Please feel free to give us a call. We look forward to hearing from you!
What's the difficulty level of replacing the defrost heater on a LG model lmxc23746s? Do you recommend replacing the refrigerator humidity sensor as well? Thanks
For model number LMXC23746S
Hi Frank, thank you for contacting us. Here is a simple video on how to replace the defrost heater: https://www.youtube.com/watch?v=wq7KYIiVDLE&ab_channel=PartSelect
If you notice your refrigerator is too warm, too cold, or not defrosting properly, then there may be a problem with your humidity sensor. We hope this information is helpful.
Fridge doesn't freeze or cools. I push button on control board but get no flashing codes. The front of fridge gives me a 22 code. Is there something wrong with the control board or do I go with 22 code and change the overload switch?
For model number LMXC23746S
Hello Allan, thank you for contacting us. The most probable cause of the issue is a faulty thermistor assembly PTC, part number PS11710395. This assembly contains the start relay of the compressor. We would also recommend checking the overload switch, part number PS3603394. If this does not help, then the issue is most likely related to the control board but its chances are lower than other parts. Customer service is available 7 days a week if you require assistance placing an order. Thanks again for reaching out!
Ice cubes appear to melt and refresh into clumps in ice maker. Water drops in door sill. Defrost appears to being on too long. Is this a faulty defrost sensor?
For model number LMXC23746S
Hello Tony, thank you for the question. Based on the description that you have provided, we believe your appliance is not maintaining temperature. A faulty defrost sensor can cause excessive defrosting, which can result in a temperature drop. You may need to replace the defrost sensor, part number PS3529165. We hope this helps.
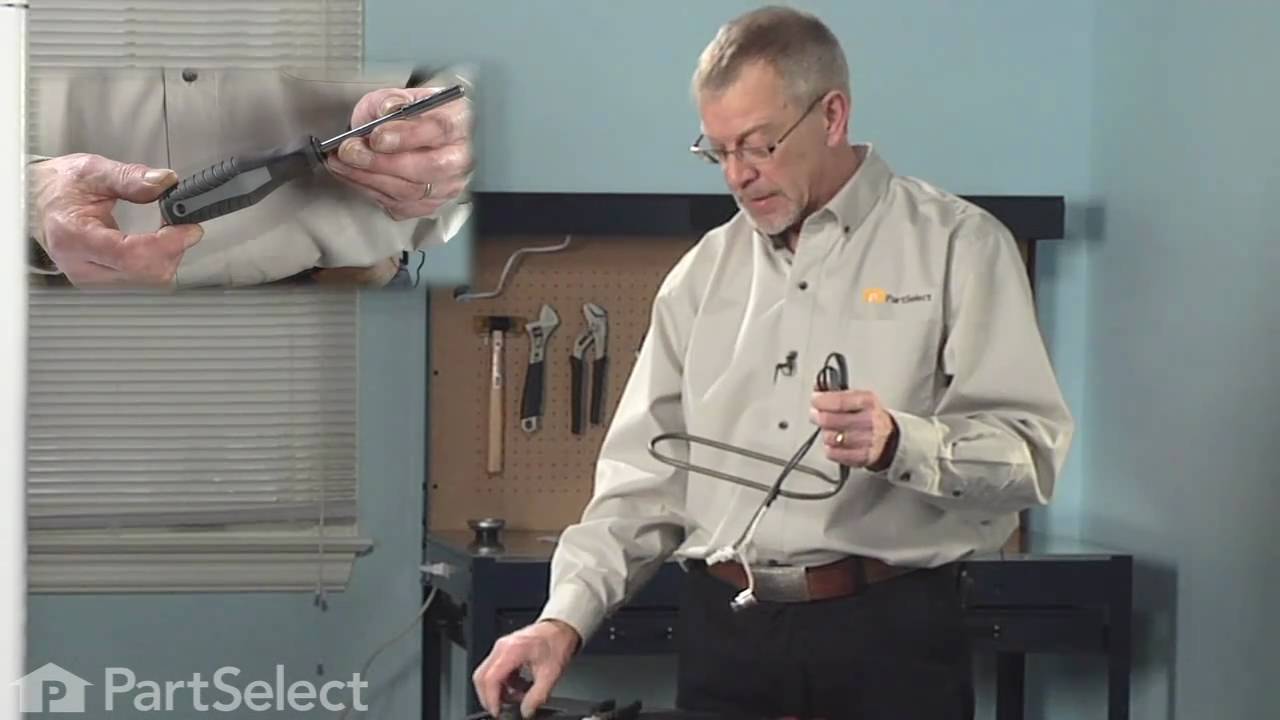
Before you begin, I'd recommend unplugging the refrigerator. You have to slip the putty knife in around the edge of the dispenser panel and carefully release the tabs all the way around and the entire panel pulls straight out. There are three wiring harnesses to unplug. You'll have to remove several screws and release the tabs around the
... Read moreelectronic panel and remove it from the main panel. It's a good idea to take note or even pictures of how the ice and water actuators are positioned on the panel, so you get them situated properly on the new panel. If the ice actuator is not fit correctly on a knob that sticks up it may dispense ice all the time (happened to me). After you transfer the actuators to the new panel and the ice and water dispensing levers, you can re-attach the electronic panel on the left side. make sure all of the wiring harnesses are plugged in and the wires situated out of the way, then re-install the panel by pushing it straight back in. Plug the refrigerator in and test it out.
Shut off water supply. Disconnect main supply line. Remove rear lower panel on back of refrigerator. Remove all tubing clamps on back. Disconnect leaking tubing from water supply valve. Remove water filter and unscrew/remove water filter housing. Replace tubing - connect to water filter housing then to water supply valve. Reconnect filter
... Read more housing and filter. Reinstall lower panel, then main water supply line, then all tubing clamps. Turn water back on and check for leaks after discarding several glasses of water to fill filter. Job complete!
The heavy work is moving the fridge, then take off the lower plans. Use a bowel or cup for screws and the water line connector spacers so you don't loos them. undo connections holding water line, including the bottom brakes for the solenoid. Reuse the spring around the lower waterline to prevent external wear on the line.
... Read morer />NOTE: remove the waterline connector spacers and save! NOTE: you must compress (not pull) the connect to then pull the waterline out of the connectors. NOTE: You must also remove the water filter and housing inside the fridge but this is easy. MOTE: Test the line for leaks by turning on the water and then using the door water. The filter will need to refill so it may take a minute before water comes up. This line only have pressure when the door water is used or the ice maker needs to make ice.
After replacing the line, test the line for leaks by using the door water so the solenoid fills the lines