


LMC1575ST (CS1ELNA) LG Microwave - Overview
Sections of the LMC1575ST
[Viewing 6 of 6]


Keep searches simple, eg. "belt" or "pump".

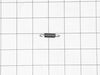
Turntable Motor Coupler
PartSelect #: PS3522918
Manufacturer #: 4370W1A006B
The turntable motor coupler connects the turntable motor to the tray. If the turntable on your microwave will not rotate, you may have a faulty motor coupler. The coupler commonly has a D shaped openi...
$16.75
In Stock


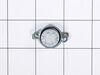
Insulator Cover
PartSelect #: PS12725272
Manufacturer #: MCK69074904
This mica plate, also known as an insulator cover or a waveguide cover, protects the opening where microwaves enter the cooking cavity from the magnetron. By covering it, the plate ensures the even di...
$13.60
In Stock


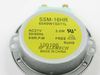
MAGNETRON
PartSelect #: PS12383382
Manufacturer #: EAS61382907
Introducing your reliable solution to efficient cooking - the LG Magnetron. This genuine OEM item, intentionally designed for safe and efficient heat generation in your microwave, produces the fundame...
$127.17
Special Order
Questions And Answers for LMC1575ST
We're sorry, but our Q&A experts are temporarily unavailable.
Please check back later if you still haven't found the answer you need.
Sort by:
- < Prev
- 1
- Next >
Search filter:
Clear Filter
Your search term must have 3 or more characters.
Keep searches simple. Use keywords, e.g. "leaking", "pump", "broken" or "fit".
Sorry, we couldn't find any existing answers that matched.Try using some different or simpler keywords, or submit your new question by using the "Ask a Question" button above!
Becky
November 7, 2023
I have a cleaning chemical smell in our microwaves in the office. Is there a filter I can replace to help get rid of this smell?
For model number LMC1575ST
Hi Becky, thank you for getting in touch. According to our research, there is no such filter listed for your model. We would recommend cleaning the microwave to get rid of this smell. Vinegar is a natural and effective way to get rid of unpleasant odours. We are providing you with some general instructions that might help you clean the microwave using vinegar:
1. Start by filling a bowl with 1/2 cup of white vinegar and 1/2 cup of water. Place the bowl in the microwave and heat it on high for 2-3 minutes.
2. Once the timer is up, leave the bowl of vinegar inside the microwave for an additional 10-15 minutes with the door closed.
3. After 10-15 minutes have passed, remove the bowl and open all the windows in the room to air out the space.
4. Using a sponge or clean cloth, wipe down all the surfaces inside your microwave with a mixture of 1/2 cup vinegar and 1/2 cup water.
5. Rinse out the bowl and fill it again with fresh water only. Place it back in the microwave and heat it for 5 minutes.
6. Remove the bowl of water and wipe down all surfaces again with a clean cloth to get rid of any remaining vinegar smell.
7. Finally, leave the door open for an hour or so to completely air out the space and ensure that no vinegar odour remains.
We hope this helps!
Was this helpful?
Thank you for voting!
- < Prev
- 1
- Next >
Common Symptoms of the LMC1575ST
[Viewing 4 of 4]Tray won’t turn
Fixed by
these parts
these parts

Show All
Door not closing properly
Fixed by
these parts
these parts
Show All
Won’t turn on
Fixed by
these parts
these parts
Show All
Sparking
Fixed by
these parts
these parts

Show All
Keep searches simple. Use keywords, e.g. "leaking", "pump", "broken" or "fit".
Sparks from an old wave guide that needed to be replaced
Put microwave on its side as my hands weren’t ready enough to hold it up while trying to push it in.
Put board on the door to hold it open.
Gently pushed the wave guide back as far as it would go. Then, I carefully pushed the front tabs in place. No bending. I had practiced on the old one first. Broke the 2 old tabs by pushing ... Read more back to hard so you need to be careful.
Put board on the door to hold it open.
Gently pushed the wave guide back as far as it would go. Then, I carefully pushed the front tabs in place. No bending. I had practiced on the old one first. Broke the 2 old tabs by pushing ... Read more back to hard so you need to be careful.
Read less
Parts Used:
-
Ellen from REDDING, CA
-
Difficulty Level:Easy
-
Total Repair Time:15 - 30 mins
4 of 5 people
found this instruction helpful.
Was this instruction helpful to you?
Thank you for voting!
The new part was too thick for the worn out plastic ring which is obsolete.
Needed to raise the part to match the ring. I used peanut butter to hold plastic shim while replacing to hold it in place. Built in Oct. 2009.
Parts Used:
-
James from PURCELLVILLE, VA
-
Difficulty Level:A Bit Difficult
-
Total Repair Time:30 - 60 mins
1 person
found this instruction helpful.
Was this instruction helpful to you?
Thank you for voting!
Shaft socket was worn out
-
Cesar from Miami, FL
-
Difficulty Level:Really Easy
-
Total Repair Time:Less than 15 mins
0 of 1 people
found this instruction helpful.
Was this instruction helpful to you?
Thank you for voting!