Your coupon for will be reflected when you check out!
✖
Your coupon for
✖
Hello!
You're visiting the PartSelect site in U.S.
Would you like to shop on the Canadian site?
Stay on this site
Go to Canadian site
✖
Model Number Locations
1Select Category Type
Select Category Type
2Select Product Type
Select Product Type
3Select {MODEL} Type
Select {MODEL} Type
Sample Model Number Tags
Model numbers can be made up of numbers (1005400, for example) or a combination of letters and numbers (LAT1000AAE). The model number will most likely appear on either a paper sticker or a metal plate. Your appliance's model number tag may look similar to the sample model number tags shown here (model number highlighted in yellow):
Model has been saved to My Models. If you're not signed in, your lists are available on this device and will expire within 30 days.
Model has been saved to My Models.
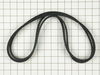
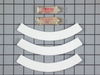
This kit includes both the drive belt and the pump belt which are both V-shaped. If your washer does not toss, spin, or drain water properly, this might be because one of these belts has worn or stret...
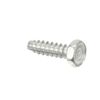
This is a multi-use and multi-appliance screw. It can be used on a microwave, refrigerator, range/oven, air conditioner, dehumidifier, washer, or dryer. The measurements of this screw are 8 x 1/2 inch...
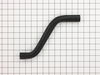
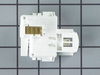
This hose clamp is used in a wide variety of household appliances. Most often it is found in washers, dishwashers, refrigerators, freezers, dehumidifiers, garbage disposals, or air conditioners. This ...
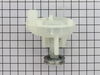
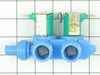
This washing machine drain pump is intended for use with automatic washers that have been manufactured since 1958. The pump itself is made of plastic, though it does come with a metallic belt pulley.
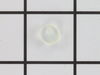
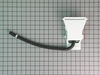
The leveling leg pad or foot pad fits over the leveling leg on your washing machine. The foot pad is designed to protect your floor and keep the washing machine level and in place. This foot pad is ju...
This washing machine lid hinge ball is well under an inch in diameter. These hinge balls are sold separately, though two are required per lid. This lid hinge ball is made of plastic and is used for Ma...
If your washer shakes or vibrates loudly when it reaches its max speed, make sure the 4 levelling legs are even. Adjust the legs so that the machine is level, and tighten the locking nuts on the legs ...
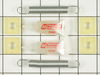
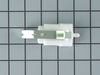
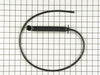
This spring retaining clip is just under 1 inch long. The clip is made entirely of metal and is attached to the back wall of the washer, under the console. If your washer is vibrating and louder than ...
The hose clamp is used to hold the water hose in place which will prevent the hose from leaking water. Sometimes the clamp may lose its ability to latch on, causing a leaking washer. For the installat...
$9.62
In Stock
Order now and your part arrives by May 16
Questions And Answers for LAT9356ABE
Be the first to ask our experts a question about this model!
✖
Ask a Question
Ask our experts a question on this model and we'll respond as soon as we can.
I removed the 2 phillips screws on the bottom of the front panel. Then checked around to find the belts were actually below the floor panel. I pulled the washing machine away from the wall and tilted it bacwards and found the pump belt was off the pully and the drive belt was badly damaged. I replaced the 2 belts which took no tools
... Read moreand about 3 minutes to accomplish then resecured the front panel, pushed back in place and leveled. Complete repair from diagnosis to back in operation took less than 15 minutes.
1: Disconnected all water and electrical connections. 2: Removed front panel. 3: Disconnected all wires leading from the control panel and removed the top of the washer. 4: Removed the springs that holds the drum down on the damper pads. 5: Flipped washer upside-down so the drum would hang from the bottom of the wash.
... Read more This made it easy to clean the area since it was full of dirt and ground metal dust. 6: Glued new pads (per the instructions) to the cone that protrudes up from the bottom of the washer and allowed to dry. 7: Lubricated the pads with the provided grease and added additional silicon grease to insure smooth operation. 8: Replaced drive belt. 9: Flipped the washer back up-right and installed the drum springs. 10: Reconnected all wires and attached the top of the washer. 11: Reconnected all electrical and water lines and tested operation. 12: Replaced the front panel.
Washer now runs as quite and smooth as it did when it was new.
First found out where the belts were by tipping the machine backwards and saw that the belts were intact but extremely loose. Ordered two belts (Drive and Pump) . Re-tipped the machine and in less than three minutes, had installed the new belts. I re-hooked the hoses to the back and the machine operated as if new.