Your coupon for will be reflected when you check out!
✖
Your coupon for
✖
Hello!
You're visiting the PartSelect site in U.S.
Would you like to shop on the Canadian site?
Stay on this site
Go to Canadian site
✖
Model Number Locations
1Select Category Type
Select Category Type
2Select Product Type
Select Product Type
3Select {MODEL} Type
Select {MODEL} Type
Sample Model Number Tags
Model numbers can be made up of numbers (1005400, for example) or a combination of letters and numbers (LAT1000AAE). The model number will most likely appear on either a paper sticker or a metal plate. Your appliance's model number tag may look similar to the sample model number tags shown here (model number highlighted in yellow):
Model has been saved to My Models. If you're not signed in, your lists are available on this device and will expire within 30 days.
Model has been saved to My Models.
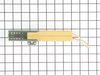
First, I pulled out the two lower drawers to access the gas shut off valve. Turned it off by using adjustable wrench and turning counter-clockwise. Then I removed the old igniter - and pulled the two wires and twist caps thru the back hole. it had continuity, but it was 220 ohms. Google research said if the resistance is too high, not
... Read more enough current will flow to flip the safety valve and/or heat the heating element.
Order the replacement. When I unboxed it, I measured the resistance at 176 ohms. I thought that was a bit high. Installed it anyway, and after turning on the gas at the shut off valve, I turned on the oven. I immediately heard a snap/pop - and found the heating element had broken. I called PartSelect - and they immediately sent me another one - giving me a refund for the first one to cancel out the charge, then charging me anew for the second one.
The second one measured resistance at 68 ohms. That was much better - since resistance in igniters increase with age - 68 is good compared to 220 ohms. Needless to say - re-installed, and it worked like a charm.
Tip - you can remove the oven doors. Each door hinge has a latch. Flip them up. Door lifts straight out. Made the job so much easier.