Your coupon for will be reflected when you check out!
✖
Your coupon for
✖
Hello!
You're visiting the PartSelect site in U.S.
Would you like to shop on the Canadian site?
Stay on this site
Go to Canadian site
✖
Model Number Locations
1Select Category Type
Select Category Type
2Select Product Type
Select Product Type
3Select {MODEL} Type
Select {MODEL} Type
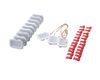
Sample Model Number Tags
Model numbers can be made up of numbers (1005400, for example) or a combination of letters and numbers (LAT1000AAE). The model number will most likely appear on either a paper sticker or a metal plate. Your appliance's model number tag may look similar to the sample model number tags shown here (model number highlighted in yellow):
Model has been saved to My Models. If you're not signed in, your lists are available on this device and will expire within 30 days.
Model has been saved to My Models.
This Refrigerator Air Filter is a white 1.8x3.2" plastic filter which neutralizes odor and bacteria in the air. It should be replaced every six months at a minimum. Refer to your user manual and model...
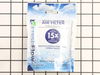
This water filter is a genuine replacement for bottom-freezer refrigerators that accept a Filter 2. it is certified to remove up to 24 different contaminants which include pharmaceuticals, waterborne ...
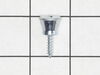
This mounting screw is a genuine OEM replacement part for the door handle in your refrigerator. If you are having trouble shutting the refrigerator door, or opening it, replacing this screw can help s...
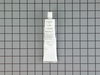
This touch-up paint can be used on a wide variety of household appliances. It is most often used on washers, dryer, refrigerators, dishwashers, ranges, freezers, trash compactors, or microwaves. It is...
This is a door shelf bin for a variety of refrigerator models. This bin is used to hold and support various food items in your refrigerator door. This shelf measures approximately 12.5 inches wide and...
Appliance spray paint is a great way to cover up any chips and scratches that have appeared on your appliances. Instead of replacing the part entirely, this is an easy fix. This is also a great way to...
This auger motor is for refrigerators.
Auger motor turns the auger that pushes the ice cubes through the dispenser chute.
Safely store any food that could deteriorate while the power is off. Unp...
Ask our experts a question about this model and we'll get back to you as soon as possible!
3 questions answered by our experts.
Sort by:
< Prev
1
Next >
Search filter:
Clear Filter
Your search term must have 3 or more characters.
Keep searches simple. Use keywords, e.g. "leaking", "pump", "broken" or "fit".
Sorry, we couldn't find any existing answers that matched.Try using some different or simpler keywords, or submit your new question by using the "Ask a Question" button above!
Alan
December 13, 2022
The water and ice dispenser 'locked' notification is on and neither ice nor water are available; pls advise how to unlock. :)
'
For model number KRFC604FSS01
Hi Alan, thank you for your inquiry. Touch and hold Cubed Ice for 3 seconds to unlock the dispenser. We hope this solves your problem!
1 person found this helpful.
Did this question help you?
Thank you for voting!
Jim
March 18, 2023
How do you remove the ice maker assembly to replace it? Ice maker is located within the door above the ice tub.
For model number KRFC604FSS01
Hello Jim, thank you for contacting us. We have found the instructions to help you:
1. First, push the button on the right top and then slightly pull out the bottom assembly of the ice maker.
2. Remove the plate on the left by just sliding it outward, and remove the wire harness behind that plate.
3. Now slightly take out the upper ice maker assembly with gentle pushes and pulls.
4. Remove the two screws and the wire harness bracket on the side of the older ice maker housing, and then replace those parts with a new ice maker.
5. After doing the tubing of the wires, rethread the screws and wire harness bracket.
6. Take out the stick and the bar from the old ice maker housing and remember the orientation, as it will help you in rebuilding.
7. Now slide the whole assembly into its place in the fridge. Push gently until it perfectly fits into its place.
8. Now contact the wire harness bracket and slide the left piece into its place.
9. Finally, push the bottom assembly of the ice maker into its lock.
We hope that helps!
1 person found this helpful.
Did this question help you?
Thank you for voting!
Ron
September 3, 2025
The water in the door doesn’t work. The ice maker works fine. How do I fix the water?
For model number KRFC604FSS01
Hello Ron, thank you for getting in touch. Inspect the water line to the dispenser. Check for a frozen water line by warming the freezer or adjusting the temperature slightly warmer, and then thawing the line with a hairdryer or warm towel. Check the water filter, part number PS11722126. If the filter is clogged or not been changed for a long time, it can slow or halt the water flow to the dispenser. Also, check the water inlet valve, part number PS16555249, if the water filter is not working properly, it can affect the water filter to the dispenser. We hope this helps.
I used a flat-head screwdriver to pop out the old light rocker switch. Then, I unplugged the wires, plugged them into the new light rocker switch, and then popped the new switch into the hole. That's it! Lights began working again.
Purchased new motor from Partselect.com. When it arrived it came with a new rubber washer that fitted on top of new motor that was not on old motor, that how water got into old motor. However, the instruction sheet did not give info on how to access the proper way to the motor that is the door. Not wanting to damage the freezer door assy.
... Read more called in a tech who made it look easy, but even he had a little problem locating access panel that was directly under the motor in the freezer side of the door. After that it was a piece of cake.
An easy job for smaller hands. Removed the two bolts holding the light cover. Removed two electrical connections from the old switch by pinching the retaining clip,removed the switch, snapped in the new one and re-attached the connectors. Your online illustrations helped me to know that the plastic housing for the light switch would only
... Read moreswing down so far and was not intended to be removed. Saved me from breaking that plastic cover's tabs. This home repair saved me more than 5 times the cost of hiring a professional to do it. Very happy homeowner.