Your coupon for will be reflected when you check out!
✖
Your coupon for
✖
Hello!
You're visiting the PartSelect site in U.S.
Would you like to shop on the Canadian site?
Stay on this site
Go to Canadian site
✖
Model Number Locations
1Select Category Type
Select Category Type
2Select Product Type
Select Product Type
3Select {MODEL} Type
Select {MODEL} Type
Sample Model Number Tags
Model numbers can be made up of numbers (1005400, for example) or a combination of letters and numbers (LAT1000AAE). The model number will most likely appear on either a paper sticker or a metal plate. Your appliance's model number tag may look similar to the sample model number tags shown here (model number highlighted in yellow):
Model has been saved to My Models. If you're not signed in, your lists are available on this device and will expire within 30 days.
Model has been saved to My Models.
This touch-up paint can be used on a wide variety of household appliances. It is most often used on washers, dryer, refrigerators, dishwashers, ranges, freezers, trash compactors, or microwaves. It is...
This is cookware designed for use in your range or oven. It is a two-piece dish that is used to grill or cook food while the broil function is on, meaning it can withstand high temperatures. This set ...
Appliance spray paint is a great way to cover up any chips and scratches that have appeared on your appliances. Instead of replacing the part entirely, this is an easy fix. This is also a great way to...
This genuine Oven Rack, designed for Whirlpool ranges, provides dependable stability and support for your cookware. Crafted with precision, its dimensions of 16 x 24.7 inches ensure a perfect fit for ...
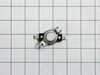
This high-limit thermostat is a safety-critical component designed to prevent overheating in ranges and wall ovens. It monitors internal temperatures and cuts power to the heating elements if the oven...
This bottom oven vent assembly is designed to direct hot air away from the oven cavity, helping regulate airflow and maintain a stable internal temperature during cooking. Made from stainless steel, i...
This product comes in a bottle with a brush like Liquid Paper. It goes on incredibly easy. A second coat might be needed. I wanted to prevent rust from setting in so I covered the scratches and dings. The paint is a little brighter since my washer is 10 years old but it still looks great.
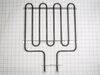
1. Turn off the breaker. 2. Remove all of the oven racks. 3. Remove the oven door as per users manual. 4. Remove two 1/4" screws on the plate holding the broil element to the back of the oven. 5.. Remove two 1/4" screws in the front of the element holding reflective plate and element toward th
... Read moree front of the oven. 6. Carefully pull the element out enough to remove the wire spade contacts with from the rear of the element with long nosed pliers being careful not to let the wires go behind the rear oven cavity. 7. Element and top reflective plate assembly can now be removed from the oven. 8. The old element is removed from the reflective plate by removing four 1/4" screws. 9. Install the new element on the plate and reverse the procedure to reinstall the completed assembly into the oven. 10 Reinstall the door and racks, turn on the power and test.


 Diagram and Parts List for Whirlpool Wall Oven")