Your coupon for will be reflected when you check out!
✖
Your coupon for
✖
Hello!
You're visiting the PartSelect site in U.S.
Would you like to shop on the Canadian site?
Stay on this site
Go to Canadian site
✖
Model Number Locations
1Select Category Type
Select Category Type
2Select Product Type
Select Product Type
3Select {MODEL} Type
Select {MODEL} Type
Sample Model Number Tags
Model numbers can be made up of numbers (1005400, for example) or a combination of letters and numbers (LAT1000AAE). The model number will most likely appear on either a paper sticker or a metal plate. Your appliance's model number tag may look similar to the sample model number tags shown here (model number highlighted in yellow):
Model has been saved to My Models. If you're not signed in, your lists are available on this device and will expire within 30 days.
Model has been saved to My Models.
This touch-up paint can be used on a wide variety of household appliances. It is most often used on washers, dryer, refrigerators, dishwashers, ranges, freezers, trash compactors, or microwaves. It is...
This is cookware designed for use in your range or oven. It is a two-piece dish that is used to grill or cook food while the broil function is on, meaning it can withstand high temperatures. This set ...
Appliance spray paint is a great way to cover up any chips and scratches that have appeared on your appliances. Instead of replacing the part entirely, this is an easy fix. This is also a great way to...
This authentic OEM black touch-up paint is specifically designed for repairing minor scratches, chips, or blemishes on your kitchen appliances. The bottle contains 16ml or 0.6oz of black paint and has...
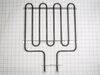
This genuine Oven Rack, designed for Whirlpool ranges, provides dependable stability and support for your cookware. Crafted with precision, its dimensions of 16 x 24.7 inches ensure a perfect fit for ...
This sliding oven rack is designed to replace damaged, warped, or missing racks in wall ovens, microwave oven combinations, and freestanding ranges. It provides a stable, smooth-gliding surface for ba...
$80.49
In Stock
Order now and your part arrives by Apr 20
Questions And Answers for KODE300ESS01
Ask our experts a question about this model and we'll get back to you as soon as possible!
2 questions answered by our experts.
Sort by:
< Prev
1
Next >
Search filter:
Clear Filter
Your search term must have 3 or more characters.
Keep searches simple. Use keywords, e.g. "leaking", "pump", "broken" or "fit".
Sorry, we couldn't find any existing answers that matched.Try using some different or simpler keywords, or submit your new question by using the "Ask a Question" button above!
Shelbenza
October 20, 2023
What is error code F1E0
For model number KODE300ESS01
Hello Shelbenza, thank you for reaching out to PartSelect. The error code F1E0 indicates that one or more keys are permanently pressed on the control panel. Make sure that there is no object left on the control area, and/or wipe any debris from the control panel surface. If this is not the issue, then you may need to replace the control panel, part number PS12070650, to fix the issue. Let us know if you have further questions!
Is part #PS11753341 the complete glass assembly of the 3 layers of glass? Thanks, Jim
For model number KODE300ESS01
Hello James, Thank you for writing. The PS11753341 is just the Middle Glass. The Inner Door Glass is listed as PartSelect #: PS11756771 and the exterior Glass is sold as part of the exterior Door Panel, PartSelect #: PS12723818. We hope this helps, good luck with the repair!
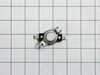
Not a repair. Just needed to replace the meat probe sensor for the programmable oven. Quick and easy purchase and very fast delivery took care of the problem. I was back in business.
This product comes in a bottle with a brush like Liquid Paper. It goes on incredibly easy. A second coat might be needed. I wanted to prevent rust from setting in so I covered the scratches and dings. The paint is a little brighter since my washer is 10 years old but it still looks great.
Remove the oven door. Remove 3 self tappers on rear wall of oven to take off a round access panel. Pull out a pre-cut rectangle of insulation. Next I removed the 2 screws holding the sensor in place. Pulling the sensor out a bit told me I was "touching" the correct wires in the SMALL rectangular opening. The wires are not visable and 2 h
... Read moreands do not fit in this small opening.I looked at the NEW sensor to see the release on the sensor plug. Slip the angled needle nose into the opening and grasp the plug/release side. The plug pulled apart easily. The sensor wire pulls out with a little bit of twisting to fit it out the hole. The new plug pushes in and has to be worked down to where you can reach it. The same angled plier works to re-attach it. It takes longer to read this than to do the job. Best of luck, Al