Your coupon for will be reflected when you check out!
✖
Your coupon for
✖
Hello!
You're visiting the PartSelect site in U.S.
Would you like to shop on the Canadian site?
Stay on this site
Go to Canadian site
✖
Model Number Locations
1Select Category Type
Select Category Type
2Select Product Type
Select Product Type
3Select {MODEL} Type
Select {MODEL} Type
Sample Model Number Tags
Model numbers can be made up of numbers (1005400, for example) or a combination of letters and numbers (LAT1000AAE). The model number will most likely appear on either a paper sticker or a metal plate. Your appliance's model number tag may look similar to the sample model number tags shown here (model number highlighted in yellow):
Model has been saved to My Models. If you're not signed in, your lists are available on this device and will expire within 30 days.
Model has been saved to My Models.
This genuine OEM microwave turntable tray is a circular plate made of glass and has a diameter of approximately 16 inches. It rotates food in your microwave oven, so that your food cooks evenly. It is...
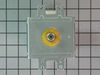
This diode, or high voltage diode, is used in microwaves. It is an electrical current control device that ensures power flows in one direction and not the other way. If your microwave produces no heat...
This genuine Whirlpool Microwave Inlet Cover, also known as a waveguide cover, plays a critical role in maintaining the longevity of your microwave. Specifically designed for Whirlpool, this cover dil...
This microwave door interlock switch is a critical safety component designed to prevent the appliance from operating when the door is open. It functions by detecting the door’s position—open or closed...
This part is the replacement halogen light bulb for your range. The bulb is 10 watts and 12 volts. The halogen lamp lights up the inside of the oven you can see the cooktop more effectively in darknes...
Introducing the Whirlpool Turntable Motor, an essential and authentic OEM part designed to maintain the performance of your microwave oven. This turntable motor is skillfully engineered to rotate the ...
Introducing a genuine Whirlpool item, the W10839793 Nameplate. Known for its durability and seamless design, this nameplate perfectly aligns with the Whirlpool's reputation for quality and longevity. ...
We're sorry, but our Q&A experts are temporarily unavailable.
Please check back later if you still haven't found the answer you need.
1 question answered by our experts.
Sort by:
< Prev
1
Next >
Search filter:
Clear Filter
Your search term must have 3 or more characters.
Keep searches simple. Use keywords, e.g. "leaking", "pump", "broken" or "fit".
Sorry, we couldn't find any existing answers that matched.Try using some different or simpler keywords, or submit your new question by using the "Ask a Question" button above!
Deidre
August 15, 2022
Built in microwave, 5 yrs old, doesn’t show all of the numbers in the display section. Only shows partial number, which makes it difficult to set time. Is this a bulb issue or something major?
For model number KMBS104ESS00
Hello Deidre, Thank you for the question. The LED is built into the Electric Control Board. The Board will need to be replaced. If you need help placing an order, customer service is open 7 days a week. Please feel free to give us a call. We look forward to hearing from you!
My microwave began suddenly making a loud harsh humming noise while cooking food. I did not let it go on long enough to know if it cooked the food or not. I did some Internet research and learned that it was likely the Magnetron. The test for this was to run the microwave for at least a minute on the lowest power setting and see if the no
... Read moreise cycled on and off. It did, so I (actually, my wife) ordered the part from partselect.com using the model number. I was successful in replacing the part, and we are back to microwave popcorn and quick defrost for a price that was less than a service call, however, it was time consuming, required a large work area, and access to 5 out of 6 sides of the unit. So proceed at your own discretion
Caution:
The first thing in every set of repair instructions was to discharge (short-circuit) the capacitor, as it may store large (as in lethal) amounts of electricity even when it is not connected to a power source. I had never done this, but found these instructions:
“Discharging your microwave's capacitor is absolutely essential in preventing injury to your microwave, your tools, and yourself. A capacitor stores a large amount of electricity even when your microwave is unplugged, and it must be discharged before beginning any repair. A capacitor is discharged by creating a short circuit between each of the two capacitor terminals, and between each terminal and the chassis. The chassis is the metal mounting (bare metal surface) of the capacitor. Read these directions thoroughly before you proceed. With your microwave unit unplugged, touch the blade of a well insulated screwdriver to one terminal. Gently slide the screwdriver forward until it reaches the other terminal, holding it there for a few seconds. Be aware that this often results in a loud and startling 'POP'. Repeat this procedure in order to create a short circuit between each capacitor terminal and the chassis (bare metal mounting plate surface). This same method can be applied to a capacitor having three, and not two, terminals.” I had not run my microwave in over a week, and then while my part was shipping, left my microwave 'unplugged' for more than two days, and my capacitor apparently discharged itself, although I did go through the above procedure carefully and completely - just in case. Step-By-Step: 1. You must remove your microwave from the cabinets - it is impossible to repair otherwise. This is best accomplished with 2 strong people - my wife and I made it work, but wished for another guy. a. While supporting the microwave, remove the two screws coming down through the cabinet above. b. Lift the rear of the microwave as much as possible, then tilt the front down - there is a clip high on the left side, as well as the hinge/clips on the bottom. c. If you do not lift it off the wall all at once, you may have to lift the rear even farther to remove it from the hinge/clips on the bottom. Important Note: Always beware of the microwave door, if it is bent or broken and cannot retain a seal, the microwave not function as a safety feature to keep from releasing microwaves. 2. Remove the vent cover on the top/front of the microwave - be careful, it's plastic. 3. Remove the vent cover and light panel on the bottom of the microwave - this is several screws and some simple wire clips. 4. Remove the "shell" (top and sides) of the microwave - this is several more screws on the back. Make sure to remove the plate that is holding the cord in place on the top. 5. Remove the interface panel by the screws on the top (which had been hidden by the vent cover) - the wires can remain attached, just slide it aside. 6. Remove the metal cover on the right side at the rear; this will expose the Magnetron and the Capacitor. Remember to immediately test and discharge the capacitor!
7. After you discharge the capacitor, remove the other cover plate and the support bracket - in case you haven't noticed, this is a time and space consuming operation.
Unless you have a very comfortable background with electronics and electricity, I don't necessarily recommend taking apart a microwave. If you are very handy and are going to be VERY cautious to follow the rules of discharging caps and testing voltages before moving forward, then go for it. That said, I took the microwave off and apart.
... Read more Not knowing where to find the parts, I was fortunate that the installer put the instruction book for the microwave inside the front vent slot above the touchpad for reference. it details the location of every part and it tells you very clearly what each part you test should show specific to this microwave on your multimeter. Find this guide online if you don't have it. Turn on the microwave for 20 seconds with a glass of water to make sure it's not heating - that with the noise means it's eeither the magnetron, cap, or diode. Read the notes on this site for all of the basic things to look for with the magnetron, diode, and capacitor. Once comfortable with the guide, locations of those devices, and how to test, then take it down and apart. Unfortunately, I didn't do all those things in that order, and it only wasted a lot of time trying to find the parts. Once I found the parts and put all the screws and covers back for all the areas that didn't need to be accessed for the repair, testing went quickly. The diode was bad. Ordered a new one and had it in 3 days or so. That means your microwave will be apart and sitting somewhere for a little while until you get the part and have time to repair it. Putting the diode back isn't too bad. Reassemble the microwave and put it back up again. If i had to do it again, it would take me 20 to 30 minutes once the microwave was down and on a table. Also, I used some bricks with towels over them or you could use some sawhorses to keep the microwave elevated so you can plug it in and run it after installing the new component. Again, make sure you discharge the cap before touching anything again even if you didn't run it, but just plugged it in.
I turn off the income electricity by shutting down the corresponding circuit breaker. Then, I removed the control panel from the microwave which gave me access to the capacitor and adjacent diode. After that i unscrewed the defective diode and replaced it with the new one and BINGO!