Your coupon for will be reflected when you check out!
✖
Your coupon for
✖
Hello!
You're visiting the PartSelect site in U.S.
Would you like to shop on the Canadian site?
Stay on this site
Go to Canadian site
✖
Model Number Locations
1Select Category Type
Select Category Type
2Select Product Type
Select Product Type
3Select {MODEL} Type
Select {MODEL} Type
Sample Model Number Tags
Model numbers can be made up of numbers (1005400, for example) or a combination of letters and numbers (LAT1000AAE). The model number will most likely appear on either a paper sticker or a metal plate. Your appliance's model number tag may look similar to the sample model number tags shown here (model number highlighted in yellow):
Model has been saved to My Models. If you're not signed in, your lists are available on this device and will expire within 30 days.
Model has been saved to My Models.
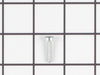
This is a multi-use and multi-appliance screw. It can be used on a microwave, refrigerator, range/oven, air conditioner, dehumidifier, washer, or dryer. The measurements of this screw are 8 x 1/2 inch...
My husband and I replaced the igniter module, following directions we found online. We removed the old one, replaced it with the new one, and thankfully everything is working great!
I went online and discovered the repair method and schematic of the range. I removed the spark module after first removing the upper rear panel cover and replaced with the new part module ordered from your company and now the spark module operates all the gas elements when they are turned on thus lighting the gas burners. My mother in law
... Read more was thrilled, as she had been using matches and burning her finger tips,since the original range part malfunctioned. The only problem was the small screw from the original installation was not long enough , so it required some changes to get it affixed to the cabinet side.Thanks for the reasonable price and the right part for the job!!
Removed back upper cover, unscrewed retaining screw from module. As noted in a comment from another do-it-yourselfer, I replaced screw with a longer one and reinstalled module. Note that the replacement part is not exactly the same as the old one(the wires are located differently), I noted the wire color codes with the slot number and r
... Read moreeinstalled them in the same slot number. Works fine.