Your coupon for will be reflected when you check out!
✖
Your coupon for
✖
Hello!
You're visiting the PartSelect site in U.S.
Would you like to shop on the Canadian site?
Stay on this site
Go to Canadian site
✖
Model Number Locations
1Select Category Type
Select Category Type
2Select Product Type
Select Product Type
3Select {MODEL} Type
Select {MODEL} Type
Sample Model Number Tags
Model numbers can be made up of numbers (1005400, for example) or a combination of letters and numbers (LAT1000AAE). The model number will most likely appear on either a paper sticker or a metal plate. Your appliance's model number tag may look similar to the sample model number tags shown here (model number highlighted in yellow):
Model has been saved to My Models. If you're not signed in, your lists are available on this device and will expire within 30 days.
Model has been saved to My Models.
This is a multi-use and multi-appliance screw. It can be used on a microwave, refrigerator, range/oven, air conditioner, dehumidifier, washer, or dryer. The measurements of this screw are 8 x 1/2 inch...
This bottle of non-abrasive cooktop cleaner breaks down and gets rid of the hardest baked-on stains and residue without causing any harm to your appliance. The bottle is 10 oz and does not require a l...
This is a replacement light bulb to illuminate the inside of your oven. It is 25 watts and 120 volts. Please wear gloves during replacement if your existing bulb is shattered. Consider ordering a spar...
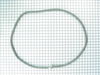
This part is the replacement door gasket for your oven. It is made of gray rubber and is sold individually. The door gasket runs along the circumference of the oven door and creates a seal that insula...
This part is the replacement door handle mounting screw for your refrigerator. The head is approximately 3/4 inch in diameter and the screw is approximately 3/4 inch in length. It is made of metal, is...
Not a repair. Just needed to replace the meat probe sensor for the programmable oven. Quick and easy purchase and very fast delivery took care of the problem. I was back in business.
Pull the end of the lens nearest the oven door out of the oven wall. Because our oven is several years old and the bulbs had not been previously changed, I could not pull the lens out with my hand, so used two small screwdriver under the metal tabs which hold the lens in place, the metal holder came out with the lens. Once the lens is r
... Read moreemoved, simply pull out the old bulb and, either while wearing surgical gloves or holding the bulb with a cloth (do NOT allow bare skin to touch the bulb or you will be replacing it again sooner rather than later), push the new bulb's pins into the socket. The lens then is simply pushed back into place.


 Diagram and Parts List for Whirlpool Range")


 – Part Number: W11675844")


")

