Your coupon for will be reflected when you check out!
✖
Your coupon for
✖
Hello!
You're visiting the PartSelect site in U.S.
Would you like to shop on the Canadian site?
Stay on this site
Go to Canadian site
✖
Model Number Locations
1Select Category Type
Select Category Type
2Select Product Type
Select Product Type
3Select {MODEL} Type
Select {MODEL} Type
Sample Model Number Tags
Model numbers can be made up of numbers (1005400, for example) or a combination of letters and numbers (LAT1000AAE). The model number will most likely appear on either a paper sticker or a metal plate. Your appliance's model number tag may look similar to the sample model number tags shown here (model number highlighted in yellow):
Model has been saved to My Models. If you're not signed in, your lists are available on this device and will expire within 30 days.
Model has been saved to My Models.
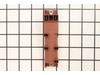
This module provides reliable ignition. Replace if burners stop sparking. This part is designed to keep your appliance operating reliably and efficiently. Replacing a worn or failing component helps p...
This comes set from the manufacturer for Natural Gas. It also includes the conversion to Liquid Propane.
This valve automatically cuts off the flow of gas at a certain pressure.
first I removed all the srews from the burners that hold the glass cooktop. I then disconected the two wires from the damaged gas valves and replaced them all four with the new ones. After that I put it all togehter and work just fine and celebrated with a good cold beer.
I unscrewed the burners which was three screws per burner then removed gas control knobs and pulled up range top and un hooked the old module and replaced it with the new one two screws hold it in place and connected it the same way the old one was and put range back together and now it works perfect and saved me over $250.00 and part onl
... Read morey coated around $40 with shipping great parts seller and I highly recommend partselect.com very easy fix thanks


 – Part Number: WB31T10016")
 – Part Number: WB31T10017")