Your coupon for will be reflected when you check out!
✖
Your coupon for
✖
Hello!
You're visiting the PartSelect site in U.S.
Would you like to shop on the Canadian site?
Stay on this site
Go to Canadian site
✖
Model Number Locations
1Select Category Type
Select Category Type
2Select Product Type
Select Product Type
3Select {MODEL} Type
Select {MODEL} Type
Sample Model Number Tags
Model numbers can be made up of numbers (1005400, for example) or a combination of letters and numbers (LAT1000AAE). The model number will most likely appear on either a paper sticker or a metal plate. Your appliance's model number tag may look similar to the sample model number tags shown here (model number highlighted in yellow):
Model has been saved to My Models. If you're not signed in, your lists are available on this device and will expire within 30 days.
Model has been saved to My Models.
Facing issues with your range? The GE Surface Element Control Switch might be just what you need to get your appliance up and running smoothly again. This key component accomplishes a significant ta...
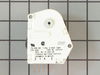
This part may appear different than the original, but will function the same. This device acts like a clock. It continually advances and alternates between activating the cooling cycle and the defrost heater.
This white fresh food door gasket measures approximately 20 inches by 60 inches. It is all white in color and is made of rubber. This gasket is used for the fresh food door of many side by side model refrigerators.
First did the easy part, removed and replaced the defrost timer. Didn't correct the problem.
Then got into the defrost heaters. Big job, because the factory didn't provide for repairs. Had to remove the ice maker because there was one screw holding on the cover panel behind it. The factory installed defrost heaters were run beh
... Read moreind the freezer coils so I had to cut them out. Then I had to bend the light aluminum sides with heavy pliers to slip the burned out defrost heaters out and replace them with the new defrost heaters. Didn't use the defrost timer, because I was taking it one step at a time.
Now the refrigerator fresh food side maintains 39 degrees and runs 1/10 the time it was running. My wife says it's better than new! Saved $ 2,400 (the replacement she had picked out).
Well first I noticed the back of the freezer compartment freezing up and the ice not freezing. I moved all the contents of the freezer to another freezer. I waited and noticed even when pluged in and everything defrosted the fan didn't kick on on the condensing unit! After a few minutes it did kick on and I took a guess that the defrost t
... Read moreimer was probally ok without checking it. I took eight screws out of the back plate and noticed the defrosting tube on the lower part of the coil was broke in half. I knew I had found the problem. It took maybe 10 minutes to remove and about 10 minutes to order the part. Three days later it was at my door. I took my time installing it which only took maybe 30 minutes. It took longer for me to wipe everything down and clean the inside of both compartments than it did to insall the part. Pluged it in and fired it up and problem solved. Thanks Part Select!
Removed everything from inside freezer compartment (food and shelves) Removed inside backpanel that covered the coils. At the top of the coils is where the thermostat was attached. Removed old one and installed new. Has been working since.