Your coupon for will be reflected when you check out!
✖
Your coupon for
✖
Hello!
You're visiting the PartSelect site in U.S.
Would you like to shop on the Canadian site?
Stay on this site
Go to Canadian site
✖
Model Number Locations
1Select Category Type
Select Category Type
2Select Product Type
Select Product Type
3Select {MODEL} Type
Select {MODEL} Type
Sample Model Number Tags
Model numbers can be made up of numbers (1005400, for example) or a combination of letters and numbers (LAT1000AAE). The model number will most likely appear on either a paper sticker or a metal plate. Your appliance's model number tag may look similar to the sample model number tags shown here (model number highlighted in yellow):
Model has been saved to My Models. If you're not signed in, your lists are available on this device and will expire within 30 days.
Model has been saved to My Models.
This is a duct felt seal for a dryer. The duct felt seal allows the front-load dryer drum to glide smoothly on the front panel. Your dryer will not function properly if the drum felt seal is compromis...
This lint filter is a genuine OEM component designed for use in both electric and gas clothes dryers. It plays a critical role in maintaining proper airflow by capturing lint and debris during drying ...
This drum glide bearing is an authentic OEM replacement part that is compatible with dryers. It is white in color and made of highly durable plastic. The bearing allows the drum to rotate smoothly and...
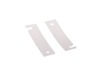
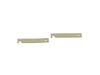
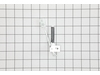
This OEM replacement dryer slide bearing is white in color, and approximately 3 inches long. The slide bearings are supportive linings for your dryer. If they have eroded, or are damaged, the drums wi...
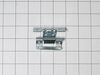
This is the door switch for your dryer. Door switches are used to communicate with the control board when the door is fully closed, so the drying cycle can safely begin, and if it is opened so it can ...
This authentic OEM rear bearing O-ring is designed for use with GE dryers. It helps secure the drum rear bearing onto the drum shaft, playing a key role in maintaining smooth and quiet dryer operation...
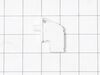
Experience the seamless functionality of your dryer with the GE Door Hinge. This dryer component plays a crucial role in the operation of your machine, supporting the dryer door on its front panel. It...
This gas dryer igniter is a critical ignition component designed to safely and reliably light the burner during the drying cycle. Positioned near the burner assembly, it generates the necessary heat t...
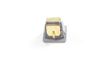
This dryer door latch is designed to securely fasten the door to the cabinet, ensuring safe and reliable operation during each cycle. Made from durable gray materials, it engages with the door strike ...
This fastening nut secures components firmly in place, helping maintain proper alignment and safe operation. It is commonly used as a replacement when original hardware is stripped, lost, or damaged.
$18.30
In Stock
Order now and your part arrives by Jun 4
Questions And Answers for GTD84GCSN0WS
Be the first to ask our experts a question about this model!
✖
Ask a Question
Ask our experts a question on this model and we'll respond as soon as we can.
Deflector has 3 bolts attaching it. They require a star wrench. Had to purchase same to do the repair. Removed the bolts(they are sheet metal type screws(bolts). Installed the deflector and started dryer. Loud rubbing sound noted. Shut off and checked the drum and noted it was not running concentrically. Removed deflector and the found th
... Read moree 3 screws actually retained the drum to drive. Had to make alignment pins to allow proper alignment of the drive, drum, and deflector. Once the pins were used during installation of the deflector everything worked correctly. Turned on dryer and it operated normally. Had I had the proper tools the repair would probably have taken 30 minutes or less.
Someone I'm related to by marriage accidentally dried a plastic-coated tablecloth on high heat, and our heat deflector was hosed. I was very happy to find this part here for such a reasonable price; Sears wanted about $65 for it. Installation required a Torx bit, and removing the old one was easy, but the dryer's design made it difficult
... Read moreto reinstall the heat deflector while keeping the dryer running concentrically. I ended up cutting the heads off three screws, threading those into the plate behind the drum, sliding the new heat deflector on over those, and then one by one replacing them with the original Torx head screws. Once I figured it out it didn't take long but it took me a while to figure it out. That's probably more a reflection on me than the dryer!


 – Part Number: WE03X37319")
 – Part Number: WE03X37320")


")
")


