Your coupon for will be reflected when you check out!
✖
Your coupon for
✖
Hello!
You're visiting the PartSelect site in U.S.
Would you like to shop on the Canadian site?
Stay on this site
Go to Canadian site
✖
Model Number Locations
1Select Category Type
Select Category Type
2Select Product Type
Select Product Type
3Select {MODEL} Type
Select {MODEL} Type
Sample Model Number Tags
Model numbers can be made up of numbers (1005400, for example) or a combination of letters and numbers (LAT1000AAE). The model number will most likely appear on either a paper sticker or a metal plate. Your appliance's model number tag may look similar to the sample model number tags shown here (model number highlighted in yellow):
GSD1807K00BB General Electric Dishwasher - Overview
Save your modelModel Saved!
Save your model for later to make things easier.
Model has been saved to My Models. If you're not signed in, your lists are available on this device and will expire within 30 days.
Model has been saved to My Models.
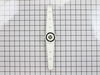
This part is the replacement guide rail bracket and wheels for your dishwasher. It is made of white plastic and is approximately 3 inches by 1 inch. The wheels are approximately 1 inch in diameter. Th...
Enhance your dishwasher's performance with the GE Lower Stud & Roller Assembly. Specially designed for the job, this crucial component allows for smooth glide and secure attachment of the dishrack. Cr...
Introduce your dishwasher to top-of-the-line maintenance with this Genuine GE Detergent Dispenser. Designed for compatibility with various GE models, this dispenser conveniently holds both dishwasher ...
Note: I also purchased the main conduit part (PartSelect #: PS958967).
My repair is pretty much the same as the previous poster from TX. The RING NUT W/GASKET part seems to wear easily on this GE dishwasher.
Disconnected dishwasher from electrical. You have to remove the rear lower brace panel in order to remove the
... Read moremain conduit. The bottom end of the main conduit is clamped to a hose.
Installed the new main conduit and o-ring, screwed RING NUT W/GASKET onto upper end of main conduit. I tightened the ring nut with the wrench to make sure I got a good seal without over tightening.
I had to use a new hose clamp to reattach the lower end of the main conduit.
Reinstalled brace panel, reconnected electric, and tested.
It was an easy fix, the parts did not cost too much. I'm glad I fixed it rather than paying some repairman $$. I purchased an extra RING NUT W/GASKET in case it deteriorates again.