Your coupon for will be reflected when you check out!
✖
Your coupon for
✖
Hello!
You're visiting the PartSelect site in U.S.
Would you like to shop on the Canadian site?
Stay on this site
Go to Canadian site
✖
Model Number Locations
1Select Category Type
Select Category Type
2Select Product Type
Select Product Type
3Select {MODEL} Type
Select {MODEL} Type
Sample Model Number Tags
Model numbers can be made up of numbers (1005400, for example) or a combination of letters and numbers (LAT1000AAE). The model number will most likely appear on either a paper sticker or a metal plate. Your appliance's model number tag may look similar to the sample model number tags shown here (model number highlighted in yellow):
GSC3430F00WW General Electric Dishwasher - Overview
Save your modelModel Saved!
Save your model for later to make things easier.
Model has been saved to My Models. If you're not signed in, your lists are available on this device and will expire within 30 days.
Model has been saved to My Models.
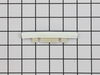
The gasket insert is connected to the gasket in the bottom of your dishwasher door. It is a small piece of white plastic that measures approximately 4 inches by 1 inch, and is sold individually. The g...
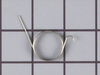
The hinge link on your dishwasher connects the spring to the dishwasher door hinge. If the hinge link becomes cracked or damaged, you may not be able to shut or lock your dishwasher door properly. In ...
This is a pump and motor kit for your dishwasher. This assembly replaces many old-style pump and motor kits that were manufactured since 1970. The instructions are included with this kit in to assist ...
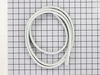
This genuine OEM dishwasher door seal gasket prevents water from leaking out of the dishwasher. If your washer is leaking from the door, check for wear on the gasket, and to ensure it is properly fitt...
Water is forced through this spray arm by the unit's pump and motor assembly. The force of the water propels the spray arms, spraying water and detergent onto the dishes on the dishrack. This spray ar...
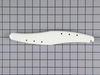
Discover the value of the GE Finished Access Panel. This essential component is specifically designed to cover and shield the wiring and components at the bottom front of your dishwasher. Crafted with...
Enhance the performance of your dishwasher with this genuine GE Detergent Cup Door Spring. Specially designed, this Soap Cup Spring plays a crucial role in automatically opening the dispenser cover wh...
This is a water hose clamp kit for a variety of appliances including dishwashers and washers. This is a genuine replacement part. The kit includes two hose clamps. The smaller of the two is 1 inch in ...
$26.40
In Stock
Order now and your part arrives by Apr 23
Questions And Answers for GSC3430F00WW
Be the first to ask our experts a question about this model!
✖
Ask a Question
Ask our experts a question on this model and we'll respond as soon as we can.
I removed the four screws holding the screen and molded plastic cage inside the rear of the dishwasher to expose the check valve assembly. I then unscrewed the piston and nut assembly with my hand and replaced it with the new one. I found that the rubber cone shaped valve on the old piston and nut assembly was entirely disintegrated. T
... Read morehis easy repair solved the problem.
I had replaced the door gasket a few years earlier and had difficulty fitting the gasket around the bottom corners. This time I removed the plastic inner door panel for complete access to the gasket channel. I opened the new gasket package and let it stand unrolled overnight to remove the kinks. Once the old gasket was removed I took
... Read morea thin piece of wood wrapped with a cloth to clean out the gasket track. The gasket snaps in easily. Be careful not to over stretch the gasket around the bottom corners. The curve of the gasket will resemble the curve of the door panel when set correctly. This is where I had trouble earlier when I tried to set the gasket in the channel with the door panel still attached. It is much easier to do this with the door panel removed.
The most difficult part was removing the dishwasher from below the counter. Once that was complete, I simply turned the washer onto it's front surface to access the pump easier. Simply disconnected the electrical connectors, loosened the three hose clamps holding the hoses to the pump. Lastly removed a stiff arm bracket holding the pum
... Read morep. Reversed the order to install the new one using a longer bracket provided with the new unit. Hooked up the electrical connections last and slid the washer back in place. The washer runs like new now and is not making noise. The replacement part was a perfect match.