Your coupon for will be reflected when you check out!
✖
Your coupon for
✖
Hello!
You're visiting the PartSelect site in U.S.
Would you like to shop on the Canadian site?
Stay on this site
Go to Canadian site
✖
Model Number Locations
1Select Category Type
Select Category Type
2Select Product Type
Select Product Type
3Select {MODEL} Type
Select {MODEL} Type
Sample Model Number Tags
Model numbers can be made up of numbers (1005400, for example) or a combination of letters and numbers (LAT1000AAE). The model number will most likely appear on either a paper sticker or a metal plate. Your appliance's model number tag may look similar to the sample model number tags shown here (model number highlighted in yellow):
Model has been saved to My Models. If you're not signed in, your lists are available on this device and will expire within 30 days.
Model has been saved to My Models.
This handle screw, also known as a mounting bolt, is a mounting screw to help secure the door handle to your refrigerator door. If your handle is loose, you may just need to tighten the screw. If your...
This door basket assembly is supplied by the original manufacturer to provide storage for various food items in refrigerators. It consists of a white plastic base and a transparent shield, measuring 1...
Refrigerator Air Filters are a key component for neutralizing odors and ensuring a fresh stream of air into your refrigerator. Swapping your old filter out for a fresh one isn’t difficult and should t...
This is a door seal, also known as a door gasket, for LG refrigerators. This door gasket is used to seal the warmer room temperature from the cooler fridge interior. If the gasket for your refrigerato...
This fridge gasket, also known as a door seal, is an authentic OEM part supplied by LG for use with various models of LG refrigerators. It is a flexible strip of rubber that sits along the perimeter o...
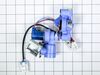
This water inlet valve in your refrigerator, also called a solenoid valve or water control valve, regulates water flow to the icemaker and dispenser. It is found at the rear of the appliance, where it...
This ice bucket assembly is designed to store and dispense ice within select refrigerator models. It includes both the ice bin and the auger mechanism, which rotates to push ice through the dispenser ...
Enhance the performance of your LG refrigerator with the genuine OEM Defrost Sensor Assembly. This product plays an essential role in maintaining the correct temperature within your refrigerator, as i...
Did your Whirlpool oven stop working like it used to? A faulty electronic control kit might be the culprit - but don't worry, we've got you covered. Our genuine OEM Whirlpool Electronic Control Kit ca...
This is a water filter bypass plug made for use with LG refrigerators. This plug is designed to act as a stand-in and allow water to flow to the dispenser or ice maker, even when the water filter is r...
Need to securely mount your Whirlpool microwave? We've got you covered with the OEM Mounting Hardware, designed just for your Whirlpool appliance. Built specially for certain Whirlpool models, it?s th...
$45.29
In Stock
Order now and your part arrives by Apr 23
Questions And Answers for GR-J298LSXM
Be the first to ask our experts a question about this model!
✖
Ask a Question
Ask our experts a question on this model and we'll respond as soon as we can.
Watch YouTube videos on this topic if you are uncertain before tackling the job. The right door was easy to replace. Just pull the gasket with your fingers and it will come off easily. Place new gasket over door and use fingers to press it inside the groove few inches at a time. Pay attention to gasket orientation.
The left
... Read more door is a bit harder because you need to remove the mullion at the door edge using a screw driver. Remove two screws on the center hinge and then slide the mullion up to disengage. Then unplug the wires to remove the mullion. Replace the gasket as described above and replace the mullion reversing the directions shown above.
For the right side of the refrigerator door, just pulled off the old gasket and replaced it with the new one. Old gasket came off easily. Just had to pull it off. No screws on the right side. Just pushed the new one in place in the groove on the door.
For the left side, needed a Phillip’s screwdriver to remove the flap first. H
... Read moreelps to have a second person hold the door from moving. Once flap was off, pulled the old gasket off and installed the new one just like the right side. Then screwed the flap back on once the gasket was in the groove properly.
Initially after install, it seemed like the magnet on the door was not strong enough but after a couple of days, the magnet seems a lot stronger, sealing the air out. Very happy I replaced it. It was a lot simpler to replace than I thought it would be.
Fortunately, others had left comments about this installation, so proved very helpful. First thing was laying out the gasket flag on the counter to allow it to unbend, get out the kinks from shipping. While the new gasket was laying out on the counter, started removing the old gasket. As it had been there for 11 years, needed pliers to
... Read more get a corner started. I was slow and careful removing the old gasket in case I needed to put it back in. A very helpful suggestion from others was to lightly rub dishwashing soap on the gasket edge that fits in the groove in the door. Again, slow and careful, got it installed, wiped off any excess dishwashing liquid, and the door closed with a better seal in a long time. Pleasantly surprised how easy this was to do!