Your coupon for will be reflected when you check out!
✖
Your coupon for
✖
Hello!
You're visiting the PartSelect site in U.S.
Would you like to shop on the Canadian site?
Stay on this site
Go to Canadian site
✖
Model Number Locations
1Select Category Type
Select Category Type
2Select Product Type
Select Product Type
3Select {MODEL} Type
Select {MODEL} Type
Sample Model Number Tags
Model numbers can be made up of numbers (1005400, for example) or a combination of letters and numbers (LAT1000AAE). The model number will most likely appear on either a paper sticker or a metal plate. Your appliance's model number tag may look similar to the sample model number tags shown here (model number highlighted in yellow):
Model has been saved to My Models. If you're not signed in, your lists are available on this device and will expire within 30 days.
Model has been saved to My Models.
This genuine OEM microwave turntable tray is a circular plate made of glass and has a diameter of approximately 16 inches. It rotates food in your microwave oven, so that your food cooks evenly. It is...
The bake element is located at the bottom of the oven and gives off heat in order to bake evenly. If you notice that the element is not heating up or is not cooking evenly, it could be because it is b...
This is a multi-use and multi-appliance screw. It can be used on a microwave, refrigerator, range/oven, air conditioner, dehumidifier, washer, or dryer. The measurements of this screw are 8 x 1/2 inch...
The interior oven door glass panel is the innermost piece of glass that faces the inside of your oven when the door is closed. This inner oven door glass is meant to be resistant to high heat and can ...
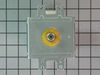
The temperature sensor measures the temperature inside the oven. If your oven is too hot, not heating evenly, is not heating enough when baking, or simply will not start, you could have a faulty tempe...
An oven thermostat is a switch that opens and closes in response to the temperature it senses. It is typically found in the control panel, where a liquid-filled temperature-sensing bulb senses and mai...
This touch-up paint can be used on a wide variety of household appliances. It is most often used on washers, dryer, refrigerators, dishwashers, ranges, freezers, trash compactors, or microwaves. It is...
This is cookware designed for use in your range or oven. It is a two-piece dish that is used to grill or cook food while the broil function is on, meaning it can withstand high temperatures. This set ...
This part is a light bulb that is 120-130 volts and 15 watts, and is used in conjunction with your range or wall oven. The function of this bulb is to illuminate the interior of the oven.Before making...
Ask our experts a question about this model and we'll get back to you as soon as possible!
4 questions answered by our experts.
Sort by:
< Prev
1
Next >
Search filter:
Clear Filter
Your search term must have 3 or more characters.
Keep searches simple. Use keywords, e.g. "leaking", "pump", "broken" or "fit".
Sorry, we couldn't find any existing answers that matched.Try using some different or simpler keywords, or submit your new question by using the "Ask a Question" button above!
Jeff
January 6, 2020
When microwave starts a message comes on door. What can i do?
For model number GMC275PDQ6
Hello Jeff and thank you for writing.
If there is a message and the microwave does not function after the initial start it could be a faulty door switch PS2338920 and/or line fuse PS11742452, you should check for signs of damage, and replace it if necessary. We hope this helps. Please contact us anytime.
Microwave part of combo, went totally dead (displaying " door")
For model number GMC275PDQ6
Hi Al,
Thank you for your question. According to the Whirlpool website, if the word "Door" is appearing on the microwave display, the door has been closed for 5 minutes or more without the microwave oven being started. This occurs to avoid unintended starting of the microwave oven. If you see the word "Door" displaying on your microwave, open and close the door, then start the cycle. To make sure that the door is closing correctly, check and see if the door contact area has any residue buildup on it. If there is, clean it. Make sure that all the packaging material has been removed from the door lock system, so nothing is blocking it. Look inside the microwave and make sure that if you have a cooking rack inside, that it is not preventing the door from closing correctly. You should always insure, that before you turn the microwave on, that the door is fully closed. We hope this helps. Thank you and have a great day.
2 people found this helpful.
Was this helpful?
Thank you for voting!
Sooren
February 4, 2025
This is really puzzling that I have not be able to find a video showing how to replace microwave door switches for Whirlpool combo wall mount oven and microwave model no. GMC275PDQ6. My unit oven is working so control panel is good, but when I enter time for microwave and push start button, it displays DOOR and I tried push the door in to make sure it is closed and still does not start.
It is and old unit and not many technician willing to fix it. I am suspecting microwave door switch problem, but I need to know how to take them out to test them. Please help if you can.
Thanks
For model number GMC275PDQ6
Hello Sooren, Thank you for contacting us. While we do not have a specific video on how to remove the door switches, there is some general information under our video on diagnosing a microwave that won't heat and we have also found the following instructions provided in one of our responses to another customer: Before beginning any repair, please unplug the appliance from the electrical outlet. Open the door and remove the screws securing the grill. Slide the grill to the left to release it. Next remove the screw on the left securing the control panel and loosen the screw behind the panel. Lift the panel up and pull it forward to detach. Now remove the screws to release the switch assembly. Depress the release tab and the actuator to detach the switch you are replacing. Disconnect the wire connector to fully release the old switch. Install the new door switch by first connecting the wire connector. Now position the new switch into the assembly and snap it into place. Realign the switch assembly on the frame and replace the screws to secure. Reposition the control panel. Tighten the screw behind the panel. Reposition the grill and slide it to the right and replace the screws. We hope this helps you.
Thank for your response, but my microwave unit door is front hanging type , it open from front and down
For model number GMC275PDQ6
Hi Sooren,
Glad to hear from you. The video we provided was meant to give you a general idea on how to access the door switches. In order to access the door switches for your model, you will need to remove the microwave/oven combo from the wall. We have included a link from our website to the installation and owners manuals for your microwave oven combo with information on how to remove it from the wall. Before beginning this repair, make sure the power is turned off to the appliance. Once you have removed it from the wall, depending on your model, you may have 2 panels to remove, one behind the control panel and one on the top of the microwave. Once you have removed the top panels, set them aside. For safety reasons, before removing and testing the switches for continuity with a multimeter on the Rx1 setting, you will need to discharge the capacitor. We have included a link from our website with information on how to discharge it. NOTE: If you are not comfortable doing this repair yourself, you will need contact an appliance repair technician. Once you have removed the top panels, you should find a schematic with a wiring diagram with information on what some of the parts are inside the microwave. When testing the switches, you should receive a reading of zero. If you get any other reading, you will need a replacement door switch. We hope this helps! If you have any questions, please let us know.
The first thing I did was to remove the oven door by releasing the two latches on the hinges (by hand). I then raised the door toward the vertical position and lifted up. The hinges slide out of the oven housing. I laid the door, inside face up on my island counter top. This ensures that none of the parts will fall when disassembling
... Read morethe door. Next I unscrewed the screws 4 top and bottom and four on the inside face. This releases the frame from the front housing. Lift the frame off the door, exposing the glass pieces. Lift off the broken inside glass and place the new piece in the glass retaining housing. Replace the outside frame and replace all screws. Take door back over to oven and slide hinge bottoms back into slots on oven. Rotate to horizontal position and flip latches back to locked position. Total time was about 10 minutes mainly because I was curious how the door was constructed and I poked around while it was disassembled.
I removed the two screws that held the bake element in place. Next I removed the Bake Element. I had to unscrew the oven to go behind it because when one piece off of the element broke, it slide back behind the oven. I pushed the wire back thru the piece holes, connected the Element, and pushed the element with the wires back through the
... Read moreholes. I rescrewed the element in place and the oven. PartSelect helped me to save this year's Christmas.
This built-in oven was slid out of it's space and set on a box. I removed the back cover with nut driver and located the safety overload device. removed nuts and used pliers to remove wires and replace them. The power must be off to do this repair.Replaced the cover and slid back into place. This could be a lot more difficult if your pow
... Read moreer cord or gas line is not long enough to make it out of your wall space. Or of your oven is attached well to the frame.


 – Part Number: WP4173175")


")

