Your coupon for will be reflected when you check out!
✖
Your coupon for
✖
Hello!
You're visiting the PartSelect site in U.S.
Would you like to shop on the Canadian site?
Stay on this site
Go to Canadian site
✖
Model Number Locations
1Select Category Type
Select Category Type
2Select Product Type
Select Product Type
3Select {MODEL} Type
Select {MODEL} Type
Sample Model Number Tags
Model numbers can be made up of numbers (1005400, for example) or a combination of letters and numbers (LAT1000AAE). The model number will most likely appear on either a paper sticker or a metal plate. Your appliance's model number tag may look similar to the sample model number tags shown here (model number highlighted in yellow):
Model has been saved to My Models. If you're not signed in, your lists are available on this device and will expire within 30 days.
Model has been saved to My Models.
This door handle for your washer is sold without screws, they can be ordered separately, or you can reuse the existing screws if they are in good shape. To replace this part, simply unscrew the handle...
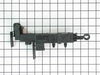
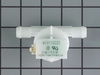
This washer drain pump is a genuine replacement component designed for select front-load washing machines from Whirlpool, Maytag, Kenmore, and affiliated brands. It plays a vital role in the wash cycl...
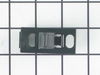
This washer door lock and switch assembly is a critical safety and control component for front-loading washing machines. It secures the door during wash and spin cycles, preventing accidental opening ...
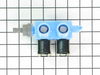
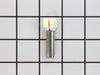
Used with some front load washers. The attaching solenoids on the valve open and close according to the desired temperature, or amount of water needed.
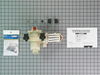
This touch-up paint can be used on a wide variety of household appliances. It is most often used on washers, dryer, refrigerators, dishwashers, ranges, freezers, trash compactors, or microwaves. It is...
The hose clamp is used to hold the water hose in place which will prevent the hose from leaking water. Sometimes the clamp may lose its ability to latch on, causing a leaking washer. For the installat...
(1) First I unpluged the washer then I removed the water from the tube with a water vac.(2) Then I removed the three (3) screws that holds the front panel, using a Torx T-20 socket. ( this is a front load washer ). The panel is below the loading door. (3) I packed towels under the washer. (4) I slowly removed the cleanout i
... Read moren the front of the pump, using the water vac to catch the water as it leaked out. (5) I removed the wiring to the motor. (6) I removed the screw that holds the pump in place with a Torx T-20 socket. (7) I pulled the pump forward so the clamps that hold the drain hose and discharge hose could be removed using the hose clamp pliers. ( they come off much easier then they go back on ). (8) I tested the pump and found it would run but was making a lot of noise and running slow. (9) To reinstall start with number (7) and work backwards to number (1) skipping (3) and (4). Don Kramer Wichita, Kansas
1. remove the three screws from the top backside of the top panel 2. push the top panel to the rear 1/8 to 1/4 inch 3. lift/rotate top panel from rear to front, set aside. 4. remove the three wire connectors from latch. 5. use #15 Torx to remove the three screws from the latch. 6. remove and replace part using to
... Read morep opening. 7. reverse order to finish.


 Diagram and Parts List for Whirlpool Washer")
 Diagram and Parts List for Whirlpool Washer")