Your coupon for will be reflected when you check out!
✖
Your coupon for
✖
Hello!
You're visiting the PartSelect site in U.S.
Would you like to shop on the Canadian site?
Stay on this site
Go to Canadian site
✖
Model Number Locations
1Select Category Type
Select Category Type
2Select Product Type
Select Product Type
3Select {MODEL} Type
Select {MODEL} Type
Sample Model Number Tags
Model numbers can be made up of numbers (1005400, for example) or a combination of letters and numbers (LAT1000AAE). The model number will most likely appear on either a paper sticker or a metal plate. Your appliance's model number tag may look similar to the sample model number tags shown here (model number highlighted in yellow):
Model has been saved to My Models. If you're not signed in, your lists are available on this device and will expire within 30 days.
Model has been saved to My Models.
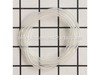
This 25-inch fuel line carries fuel from the tank to the carburetor, ensuring proper engine operation. Made from durable clear plastic, it is designed to withstand regular use but may become clogged o...
This Genuine OEM fuel filter is designed to maintain the performance and longevity of your equipment by preventing dirt and debris from entering the carburetor. Located inside the fuel tank, this esse...
This is the Genuine Craftsman replacement part. It is made out of Flexible Rubber and is Sold Individually. The purpose of the 530069216 Tank Purge Line is to return the excess fuel that is in the car...
The Fuel Line Fitting is a plastic part which attaches two pieces of fuel line together. If broken due to damage/fatigue, there may be a leak and the part must be replaced. Installation is rated as "E...
This flywheel is an authentic manufacturer replacement part for use with lawn and outdoor equipment. The flywheel is a heavy, circular disc that has magnets that create an electric charge sent to the ...
The Starter Spring is a metal spring used to restract the rope after you pull it to start the engine. Installation of this OEM part is rated as "Medium" difficulty and requires a screwdriver, nutdrive...
The Fuel Cap Asssembly attaches on top off the fuel tank in order to prevent fuel from exiting, or debris from entering. Installation is rated as "Easy" by customers. If broken due to fatigue/wear/dam...
This metal ring in your engine, known as the piston ring, seals the gap between the piston and cylinder wall. It makes sure that the gases produced during combustion do not escape and that the engine ...
The chainsaw starter rope is a three-foot-long white rope that is approved by the original equipment manufacturer, and which wraps around the recoil pulley and is pulled to start the engine. Installat...
This is an authentic replacement foam filter commonly used on handheld lawn and garden equipment. The purpose of this air filter is to prevent dust and other particles from entering carburetor and eng...
The Carburetor Assembly (Carburetor, WT 379 w/ Limiter Caps) includes the carburetor and primer bulb. This assembly requires a screwdriver, pliers, and a wrench set, and is rated as "Easy" to install ...
This is an original Craftsman replacement part. The screw is designed by the manufacturer for use in yard tools such as trimmers, blowers, and brushcutters. This part is made of metal, and is genera...
$6.72
In Stock
Order now and your part arrives by Jun 14
Questions And Answers for GHT220
Ask our experts a question about this model and we'll get back to you as soon as possible!
1 question answered by our experts.
Sort by:
< Prev
1
Next >
Search filter:
Clear Filter
Your search term must have 3 or more characters.
Keep searches simple. Use keywords, e.g. "leaking", "pump", "broken" or "fit".
Sorry, we couldn't find any existing answers that matched.Try using some different or simpler keywords, or submit your new question by using the "Ask a Question" button above!
Denis
July 2, 2022
setting on the carb adj. screws
For model number GHT220
Hi Denis,
Thank you for your question. The carburetor needs to be set. Here are general instructions for a 2-stroke carburetor. There will be 2 idle screws. One will be idle mix and the other will be high speed. Turn both screws in to shut off the fuel then back off 2 turns, next start engine, it may not run great, but should start at these settings. Start the motor, and let it run for a few minutes to warm it up. You may have to fiddle with the throttle a bit to keep it running. Slowly turn in the low-speed jet, until it starts to die, then back it out another 1/4 to 1/2 turn. Next, hold the throttle wide open, and slowly turn in the high speed, until it really starts to smooth out and rev high, and start screaming, then back this out until it starts to run rough or slow down, and then turn it back to the midway point between these two positions. Keep playing with the low-speed needle until you get rapid immediate response from the throttle and good idle with the idle adjustment. Then play with the high-speed needle, but always back it out from the setting about 1/4 turn or so, from where it runs the smoothest. This setting of backing it out will allow more fuel when under a load and keep your 2-cycle motor from running too lean. Put a load on it and just tweak the settings just a hair at a time. If you are in the ballpark it will not take much adjustment to make a difference. If you have any questions, please let us know. We are open 7 days a week. We look forward to hearing from you!
Did this question help you?
Thank you for voting!
< Prev
1
Next >
✖
Ask a Question
Ask our experts a question on this model and we'll respond as soon as we can.
1) While still attached to the fuel tank, I first sized up the old fuel lines with the newer fuel lines. 2) With a pair of needle nose players, I then removed the old dry rotted fuel ?? lines, from the fuel tank. 3) I cleaned the fuel tank and around the carburetor area, to insure that there was no debris, that could possibly fa
... Read morell into the path of the new fuel lines installation. 4) I then installed the smaller one of the fuel lines, so that it would be out of the way, of the larger fuel line. I Pulled the fuel line through the smaller hole in the fuel tank, with needle nose players. I pulled the smaller fuel line out through the fuel tank filler hole, attached the fuel filter to the smaller fuel line. I Made sure that the fuel filter was extended to the furthest end of the fuel tank bottom. Six inches in all. I then attached the smaller fuel line to the carburetor. 5) I Installed the larger fuel line, followed the same procedures as the smaller fuel line. 6) Both fuel lines where cut on an angle for easy installation. No lubricant was necessary. 7) I filled up the fuel tank with fresh fuel and oil, new air filter and spark plug. It started on the first pull. Amazing.
Be sure the fuel line is the exact same size (id and od) as the one you are replacing. I had purchased a Fuel line from my local dealer - and after a few hours I figured out that it was the wrong size! He simply cut some line from a spool he had. Didn't bother to look it up! The line from this site was perfect! The id is important because
... Read more the line has to Compress to go through the hole.
To start, remove the plastic carburetor grill. DO NOT remove the carburetor. The fuel line has to be sliced down to fit through the tank hole and get it in far enough up into the tank to grab with needle nose pliers.( need long needle nose pliers which I didn't have) I placed about six inches of the plastic tubing in the jaws of vice so t
... Read morehat half of the tube was squeezed in the vice jaws. I then used a razor blade to shave off the exposed tube. I slipped the shaved end of the tube up through the tank hole far enough to grab with long tweezers and pulled it up to where I could grab it in the tank with needle nose pliers. I put light lube oil on the remaining tubing and pulled it through. It takes a steady firm pull to pull it in. Install the filter and pull the tube back down into the tank. I also used a small diameter drill bit and with my fingers slightly reamed the tube ends to ease the tube over the filter and carburetor nipples. To prime the engine, spray starting fluid into the carburetor and start. Repeat until the engine will run on fuel. It took me hours to figure this out, but will take less than an hour with this method.


_WW_1.gif "Page A Diagram and Parts List for Type 5 Poulan Hedge Trimmer")
_WW_2.gif "Page B Diagram and Parts List for Type 5 Poulan Hedge Trimmer")
_WW_3.gif "Page C Diagram and Parts List for Type 5 Poulan Hedge Trimmer")
 – Part Number: 530069247")


")


 – Part Number: 530069247")