Your coupon for will be reflected when you check out!
✖
Your coupon for
✖
Hello!
You're visiting the PartSelect site in U.S.
Would you like to shop on the Canadian site?
Stay on this site
Go to Canadian site
✖
Model Number Locations
1Select Category Type
Select Category Type
2Select Product Type
Select Product Type
3Select {MODEL} Type
Select {MODEL} Type
Sample Model Number Tags
Model numbers can be made up of numbers (1005400, for example) or a combination of letters and numbers (LAT1000AAE). The model number will most likely appear on either a paper sticker or a metal plate. Your appliance's model number tag may look similar to the sample model number tags shown here (model number highlighted in yellow):
Model has been saved to My Models. If you're not signed in, your lists are available on this device and will expire within 30 days.
Model has been saved to My Models.
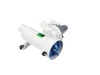
This drain pump and filter assembly is a genuine OEM replacement assembly that is designed for washing machines. It is responsible for removing water from the washing machine tub at the end of each wa...
This genuine OEM door lock is a replacement part specially designed for front-load washing machines. It is a safety mechanism designed to prevent the door from being opened during the wash cycle. When...
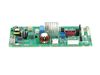
Introducing the GE Main Control Board FLW LE, a key component of your GE appliances. This reliable control board is the perfect solution for handling your device's actions, from managing operation com...
This long shipping bolt is a heavy-duty fastener designed to secure the washer’s tub to the frame during transport, preventing internal damage caused by vibrations. It is essential for safe shipping a...
This is a gasket seal for use in washing machines. This seal, also known as a gasket or boot, is used to seal the inner drum of the washing machine from the rest of the washer cabinet, and beyond. If ...
Keep your washer running smoothly with this genuine door latch. It helps keep the door securely closed during cycles, preventing leaks and making sure everything works as it should. Made for select GE...
This inverter control board is a vital electronic component for front-load washers, responsible for regulating the motor’s speed and direction to ensure smooth washing and spinning cycles. It converts...
This damper stabilizes the washer drum during spin cycles. Replace if your washer shakes or vibrates excessively. This part is designed to keep your appliance operating reliably and efficiently. Repla...
This water inlet valve controls the flow of hot and cold water into the washer tub, ensuring proper water levels and temperatures for efficient cleaning. Built with durable ABS plastic and stainless s...
$73.09
In Stock
Order now and your part arrives by Mar 19
Questions And Answers for GFW550SPR4RS
Be the first to ask our experts a question about this model!
✖
Ask a Question
Ask our experts a question on this model and we'll respond as soon as we can.
My first step was to unplug and re-plug the washer into a different working electrical outlet to see if the power-on control panel would reset itself. The washer would cycle on but within few second it would power down. After watching an how to short video from GE website My next step was to get access to the main control board by disasse
... Read morembling the front and top panels to check for a blown fuse located on the board. I also checked the water pump filter for sign of lint build up. The lint filter was clean and the fuse wasn’t blown. Next I attempted to set the control panel into diagnostic mode so as to read any error code stored on the board , I wasn’t successful therefore I summarized the control board needed to be replaced. With the new control board on hand I unplugged the washer from the electrical outlet, grounded my wrist with a ground wire linked to the house water metal pipe. I proceeded to unscrew the control board module from the washer frame, unsnapped half dozen electrical leads then extracted the defective board. I carefully installed the new board double checking all connections for proper fit. After reinstalling the top and front panels I plugged and powered up the washer, it took me approximately two hours to successfully repair the washer.
1. Slid out the soap dispenser and placed in sink to be rinsed also unplugged power. 2. Took off the control panel and unplugged the two wire clips 3 screws on left side of soap dispenser opening and 2 screws on the right side. 3 For the top panel removed 3 screws, 1 right, 1 center and 1 left. 4. Pulled top towards self an
... Read mored lifted up. 5. Shut off water pressure to house and bled off the pressure. 6 Disconnected water hoses. 7. Disconnected the solenoid power clips (4) and pushed to side. 8. Disconnected the water lines to the Water Inlet lines of the old valve to washer. 9. Connected the Washer water lines to new Water inlet valve in the same order. 10. Reconnected the power clips to the new Water inlet valve in the same order that were taking off. 11 Connected the New water inlet valve to washer and connected the water lines. 12. turned water on checked for any leaks. 13. No leaks, started putting the top on and tightened the there screws. 14. Started to install the control panel back on reattaching the two wire clips and snapping panel back in place. 15. Reinstall the 5 screws around the soap dispenser after cleaning it. 16. Ran a test wash cycle with some old towels and no loud sound from the water running and the the fabric softener was added during the rinse cycle. Just like brand new!! First time working on this unit. Very easy!!
The first thing to get is a baking sheet/pan and a bucket. You'll want to get it as close to the drain as possible. Be ready for ALOT of water to be in there. Ease it out and dump the water into the bucket until it's all out. Next you'll have to prop up the front of the machine at least 4 or 5 inches. You'll need pliers to loosen the hos
... Read moree clamp. There's only 4 screws so it's pretty easy, but you'll only be able to see the 2 in front. The other 2 you'll have to feel your way thru it.


 Diagram and Parts List for General Electric Washer")
 Diagram and Parts List for General Electric Washer")