Your coupon for will be reflected when you check out!
✖
Your coupon for
✖
Hello!
You're visiting the PartSelect site in U.S.
Would you like to shop on the Canadian site?
Stay on this site
Go to Canadian site
✖
Model Number Locations
1Select Category Type
Select Category Type
2Select Product Type
Select Product Type
3Select {MODEL} Type
Select {MODEL} Type
Sample Model Number Tags
Model numbers can be made up of numbers (1005400, for example) or a combination of letters and numbers (LAT1000AAE). The model number will most likely appear on either a paper sticker or a metal plate. Your appliance's model number tag may look similar to the sample model number tags shown here (model number highlighted in yellow):
Model has been saved to My Models. If you're not signed in, your lists are available on this device and will expire within 30 days.
Model has been saved to My Models.
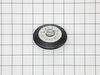
This dryer drum support roller wheel kit is engineered to stabilize and support the drum during rotation, ensuring smooth and efficient operation throughout the drying cycle. The assembly typically in...
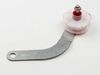
Enhance the functionality of your dryer with this highly durable Control Knob from GE. This chrome control knob, an integral part of the dryer, allows for the precise and easy adjustment of cycle sett...
Upgrade the efficiency of your dryer with the GE Lint Screen ASM. This lint screen is specifically designed to trap lint and debris from the exhaust air released by your appliance, maintaining the mac...
Ask our experts a question about this model and we'll get back to you as soon as possible!
3 questions answered by our experts.
Sort by:
< Prev
1
Next >
Search filter:
Clear Filter
Your search term must have 3 or more characters.
Keep searches simple. Use keywords, e.g. "leaking", "pump", "broken" or "fit".
Sorry, we couldn't find any existing answers that matched.Try using some different or simpler keywords, or submit your new question by using the "Ask a Question" button above!
Bernice
March 7, 2020
Do you have video or instruction how to replace a broken belt on this dryer.
For model number GFDR270GH0WW
Hello Bernice,
Thank you for your question. First, you will need to remove the main top so we can access to the screws keeping the front panel on, by removing the screws that are located near the top of the door frame, you'll be able to remove the top panel. Now that the top panel is removed, you can remove the screws behind the front panel near the top, then by tilting the panel back, you can detach the wires that connect to the door switch on the front panel, to remove it from the dryer, and remember to take note of the color coding of the wires so it can be reconnected correctly. There should be an opening on the bottom left or right that will allow you to reach your hand to grab the idler pulley, and the belt. Pull the idler pulley towards the center of the drum so you can slide the belt off the pulley and the entire drum without having to remove the drum itself. When putting on the new belt, make sure the grooved side is hitting the drum, so the flat side is hitting the idler pulley. We hope this helps.
1 person found this helpful.
Did this question help you?
Thank you for voting!
Steven
March 15, 2022
Why won't the machine turn on the lights bells all go on but drum does't turn
For model number GFDR270GH0WW
Hi Steven,
Thank you for your question. If your dryer does not start, there are some parts that you will need to check to see which one is causing the issue. You will need to check the door switch, the electronic control board, the button tree start assembly and the drive motor. We have included a link that you may reference on how to check some of these parts. Once you have determined the part you need, please feel free to call customer service. We are open 7 days a week and anyone will be happy to assist you. We look forward to hearing from you!
How do I remove the control panel .There are no screw at the back to remove on all the videos that I se there is three screws to be removed.
For model number GFDR270GH0WW
Hello Brenda, thank you for your inquiry. To remove the control panel, you will need a head screwdriver and a plastic hammer to tap it upward and pop it up and off. We hope this helps!
Did this question help you?
Thank you for voting!
< Prev
1
Next >
✖
Ask a Question
Ask our experts a question on this model and we'll respond as soon as we can.
Could tell from the sound it was making that it was related to drum rotation. Searched online videos on how to disassemble this model GE Dryer. The Dryer drum rides on 4 rollers. 2 of the 4 of mine were very noticeably loose and made a similar noise when I spun them by hand. Simply replace the rollers and re-assembled.
I
... Read morecould type out instructions, but it's much simpler to just search for the right video online.