Your coupon for will be reflected when you check out!
✖
Your coupon for
✖
Hello!
You're visiting the PartSelect site in U.S.
Would you like to shop on the Canadian site?
Stay on this site
Go to Canadian site
✖
Model Number Locations
1Select Category Type
Select Category Type
2Select Product Type
Select Product Type
3Select {MODEL} Type
Select {MODEL} Type
Sample Model Number Tags
Model numbers can be made up of numbers (1005400, for example) or a combination of letters and numbers (LAT1000AAE). The model number will most likely appear on either a paper sticker or a metal plate. Your appliance's model number tag may look similar to the sample model number tags shown here (model number highlighted in yellow):
Model has been saved to My Models. If you're not signed in, your lists are available on this device and will expire within 30 days.
Model has been saved to My Models.
This water tube, or plastic tube, is used in refrigerators and freezers. The tube ensures water is directed to parts of the refrigerator that need it, such as the water dispenser and ice maker. If you...
The Water filter reduces contaminants such a s lead, iron, and chlorine from drinking water. Replace every 6 months or 200 gallons for best performance.
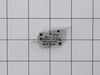
This is a micro switch for various models of LG refrigerators. This switch is responsible for turning the ice dispenser on and off within the freezer compartment of the fridge. If this switch is damag...
This ice bucket assembly is designed to store and dispense ice within select refrigerator models. It includes both the ice bin and the auger mechanism, which rotates to push ice through the dispenser ...
Did your Whirlpool oven stop working like it used to? A faulty electronic control kit might be the culprit - but don't worry, we've got you covered. Our genuine OEM Whirlpool Electronic Control Kit ca...
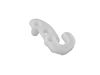
This door basket or bin assembly attaches to the inner side of your refrigerator door. It holds bottles, jars, and condiments, so they are easily accessible. It is clear in color and is the lower bin ...
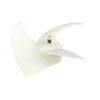
This door stopper is a replacement component designed to limit door movement and protect hinges and surrounding surfaces. It is commonly replaced when worn or damaged and helps ensure smooth, controlled door operation.
This temperature sensor monitors internal conditions and provides accurate feedback to the control system. Precise sensing helps maintain stable performance and efficiency. Replacing a faulty sensor r...
$31.58
In Stock
Order now and your part arrives by Jun 30
Questions And Answers for GF5D906SL
Be the first to ask our experts a question about this model!
✖
Ask a Question
Ask our experts a question on this model and we'll respond as soon as we can.
Shut off water supply. Disconnect main supply line. Remove rear lower panel on back of refrigerator. Remove all tubing clamps on back. Disconnect leaking tubing from water supply valve. Remove water filter and unscrew/remove water filter housing. Replace tubing - connect to water filter housing then to water supply valve. Reconnect filter
... Read more housing and filter. Reinstall lower panel, then main water supply line, then all tubing clamps. Turn water back on and check for leaks after discarding several glasses of water to fill filter. Job complete!
The heavy work is moving the fridge, then take off the lower plans. Use a bowel or cup for screws and the water line connector spacers so you don't loos them. undo connections holding water line, including the bottom brakes for the solenoid. Reuse the spring around the lower waterline to prevent external wear on the line.
... Read morer />NOTE: remove the waterline connector spacers and save! NOTE: you must compress (not pull) the connect to then pull the waterline out of the connectors. NOTE: You must also remove the water filter and housing inside the fridge but this is easy. MOTE: Test the line for leaks by turning on the water and then using the door water. The filter will need to refill so it may take a minute before water comes up. This line only have pressure when the door water is used or the ice maker needs to make ice.
After replacing the line, test the line for leaks by using the door water so the solenoid fills the lines
An easy way to get a refrigerator out from the wall is to use a tow strap or 1/2 to 3/4 in. rope. Throw a loop behind refer while keeping both ends in your hands. Let it settle down to the lower half of unit and pull using both hands. Comes right out. Remove lower panel. Unscrew water valve from cabinet. Remove all tube holders L
... Read moreay some rags down to catch a little water drainage. Turn off water supply valve at wall. Unplug Power. Remove filter and filter holder. (one screw). remove tube from valve by removing plastic C clip. Push plastic ring towards the valve and pull out tube at same time. With the tube free, remove filter, then mount screw to remove the inside filter holder. When it is out, pull the tube doing the same process as the lower end. Pull tube out and replace with new one putting everything back in reverse order. Before placing tube holders back on, turn on water to check for leaks. After turning water back on and plugging in power, push refer back into place. While I was there, I also replaced the hose from the wall to the refer.