Your coupon for will be reflected when you check out!
✖
Your coupon for
✖
Hello!
You're visiting the PartSelect site in U.S.
Would you like to shop on the Canadian site?
Stay on this site
Go to Canadian site
✖
Model Number Locations
1Select Category Type
Select Category Type
2Select Product Type
Select Product Type
3Select {MODEL} Type
Select {MODEL} Type
Sample Model Number Tags
Model numbers can be made up of numbers (1005400, for example) or a combination of letters and numbers (LAT1000AAE). The model number will most likely appear on either a paper sticker or a metal plate. Your appliance's model number tag may look similar to the sample model number tags shown here (model number highlighted in yellow):
GDS20KBSDBB General Electric Refrigerator - Overview
Save your modelModel Saved!
Save your model for later to make things easier.
Model has been saved to My Models. If you're not signed in, your lists are available on this device and will expire within 30 days.
Model has been saved to My Models.
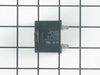
This electronic board (Main Control Board Assembly, Control Board, Motherboard) controls the temperature and defrost functions of the unit. This control board is located on the back of the refrigerato...
The water inlet valve on your refrigerator allows water to enter the ice maker and water dispenser. If your ice maker or water dispenser is not functioning properly, or you notice a leak, you may need...
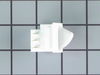
This part helps the compressor kick on and off while maintaining a constant temperature to keep things frozen in your freezer. This part has been updated by the manufacturer and may appear different t...
This OEM filter is sold individually. Change your filter every 6 months for the best results. This filter is found in top-freezer and bottom-freezer refrigerators located in the back upper right corne...
The fan blade is not included. This motor operates the fan to help circulate the air for cooling of the compressor and the coils. It also helps to evaporate the excess water located in the drain pan.
After checking the stories, the consensus of opinion was to change the mother board. I had a tremendous help from Tom Paone at quality@applianceeducator.com. He also told me to change the motherboard but to make sure that the coils were totally defrosted before starting up the refrigerator after changing the board.
Took off thr
... Read moreee nuts around the board at the back of the unit. Removed the input wires and you have to push in the plastic tabs holding the board in. Then just put the new board in place and push till the tabs click. Re-install the wires and put the cover back on.
Really simple task,
It is now a week since doing this and the unit is working perfectly. No soulds and good nights sleep. The ghost has moved on.
Unplug refrigerator. First I removed 3 screws to remove cover for Board ASM Main located on back of refrigerator then loosen Board by pressing on each of 4 plastic pins then unscrew ground wire (green) then transfer all plugs from old Board to new Board, put back new board through pins, screw back ground wire then put back cover then plug
... Read more back refrigerator, took 5 minutes
The main board is easy to get to behind the access plate. You will find seven different wire harness plugs, six which are white, that are impossible to remove without breaking the retaining clips which hold them in place....but that's OK.....you are throwing away the old board anyway, so nothing lost. The plugs will snap back into each o
... Read moref their respective terminal locations without a problem. Be sure to treat the four white, plastic pins that hold the board in place delicately....you will not want to mess those little dudes up!