Your coupon for will be reflected when you check out!
✖
Your coupon for
✖
Hello!
You're visiting the PartSelect site in U.S.
Would you like to shop on the Canadian site?
Stay on this site
Go to Canadian site
✖
Model Number Locations
1Select Category Type
Select Category Type
2Select Product Type
Select Product Type
3Select {MODEL} Type
Select {MODEL} Type
Sample Model Number Tags
Model numbers can be made up of numbers (1005400, for example) or a combination of letters and numbers (LAT1000AAE). The model number will most likely appear on either a paper sticker or a metal plate. Your appliance's model number tag may look similar to the sample model number tags shown here (model number highlighted in yellow):
Model has been saved to My Models. If you're not signed in, your lists are available on this device and will expire within 30 days.
Model has been saved to My Models.
The drain pump and motor assembly may also be known as the washer drain pump and is a part for your washer. The drain pump helps expel water from the washing machine. The drain pump is activated after...
The hot water inlet valve on your washing machine controls the water flow into the washer. This inlet valve has a standard hose fitting inlet and one water outlet. The water inlet valve opens to allow...
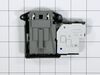
This magnetic door plunger, also known as the magnet holder, is built for your washer. When you order this part, you will receive the plastic housing and a spring that goes with it. The magnetic door ...
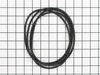
This is a tub-to-pump drain hose for a front load washer. The hose features flexible bellows which allow it to expand and contract when necessary. It carries the water from the tub of the washer to th...
This is a seal for a washer tub. It creates a seal between the front and rear halves of the washer tub to prevent the appliance from leaking. If you notice leakage between the two sections of the tub,...
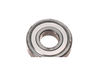
This tub bearing is for washers.
Tub bearing supports the spin basket shaft at the tub.
Unplug the washer and shut off the water supply before installing this part. Wear work gloves to protect your hands.
This replacement water inlet valve is designed for use in washing machines to manage water flow during the cold water fill, bleach dispensing, and prewash cycles. It features a standard hose fitting i...
This replacement pump filter, also known as a filter assembly, is a genuine OEM part for your washer or washer/dryer combo. Before beginning this repair, turn off the power and water supply to your wa...
The door boot seal clamp, also referred to as an outer door gasket clamp, holds the door boot in place in a front-loading washer. If your washer is leaking from the door and there are no signs of dama...
This shipping bolt is an OEM part that holds the tub and basket of your washer steady during transport, stopping them from moving around and getting damaged. You will usually find these bolts at the b...
$19.30
Special Order
Questions And Answers for GCWL1069QD3
Be the first to ask our experts a question about this model!
✖
Ask a Question
Ask our experts a question on this model and we'll respond as soon as we can.
Removed the top of the washer by removing the 4 back screws and 2 small brackets. Then I removed the front panel, this was actually the hardest part, 2 screws and 8 tabs that you pop out carefully from the top of the panel. I only disconnected the power button and was able to rest the panel on top of the washer. The rest of the washer cam
... Read moree apart quickly just moving down the front of the washer and removing the door, latch, tub gasket, drain cover. Removing the pump was just a mater of disconnecting the drain hoses, and one clip under the drain assembly. 3 screws attach the drain to assembly to the pump and only 2 wires that are clearly marked. Reassembly is just going back through in reverse order of disassenbly. The best thing about this is that it all comes apart with a standard phillips screwdriver.
There is a magnet at the bottom of the door which allows the door to be held ajar when the washer is not in use to allow the tub and gaskets to dry. A tab on the plastic housing which retains the magnet broke which allowed the housing to pull free of the door and stick itself to the machine preventing the door to close. Easy fix to replac
... Read moree the magnet was $18. Instructions were included in the box. Part number on the drawing was A165. PS3618292 Magnetic Door Plunger
Thank you for the very helpful YouTube video. After watching the video, I was able to diagnose the problem, buy the part from your website, and complete the repair. This is my personal machine - I am not a professional repairman.