Your coupon for will be reflected when you check out!
✖
Your coupon for
✖
Hello!
You're visiting the PartSelect site in U.S.
Would you like to shop on the Canadian site?
Stay on this site
Go to Canadian site
✖
Model Number Locations
1Select Category Type
Select Category Type
2Select Product Type
Select Product Type
3Select {MODEL} Type
Select {MODEL} Type
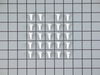
Sample Model Number Tags
Model numbers can be made up of numbers (1005400, for example) or a combination of letters and numbers (LAT1000AAE). The model number will most likely appear on either a paper sticker or a metal plate. Your appliance's model number tag may look similar to the sample model number tags shown here (model number highlighted in yellow):
Model has been saved to My Models. If you're not signed in, your lists are available on this device and will expire within 30 days.
Model has been saved to My Models.
This assembly is the door shelf end cap set for the left and right side of your refrigerator. The function of the door shelf end cap is to attach the inner door liner to the door shelf rail. This will...
This gasket retainer clip kit is for freezers. There are 24 pieces in this kit. The clips are what secure the gasket and liner to the freezer lid. The clips are white in color and made of plastic. If ...
This is a shelf support for freezers. It is used to help hold the inside of the shelf from both sides (left and right.) Please note: right and left side of shelf support are sold separately. If the sh...
This is a shelf support for the left side of a freezer. It is used to help support the inside of the shelf from both sides. *Please note: right and left side of shelf support are sold separately. If t...
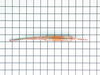
This gasket is intended for use with upright freezers.
This white door gasket is used to make an air-tight seal for the cabinet when the door is closed
This is a plastic OEM drain plug that is attached to the drain system of your appliance and is compatible with several different makes and models of refrigerators, freezers, and air conditioners. This...
A filter-drier in a refrigerator has two essential functions. The first is to absorb system contaminants, such as water, which can create acids. The second is to provide physical filtration. This mean...
Introducing the genuine Frigidaire Bearing-Hinge, an essential appliance part for your freezer. Renowned for its superior quality, this OEM part enhances the smooth functioning of your appliance by su...
This part is found in freezers. The stud may have broken over time and may no longer be supporting the shelf. If your shelf is not staying in place or you are not able to adjust heights, it may be due...
We loosened all the screws around the door and slid out the old gasket. We then slid the new gasket behind the panel and screwed the screws back in place.
I unplugged electrical cord to the freezer. I removed the cover to the relay and load protector. I labeled the wires and made a diagram on the proper placement of each wire going to the relay. I unplugged each wire and removed the relay. Then I removed the load protector. I installed the new load protector and new relay. I placed the wire
... Read mores on the proper terminals of the relay. I replaced the electrical cover to the relay and load protector. I plugged the electrical cord back in the electrical outlet. My freezer started working again. I placed several bottles of water in the freezer to make sure the freezer was working properly before I restocked it with food.
Thanks again for the help. You just saved me about $400.
hardest part was to remove deformities using a hair dryer. Working with hand after heating seemed to work but was not quick. Loosen screws under old gasket. Screws hold gasket lip under the edge of the door liner. Remove old gasket. As door liner was brittle from age, I used silicone caulk across top of door behind flange, set li
... Read morep of gasket in silicone and tighten screws. Did top and half was down the side, then did the bottom up, taking ank excess gasket and trying to distribute along straight side. Make sure door is plum and square on hinges, then close door. Turned freezer on and allow to cool to see if ice would form, before refilling with food.