Your coupon for will be reflected when you check out!
✖
Your coupon for
✖
Hello!
You're visiting the PartSelect site in U.S.
Would you like to shop on the Canadian site?
Stay on this site
Go to Canadian site
✖
Model Number Locations
1Select Category Type
Select Category Type
2Select Product Type
Select Product Type
3Select {MODEL} Type
Select {MODEL} Type
Sample Model Number Tags
Model numbers can be made up of numbers (1005400, for example) or a combination of letters and numbers (LAT1000AAE). The model number will most likely appear on either a paper sticker or a metal plate. Your appliance's model number tag may look similar to the sample model number tags shown here (model number highlighted in yellow):
Model has been saved to My Models. If you're not signed in, your lists are available on this device and will expire within 30 days.
Model has been saved to My Models.
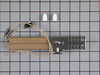
This is a flat style oven igniter used to light the oven burner in a gas range. When the element in this igniter glows white hot, the gas is released from the safety valves, which lights the oven burn...
This OEM 40 watt appliance light bulb is used for some ranges, refrigerators, freezers, and microwaves. Simply locate the existing bulb, unscrew it from its socket, and replace with new light bulb. If...
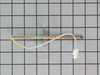
The oven temperature sensor for your range may also be called a probe. The quick connect on this part may differ than your original piece. If the temperature sensor does not fit you will have to cut o...
The Frigidaire light bulb lens covers the interior light bulb in an oven. No tools are necessary to replace this item. After unplugging the appliance, slide off the wire bracket to remove the existing...
The oven light socket allows you to screw in a light bulb so that you can see the inside of your oven. The light socket is located in the back of your oven, so you will need to remove the back panel t...
The door lock switch, or simply door switch, is used in ranges and ovens. The switch activates signals to the oven control board about the state of the door lock. If the light in the oven is not turni...
This is a light lens retainer clip and it is used in conjunction with the oven on your range. This retainer clip secures the light lens to the oven cavity. The part is made entirely of metal, and it i...
If your oven rack has seen better days, the Frigidaire Oven Rack is a perfect upgrade that enhances cooking performance by offering even heat distribution and increased capacity for family meals or ba...
Ask our experts a question about this model and we'll get back to you as soon as possible!
3 questions answered by our experts.
Sort by:
< Prev
1
Next >
Search filter:
Clear Filter
Your search term must have 3 or more characters.
Keep searches simple. Use keywords, e.g. "leaking", "pump", "broken" or "fit".
Sorry, we couldn't find any existing answers that matched.Try using some different or simpler keywords, or submit your new question by using the "Ask a Question" button above!
Dennis
February 13, 2020
When oven is heating will gas come on in intervals of about 20 seconds
For model number FGB24S5ABA
Hi Dennis, thank you for your question. There are a few parts that could cause heating issues in your appliance. First I would say test your igniters with a multi meter to see if they are working correctly or not. They should be reading between 0 - 1100 ohms to be working correctly. The other part you should check would be your oven temperature sensor. That can also be tested with a multi meter and should be reading between 1000 - 1100 ohms. If those three parts are fine however, then the issue may be in your control board or the spark module. Good luck with your repair.
Did this question help you?
Thank you for voting!
Dennis
February 13, 2020
Is it normal for Flame to come on at 20 second intervals
For model number FGB24S5ABA
Hi Dennis, thank you for your question. The flame will come in to keep your oven at the temperature you set it at. It sounds like you are having a heating issue in your appliance if it is coming in that quickly. Once your appliance is to temperature it should not come back on until the temperature lowers and needs to be brought up again. Good luck with your repair.
Did this question help you?
Thank you for voting!
Gil
April 7, 2022
temperature will not go above 350.
For model number FGB24S5ABA
Hello Gil, thank you for writing. One of the common reasons for oven not heating enough is a defective or faulty Thermostat PS735281.The thermostat is responsible for helping you change the temperature. You can test your elements with a multi meter to see if they are working correctly or not. They should be reading between 0 - 50 ohms to be working correctly. If you need help placing an order, customer service is open 7 days a week. Please feel free to give us a call. We look forward to hearing from you.
After reading up on the problem of the gas oven not lighting I decided I needed to install a new igniter. I had read where some people just pulled a panel off the back and installed a new one.. yeah, no such luck with this model so I had to crawl into the broiler drawer space [which I had to clean out first]. Note, if you wear trifocal g
... Read morelasses you might as well close your eyes and replace it by feel because there is no way to tilt your head back enough to see what you are doing and still get both arms and your chest in a broiler. Also be sure to remove all cats and dogs from the area before starting. They seem to think they can help or it's a game of hide and seek and they want to hide with you.. they were no help at all. Other than that, it was quite easy.
1. Turned off circuit breaker to stove 2. Removed the two screws holding down the floor of the oven (screws are at back.), and then lifted it out. 3. Removed the nut holding down the flame guard, and lifted it off. 4. Opened the bottom drawer. 5. Removed the protective cover in the back left of the oven at the bottom,
... Read more first removing the one screw at the bottom that holds it. This reveals a white plug, presumably going to a fuse. 6. Disconnected the white plastic connector, lifting its front tab to release it. 7. The igniter wires go to two lugs that attach at the floor of the oven at the back (one goes via the now free white connector). Slide back the plastic lug covers and use pliers to pull off the lugs. Note that the wider one (on the right) goes to the top of the igniter, while the narrower one (on the left) goes to the bottom of the igniter via the white plastic connector. 8. Removed the two bolts holding the igniter. 9. At this point, the igniter comes out. Nice, since it means you can work on the wires in comfort. 10. Slide the flame retardant sleeves away from the igniter. I found in-line connections about 1.5 inches from the igniter, and cut the wires next to these (on the side away from the igniter, of course.), and stripped the final 3/8 inch. Shorten the wires on the replacement igniter so that they are 3 or 4 inches long, slide on the flame retardant sleeves, then strip the final 3/8ths inch. Use the provided caps to connect the wires. Bottom wire goes to the plastic connector, top wire goes to the wide lug. 11. Install the new igniter by connecting the lugs, sliding on their protective plastic sleeves, reconnecting the white plastic connector, screwing in the two igniter mounting screws, and reinstalling the corner cover. Put back the flame shield and floor of the oven. Turn on the circuit breaker, and it works!
I first looked up my Model Number on PartSelect.com and looked at the schematic as well as Trouble Shooted my problem.
Reading the posts by others how they Removed, Replaced, and Repaired their Oven Ignitors, I used their helpful info, and of course did mine.
1. Unplugged my Oven/Stove.
2. Removed botto
... Read morem storage door to get access to cover plate.
3. Removed oven racks inside oven to gain access to and removed Flame Cover.
4. Removed Screw holding Oven Ignitor in place.
5. Unplugged Ignitor Plug from feed wird in Oven from underneath.
6. Removed Oven Ignitor from the bottom area where storage drawer was.
7. Installed new Ignitor and replaced screw holding Ignitor assembly in place.
8. Replace Flame cover and racks.
9. Plugged in new ignitor underneath, and replaced cover plate.
10. Plugged in Stove/Oven and Oven began to heat! IGNITOR worked!
11. Replaced bottom drawer and slid Stove back into position.
All went easy and only difficulty was replacing cover plate below as it is awkward and having to line up screws/holes was a bit trying.
Using Work Light essential to see well, and, some screws may or can be hard to remove.
Both my neighbor and I ordered our Ignitors within a week of each other. My Oven was Amana his is a Tappan. His failed after a few weeks, but, PartSelect replaced promptly and we are all happy.