FER341ZAS0 Frigidaire Dryer - Overview
Sections of the FER341ZAS0
[Viewing 4 of 4]Keep searches simple, eg. "belt" or "pump".
Drum Belt
PartSelect #: PS1148434
Manufacturer #: 134503600
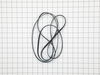
This drum belt, often referred to as a drive belt, is used in the assembly of dryers. It goes around the drum, the idler pulley, and the motor pulley. As the armature on the motor spins, this belt is ...
$17.15
In Stock
Selector Knob
PartSelect #: PS2330885
Manufacturer #: 134844410
This selector knob, also be known as the laundry appliance control knob, is meant for your washer or dryer. This model is sold individually and takes a D-shaped shaft. The purpose of this part is to a...
$55.29
In Stock
Drum Support Bearing
PartSelect #: PS418807
Manufacturer #: 131825900
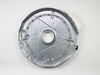
If your dryer does not tumble, will not start, is noisy, or is leaving marks on your clothing, you may need to replace the drum support bearing. The drum is supported at the rear by a bearing, which a...
$10.70
In Stock
Heating Element Assembly
PartSelect #: PS418120
Manufacturer #: 131553900
This dryer heating element produces heat to dry clothes and is located in the rear of a dryer. If the heater element is burned, the dryer does not heat or over heats, or clothes are taking too long to...
$129.80
In Stock
Turn - Type Start Switch
PartSelect #: PS975832
Manufacturer #: 134398300
This part is used to start the dryer once you have selected a setting on the timer.
$63.64
In Stock
Timer Knob - White with Gray Grip
PartSelect #: PS2330897
Manufacturer #: 134886700
Sold individually. This knob accepts a D-shaped shaft.
$51.61
In Stock
Dryer Drum Bearing Bracket
PartSelect #: PS12579101
Manufacturer #: 131724301
This drum bearing bracket is for dryers. Drum bearing bracket holds and supports the drum bearing
$22.52
In Stock
High Limit Thermostat
PartSelect #: PS446428
Manufacturer #: 3204267
This high limit thermostat is used in a dryer and monitors the temperature to make sure it does not exceed 260 degrees Fahrenheit. When your dryer temperature reaches 260 it will cut it out and only c...
$57.61
In Stock
Lint Filter
PartSelect #: PS417841
Manufacturer #: 131450300
Located at the front of the dryer, this lint filter traps lint and debris from the exhaust air flowing out of the dryer drum. This part measures approximately 12 inches long x 7 inches high, has a pla...
$31.58
In Stock
Idler Arm Assembly
PartSelect #: PS1156706
Manufacturer #: 131863007
Part may differ in color from image. Please note that this is only a cosmetic difference.
$53.26
In Stock
Screw
PartSelect #: PS417463
Manufacturer #: 131302800
This is a replacement screw for your washer or dryer. The screw is approximately half an inch in length and is a Phillips-head screw. It screws in from the outside of the drum, into the vane/baffle. T...
$23.60
In Stock
Door Handle
PartSelect #: PS418388
Manufacturer #: 131644700
This part is the replacement door handle for your dryer. It is made of white plastic and measures about 2 ½ inches long and 4 inches wide. The door handle allows you to open and close the dryer door. ...
$52.67
In Stock
Questions And Answers for FER341ZAS0
Be the first to ask our experts a question about this model!
✖
Ask a Question
Ask our experts a question on this model and we'll respond as soon as we can.
Sorry, we couldn't find a match for "".
Here's a guide for finding your model number.
Something went wrong. Please try again later.
Your Question Has Been Submitted!
Our experts will send you an email as soon as your question has been answered.
Common Symptoms of the FER341ZAS0
[Viewing 8 of 8]Noisy
Fixed by
these parts
these parts
Show All
Drum Not Spinning
Fixed by
these parts
these parts
Show All
Too hot
Fixed by
these parts
these parts
Show All
Not Heating
Fixed by
these parts
these parts
Show All
Marks left on clothes
Fixed by
these parts
these parts
Show All
Won’t Start
Fixed by
these parts
these parts
Show All
Touchpad does not respond
Fixed by
these parts
these parts
Show All
Will Not Start
Fixed by
these parts
these parts
Show All
Keep searches simple. Use keywords, e.g. "leaking", "pump", "broken" or "fit".
Knob replacement
Just slipped them on and ready to go. Ordered them on thur and got em on Tues.
Parts Used:
-
Kevin from Donalsonville, GA
-
Difficulty Level:Really Easy
-
Total Repair Time:Less than 15 mins
381 of 390 people
found this instruction helpful.
Was this instruction helpful to you?
Thank you for voting!
short circuit with a brasier metal support
Disconect the dryer from the main power source.
1) Remove the two screws from the rear / upper panel (below the control panel).
2) Snap the front side using a flat head screw driver.
3) On the inside front, remove two screws (one on each side) from the upper side and snap the door assembly off.
... Read more 4) Remove the rear motor access panel (two screws) and appying tension to the spring remove the belt.
5) Pull the drum upwards (verticaly) unnapping it from the rear wall and remove it horizontally through the front panel.
6) Disconect the four leads to the heating element and remove the four screws from the rear of the dryer and replace the heating element.
Follow the same steps backwards to put the dryer together again.
Read less
Parts Used:
-
Juan Carlos from Weston, FL
-
Difficulty Level:Easy
-
Total Repair Time:30 - 60 mins
-
Tools:Screw drivers
235 of 273 people
found this instruction helpful.
Was this instruction helpful to you?
Thank you for voting!
dryer start switch shaft was broken by using pliers after knob was lost
I first disconnected the power by unplugging power cord.
I then removed back cover from control panel using philips screwdriver.
I removed the start switch by twisting it counter clockwise.
I removed the two push on connectors from the start switch.
I installed the two connectors on the new swi ... Read more tch.
I twisted the new switch into place, and installed the new knob.
I reinstalled the back cover plate.
I inserted the power cord back into the receptacle.
I twisted the start knob clockwise.
VOILA!!!!!
Read less
Parts Used:
-
ERNEST from SPRINGFIELD, MA
-
Difficulty Level:Really Easy
-
Total Repair Time:Less than 15 mins
-
Tools:Screw drivers
207 of 286 people
found this instruction helpful.
Was this instruction helpful to you?
Thank you for voting!