


ER4 - Overview
Models starting with ER4
Click on the best match to narrow your results.
- ER4 Hotpoint Range (Hotpoint Range/Stove/Oven Rgb528 Er4)
- ER400 (Type AVIN# GE300-1175814-2147285) Honda Generator (Generator)
- ER400MP Makita Trimmer (Curved String Trimmer Couple Shaft Attachment)
- ER410J Toshiba Microwave (Toshiba Microwave Er410j)
- ER410M Toshiba Microwave (Toshiba Microwave Er410m)
- ER411M Toshiba Microwave (Toshiba Microwave Er411m)
- ER413M02 Toshiba Microwave (Toshiba Microwave Er413m02)
- ER42BDCBSS Dacor Refrigerator (Dacor Refrigerator Model ER42BDCBSS Parts)
- ER4330C Toshiba Microwave (Toshiba Microwave Er4330c)
- ER438M Toshiba Microwave (Toshiba Microwave Er438m)
- ER4460 Toshiba Microwave (Toshiba Microwave Er4460)
- ER446M Toshiba Microwave (Toshiba Microwave Er446m)
- ER48D Dacor Range (Dacor Range/Stove/Oven Model ER48D Parts)
- ER48DSCHLP Dacor Range
- ER48DSCHLPH Dacor Range
- ER48DSCHNG Dacor Range
- ER48DSCHNGH Dacor Range
Keep searches simple, eg. "belt" or "pump".

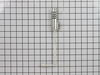
Light Bulb - 40W
PartSelect #: PS884734
Manufacturer #: 8009
This an authentic OEM 40-Watt replacement light bulb, used in a number of household appliances. It is specially designed to withstand extreme temperatures, which is why these replacement bulbs are mos...
$18.22
In Stock

Round Style Oven Igniter
PartSelect #: PS243425
Manufacturer #: WB2X9154
The round style oven igniter is also known as an oven bake or broil igniter and is compatible with your range appliance. The function of the round style oven igniter is to pull electrical current thro...
$95.01
In Stock

Oven Rack
PartSelect #: PS6447646
Manufacturer #: WB48T10095
The oven rack is sold individually. It is chrome in color and measures approximately 24 inches wide by 17-1/2 inches deep. The rack is used to hold cookware in the oven and slides back and forth for e...
$73.86
In Stock

Double Burner Assembly
PartSelect #: PS232404
Manufacturer #: WB16K10026
Both burners are mounted on the same bracket.
$59.47
In Stock

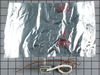
Refrigerator Screw
PartSelect #: PS11742240
Manufacturer #: WP400021-1
Sold individually.
$12.20
In Stock

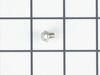
Screw
PartSelect #: PS12349731
Manufacturer #: W11233072
This is a multi-use and multi-appliance screw. It can be used on a microwave, refrigerator, range/oven, air conditioner, dehumidifier, washer, or dryer. The measurements of this screw are 8 x 1/2 inch...
$21.45
In Stock

Door Bumper - Black
PartSelect #: PS241365
Manufacturer #: WB2K15
Sold individually.
$17.19
In Stock

Dryer Screw
PartSelect #: PS11746840
Manufacturer #: WP90767
This screw is sold individually.
$7.47
In Stock

Washer Hose Clamp
PartSelect #: PS11743008
Manufacturer #: WP596669
This hose clamp is used in a wide variety of household appliances. Most often it is found in washers, dishwashers, refrigerators, freezers, dehumidifiers, garbage disposals, or air conditioners. This ...
$7.47
In Stock

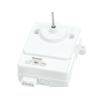
Timer Knobs - Kit of 3
PartSelect #: PS248906
Manufacturer #: WB3X5699
This set of 3 clock timer knobs let you set and change the settings on your range clock. These genuine OEM knobs are made of black plastic and measure approximately 1-inch long.
$36.85
In Stock

Refrigerator Water Fill Cup & Bearing
PartSelect #: PS11743318
Manufacturer #: WP628356
This refrigerator ice maker fill cup dispenses the water into the ice cube mold during the fill cycle. Replacing the water fill cup is a possible solution if you notice that the ice maker is leaking, ...
$35.80
In Stock

Common Symptoms of models starting with ER4
[Viewing 18 of 18]Will Not Start
Fixed by
these parts
these parts

Show All
Little to no heat when baking
Fixed by
these parts
these parts
Show All
Gas igniter glows, but will not light
Fixed by
these parts
these parts
Show All
Leaking
Fixed by
these parts
these parts


Show All
Element will not heat
Fixed by
these parts
these parts
Show All
Ice maker not making ice
Fixed by
these parts
these parts

Show All
Oven is too hot
Fixed by
these parts
these parts
Show All
Fridge too warm
Fixed by
these parts
these parts

Show All
Oven not heating evenly
Fixed by
these parts
these parts
Show All
Little to no heat when broiling
Fixed by
these parts
these parts
Show All
Noisy
Fixed by
these parts
these parts

Show All
Ice maker dispenses too much ice
Fixed by
these parts
these parts

Show All
Ice maker won’t dispense ice
Fixed by
these parts
these parts
Show All
Timer will not advance
Fixed by
these parts
these parts

Show All
Light not working
Fixed by
these parts
these parts

Show All
Not dispensing water
Fixed by
these parts
these parts
Show All
Fridge and Freezer are too warm
Fixed by
these parts
these parts
Show All
Gas smell
Fixed by
these parts
these parts
Show All


Keep searches simple. Use keywords, e.g. "leaking", "pump", "broken" or "fit".
No ignition
Unplug the oven.
Open the oven door.
Remove the racks.
Remove the two screws that hold the oven floor; they are located toward the back.
Remove the oven floor pan.
Remove the screw holding the heat shield/dispenser.
Remove the heat shield/dispenser.
Untwist the ceramic wire caps on the two igniter wires. ... Read more
Remove the two screws holding the igniter.
Remove the igniter.
Replace the igniter working all the steps backwards.
It’s super simple.
Read less
Parts Used:
-
Mark from Upland, CA
-
Difficulty Level:Really Easy
-
Total Repair Time:Less than 15 mins
-
Tools:Nutdriver, Screw drivers
766 of 837 people
found this instruction helpful.
Was this instruction helpful to you?
Thank you for voting!
broiler works, bake oven does not work.
Your website help me troubleshoot the problem and locate the part. Part was delivered the next day. Following the instructions that others on your website had provided, the repair was quick and SUCCESSFUL.
Gas will not flow if the igniter is bad. Gas will only flow if the igniter heats up the internal bimetal strip which in turn, ... Read more allows gas to flow through the safety valve
First, unplug the power sourse. For this repair it is not necessary to shut off the gas, but do so if it makes you more comfortable. Remove the oven door...it lifts right off. Next, remove the screws and lift out the bottom panel in the oven box. This will expose the igniter. Next, remove the lower drawer. Two 1/4-28 screws retain the igniter...remove these. With the drawer removed, go underneath and locate the 2 wires to the igniter. One has a green connector, and the other has a red connector. Disconnect these 2 wires and carefully remove the igniter and wires. Cut the wires from the igniter on the igniter end. You will need to reuse the plug end of each wire, so don't cut them too short. Splice these two wires to the new igniter with the wire splice caps provided. Feed the wires back down throught the opening at the back of the oven and carefully move the igniter into place. Install the two 1/4-28 retaining screws. Go back underneath the oven through the drawer opening and plug in the 2 wires. You should be good to go. Reassemble the oven and have mama bake a cake..
Read less
Parts Used:
-
Robert from Hebron, CT
-
Difficulty Level:Easy
-
Total Repair Time:30 - 60 mins
-
Tools:Pliers, Screw drivers, Socket set, Wrench set
604 of 787 people
found this instruction helpful.
Was this instruction helpful to you?
Thank you for voting!
Oven igniter failed to heat up and ignite the gas burner.
Before starting it's a good idea to disconnect the electricity and turn the gas valve off behind the stove.
Next, uncrew the two finger-screws at the back of the oven that hold the porcelain & steel drip plate in. It comes out if you push it towards the back of the oven and lift it out. This reveals the burner and the cylin ... Read more drical igniter attached to the side of the burner. While I was there I unscrewed the one screw at the front end of the burner (nearest me).
After attempting the repair from inside the oven, I realized it was far easier to pull out the bottom drawer and work from under the oven instead. Using only one size mini-socket for all screws it was easy. I undid the two screws that hold the main burner to the back of the oven. This allowed me to pull the burner up inside the oven so I could access the screws that held the igniter to the side of the burner. A flashlight helps when working under the oven.
Under the oven again I then pulled the two wires off their respective connectors. Then inside the oven unscrewed the two screws holding the igniter to the burner. The old part came off very easily. However, the new part didn't have connectors attached, so I had to remember which wire went where and cut the old connectors off and splice them to the new. Be sure to leave yourself as much of the old wire as possible attached to the connector. Otherswise you might find the "new" wires too short to reach the connectors.
I reconnected the igniter to the main burner with the two screws. Then fed the burner and wires back into place. I then lightly screwed the single front screw on the burner (inside the oven) to help position the burner, then went underneath to install the other two screws.
Under the oven I made sure the wires fit onto their connectors then tightened the two screws to hold the burner to the back wall. Once the burner was properly in place I tightened the two screws and the single one inside the oven.
I then plugged the oven back in and turned on the gas flow. I turned the oven dial and watched the new igniter glow wonderfully.
Finally I replaced the porcelain floor cover inside the oven. These finger screws can be a bit tricky because they go into a threaded clip that might have moved while you worked. The whole task took less than 30 minutes - and I had never done this before.
Read less
Parts Used:
-
Paul from Santa Rosa, CA
-
Difficulty Level:Easy
-
Total Repair Time:15 - 30 mins
-
Tools:Socket set
355 of 518 people
found this instruction helpful.
Was this instruction helpful to you?
Thank you for voting!