Your coupon for will be reflected when you check out!
✖
Your coupon for
✖
Hello!
You're visiting the PartSelect site in U.S.
Would you like to shop on the Canadian site?
Stay on this site
Go to Canadian site
✖
Model Number Locations
1Select Category Type
Select Category Type
2Select Product Type
Select Product Type
3Select {MODEL} Type
Select {MODEL} Type
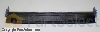
Sample Model Number Tags
Model numbers can be made up of numbers (1005400, for example) or a combination of letters and numbers (LAT1000AAE). The model number will most likely appear on either a paper sticker or a metal plate. Your appliance's model number tag may look similar to the sample model number tags shown here (model number highlighted in yellow):
Model has been saved to My Models. If you're not signed in, your lists are available on this device and will expire within 30 days.
Model has been saved to My Models.
This wheel is a dishwasher rack wheel designed for the upper rack of your appliance. The roller wheel is approximately 1.25 inches in diameters and includes the brushing you need for installation. It ...
This wheel for the lower rack of your dishwasher, it includes the brushing you will need for installation; the axel is not included. You need to line the replacement wheel up with the axel, slide it i...
This seal is also referred to as a door gasket, and it is designed for use on dishwashers. It is installed on the door of the appliance, and it seals the space between the tub of the dishwasher and th...
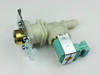
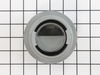
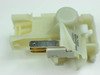
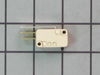
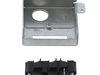
This is a replacement water inlet valve for your washer. The water inlet valve in your washer connects to the water source and solenoid wires, and ensures the tub has the right amount of water enterin...
This micro filter basket assembly is used in dishwashers. The filter is responsible for filtering the water inside the dishwasher. All of the food and debris particles that are removed from your dishe...
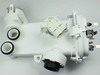
This dishwasher drain pump is a genuine OEM replacement part designed to efficiently remove water from the tub during the wash cycle. Compatible with a range of models from Bosch, Thermador, Gaggenau,...
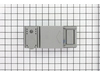
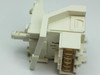
Introducing the Dishrack Tine Row Holder from Bosch, a high-quality, authentic OEM part designed for dishwashers. This particular component is known for its compatibility with various models from the ...
This door seal, also known as a door gasket, is an authentic manufacturer replacement part for your dishwasher. It is responsible for creating a watertight seal between the tub and dishwasher door and...
This dishwasher tine row retainer is a genuine OEM component designed to secure movable tine rows on the lower rack of select dishwashers. Constructed from durable gray plastic, it enables flexible ra...
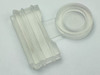
A holder is used in dishwashers, it is known as the dishrack stop kit. This kit comes with both the front and the rear stop, these parts are installed at either end of the rails that the upper rack sl...
We let this go for a shameful amount of time before I decided I could probably fix it. The roller broke so you could only pull it out about halfway or it would come off the track. I looked up the part, and bought it. Actually bought two in case it happened again. When I arrived I looked at how it was put together on the other side and t
... Read morehen just basically pushed it onto the rod and it was fixed. I am ashamed it took so long to do it. Never be afraid to try it yourself. It was a total of $10 shipped to fix it.
With the help of You Tube, this 50 year old Mom got the job done. Not that complicated if you watch the step by step instructions on the Appliance Pro video. My repairman and husband were both determined to just buy a new one but this 20 year old dishwashing genius was just in need of a little repair. Only need a screwdriver, and sli
... Read moreghtly confusing as wires hook on a little different on new pumps. I suggest watching video the whole way through and then playing it step by step as you do the repair. Worked great for me. Thanks.
Here are the steps you need to take to do the job properly:
1. turn off electrical circuit breaker to the dishwasher 2. remove 8 total hex screws (3 on each side and 2 at the top) of the inside door panel. The door panel will slide off so be careful and it happens pretty quickly when the last hex screw is removed. 3
... Read more. unplug the wiring harness to the detergent/rinse aid dispenser 4. you need to use a flat head screw driver to lift the metal flanges on the top and bottom of the detergent/rinse aid dispenser. 5. the unit will pop out toward the inside of the dishwasher 6. insert the new detergent rinse/aid dispenser and very important all metal flanges are pulled back over the plastic edge (top and bottom) of the dispenser unit. The screw driver needs to be used to assist in pushing the dispenser unit as tight to the frame of the door to ensure the metal flanges grab hold and lock in. 7. re-attach the wiring harness 8. re-install the dishwasher door with 8 hex screws. Doing this step alone is challenging as the door frame will want to keep going up to close. I used a small foot stool and placed it inside the dishwasher front area on top of the inside metal door area so the door would stay open roughly half way. I then used my knees to prop up the outer door cover while i got 2 screws started then was able to easily complete the job. 9. run the dishwasher with a detergent packet loaded into your new dispenser. I checked for 15-20 minutes during initially running to insure no issues or leaks. 10. One last note - my Bosch dishwasher had a custom wood door installed to the outer panel to blend in with our kitchen cabinets. The door itself was much heavier as a result. Some of you may not experience the slight difficulty i noted above in step 8. Good luck.