Your coupon for will be reflected when you check out!
✖
Your coupon for
✖
Hello!
You're visiting the PartSelect site in U.S.
Would you like to shop on the Canadian site?
Stay on this site
Go to Canadian site
✖
Model Number Locations
1Select Category Type
Select Category Type
2Select Product Type
Select Product Type
3Select {MODEL} Type
Select {MODEL} Type
Sample Model Number Tags
Model numbers can be made up of numbers (1005400, for example) or a combination of letters and numbers (LAT1000AAE). The model number will most likely appear on either a paper sticker or a metal plate. Your appliance's model number tag may look similar to the sample model number tags shown here (model number highlighted in yellow):
Model has been saved to My Models. If you're not signed in, your lists are available on this device and will expire within 30 days.
Model has been saved to My Models.
This an authentic OEM 40-Watt replacement light bulb, used in a number of household appliances. It is specially designed to withstand extreme temperatures, which is why these replacement bulbs are mos...
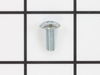
Sold individually. Lock washers are used with screws when vibration from an appliance may cause the screw to loosen. Lock washers are also used in the electrical components of an appliance to ensure ...
This broiler pan and roasting rack set is designed to help reduce mess while cooking by allowing grease to drain away from food. Its durable porcelain-coated construction stands up to high temperature...
This lower bake element provides heat from the bottom of your electric oven, ensuring even cooking and baking. Made from a durable metal coil, it heats up as electricity flows through it. Located at t...
This temperature probe consists of two ends joined together by an insulated wire. The small end is almost four inches long, whereas the longer end is almost seven inches long. The small end, the jack,...
The clock knob attaches to the center of the oven control panel and is used to adjust the built-in clock. This clock knob is less than an inch in diameter. It is all black in color and is made of plas...
Upgrade the performance of your oven with this broil element from Whirlpool. It's a genuine OEM part designed specifically to fit a variety of Whirlpool oven models. Expertly crafted, this broil eleme...
$82.11
In Stock
Order now and your part arrives by Jun 26
Questions And Answers for CWE701
Be the first to ask our experts a question about this model!
✖
Ask a Question
Ask our experts a question on this model and we'll respond as soon as we can.
Unscrewed and pulled the door off and then took the three layers of the door apart in order to clean off the burned-on goop and remove the old and insert the new seal. The last screw was rusted in and the drill stripped it so that it was impossible to remove. I levered the remaining two layers apart, holding them open with screw drive
... Read morers, and inserted the new seal. Had to be careful with the shaping of the metal core of the seal and the distribution of the sealing fabric. Phew! I saved the screws from each layer separately by taping them to the counter in the order of removal. This made reassembly easier. Getting the door back on was a bit difficult and I needed another pair of hands to help me.
1. Removed screws and detached push on cannectors 2. Removed old element 3. Pushed eclectrial connectors onto new element and attached new element to oven with screws.
1.remove the trim around the door (8 screws) 2.remove over glass panel (part with the handle) Caution; the springs on the door are exactly set for the weight of the door. When we removed the outer glass panel, I almost killed my wife when the door slammed shut. 3.Remove inner metal cover (6-8 screws).some of these screws
... Read morewere baked pretty tight so I used vise grips on their little heads to convince them to get turning. 4. To get the door window out you must also remove the inner enamel baked cover, held on by 5-6 screws from the back. This is also the pieces which holds the door seal in place, so it is a good time to change that as well. 5. After cleaning up all the broken glass from the old window, the new window slides right in - perfect fit! Reverse the steps to put it all back together.
From the time the glass broke until it was completely repaired took only six days! Pretty amazing for a twenty year old oven.


 Diagram and Parts List for Maytag Wall Oven")


 Diagram and Parts List for Maytag Wall Oven")