Your coupon for will be reflected when you check out!
✖
Your coupon for
✖
Hello!
You're visiting the PartSelect site in U.S.
Would you like to shop on the Canadian site?
Stay on this site
Go to Canadian site
✖
Model Number Locations
1Select Category Type
Select Category Type
2Select Product Type
Select Product Type
3Select {MODEL} Type
Select {MODEL} Type
Sample Model Number Tags
Model numbers can be made up of numbers (1005400, for example) or a combination of letters and numbers (LAT1000AAE). The model number will most likely appear on either a paper sticker or a metal plate. Your appliance's model number tag may look similar to the sample model number tags shown here (model number highlighted in yellow):
CTS90DP4N1W2 General Electric Wall Oven - Overview
Save your modelModel Saved!
Save your model for later to make things easier.
Model has been saved to My Models. If you're not signed in, your lists are available on this device and will expire within 30 days.
Model has been saved to My Models.
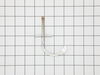
This halogen light bulb is a genuine OEM component designed for top-mounted lighting in wall ovens and ranges. Operating at 120 volts and 40 watts, it emits a clear, warm white light (approximately 27...
The GE Set Screw is a critical refrigerator component, designed with meticulous precision to adhere to the strict GE standards. This essential item contributes to the smooth and efficient operation of...
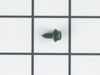
This part is a replacement screw for your oven. It is made of black metal and is sold individually. This screw is approximately 1/4 inch in diameter and about 1/2 inch in length. It is designed to con...
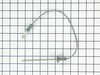
This oven temperature sensor assembly is a precision component designed to monitor and regulate the internal temperature of select wall ovens, ranges, and microwave-oven combinations. It continuously ...
Introducing the GE Oven Door Gasket, a highly essential component for your wall oven. This door seal creates a reliable barrier around your oven door, ensuring optimal oven functionality by preventing...
Introducing the Latch Assembly from GE, your reliable solution for wall ovens. This high-quality door lock assembly is specifically designed to secure the oven door during the self-cleaning cycle. Saf...
Introducing the HIDDEN BAKE ELEMENT K kit from GE, a key component for all your baking needs. Situated at the oven's bottom, this bake element is designed to provide the optimal heat distribution for ...
Introducing a highly essential component for your GE appliances, the High Limit Switch. This finely designed switch mechanism plays a crucial role in ensuring the safety of your appliances by regulati...
After opening the Oven door, I removed the glass cover to view and locate the bulb, at the inside, top front of the Oven. Removed the burnt out bulb by pulling it in a forward motion towards the front of the Oven, slid the new bulb into place and the Oven is again functional.