Your coupon for will be reflected when you check out!
✖
Your coupon for
✖
Hello!
You're visiting the PartSelect site in U.S.
Would you like to shop on the Canadian site?
Stay on this site
Go to Canadian site
✖
Model Number Locations
1Select Category Type
Select Category Type
2Select Product Type
Select Product Type
3Select {MODEL} Type
Select {MODEL} Type
Sample Model Number Tags
Model numbers can be made up of numbers (1005400, for example) or a combination of letters and numbers (LAT1000AAE). The model number will most likely appear on either a paper sticker or a metal plate. Your appliance's model number tag may look similar to the sample model number tags shown here (model number highlighted in yellow):
Model has been saved to My Models. If you're not signed in, your lists are available on this device and will expire within 30 days.
Model has been saved to My Models.
This door seal, also known as a door gasket, is a flexible strip made of rubber that acts as a seal between the refrigerator door and frame. This door seal is used in two-door fridges and therefore on...
This ice maker assembly is a complete replacement unit designed to automatically produce and dispense ice within compatible refrigerator models. It includes the ice mold and control mechanism, which r...
With its advanced filtration system, this water filter is capable of removing impurities and contaminants from your water, including chlorine, lead, and other harmful substances. This ensures that you...
This refrigerator dividing wall is a precision-molded component designed to enhance the performance and organization of select Bosch French-door refrigerators. Also known as a door divider or flipper ...
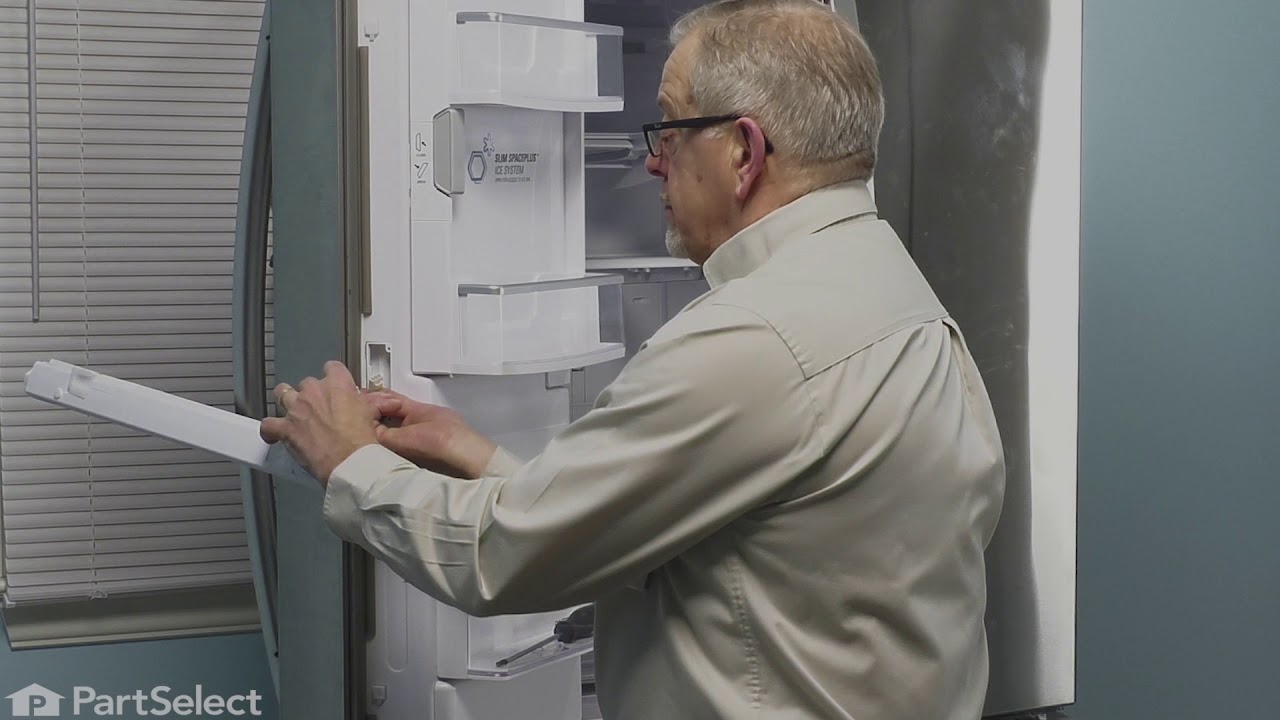
This door seal creates a tight barrier that helps retain heat or cooling while preventing leaks and air loss. A secure seal supports energy efficiency and stable internal conditions. Replacing a worn ...
Ask our experts a question about this model and we'll get back to you as soon as possible!
5 questions answered by our experts.
Sort by:
< Prev
1
Next >
Search filter:
Clear Filter
Your search term must have 3 or more characters.
Keep searches simple. Use keywords, e.g. "leaking", "pump", "broken" or "fit".
Sorry, we couldn't find any existing answers that matched.Try using some different or simpler keywords, or submit your new question by using the "Ask a Question" button above!
Joe
February 4, 2022
How do I remove ice maker? I found bottom screw, but there are not the normal 2 top screws. There are what look like metal tabs that rest in where the 2 top screws normally go. Any advise would be appreciated.
For model number B22CT80SNS
Hello Joe, Thank you for your inquiry. You would need to release those tabs by pushing down with a flat blade screwdriver and then you should be able to pull it out and disconnect the wire harness. Good luck with your repair.
1 person found this helpful.
Was this helpful?
Thank you for voting!
Jack
April 25, 2022
CAN YOU TELL ME THE PART NUMBER FOR THE DAMPER MOTOR LOCATED UNDER THE TOP CENTER COVER PANEL IN THE ABOVE NOTED BOSCH MODEL NUMBER?
THANK YOU. JACK
For model number B22CT80SNS
Hello Jack, Thank you for contacting us. We have researched the model you have provided and have found the part you are looking for is PartSelect Number PS9492885. If you need help placing an order, customer service is open 7 days a week. Please feel free to give us a call. We look forward to hearing from you!
Hi Willis, thank you for your inquiry. To replace the door seal, simply peel off the old seal, and clean the sealing area. Align the new seal along the door perimeter and press it firmly into place to create a tight seal. Please submit a new question if you have any follow-ups!
Was this helpful?
Thank you for voting!
Ronald
December 31, 2023
On left door the folding edge piece has unclipped from the top holding clip and makes closing doors difficult. How to reattach latch to door?
For model number B22CT80SNS
Hi Ronald,
Thank you for your question. Here is a link to one of our YouTube videos that you may reference for information on how to install the mullion. The refrigerator and the mullion in the video may not be the same as yours, but it will give you a general idea on how to install the part. We hope this helps!
- Prior to ordering the gaskets, I went online to make sure the installation was something I could readily do—it is really easy. - When I received the gaskets, I laid them out on a flat surface, but as per the product description, they had become distorted in the shipping container. At first I thought one was severely distorted, but
... Read moreit was turned “inside out.” - I followed the directions to use a hair dryer to heat the rubber material until it returned to its original shape: about 15 minutes for each gasket. - With a little effort, the old gaskets pop out and the new ones pop into a groove (I ran my fingers firmly over the installed gaskets to make sure they were securely installed.). - Everything appears to fit perfectly: problem solved!