


AK2T30E2-P1131563NE Amana Cooktop - Overview
Sections of the AK2T30E2-P1131563NE
[Viewing 4 of 4]


Keep searches simple, eg. "belt" or "pump".

Appliance Scraper
PartSelect #: PS408570
Manufacturer #: WA906B
Use this scraper for your ceramic/glass cooktop. It has a retractable blade and is an all-purpose tool for cooktops, mirrors, windows and tile. Use it to also remove paint, paper, dirt, stickers and more.
$11.77
In Stock

Radiant Surface Burner Element 1500W
PartSelect #: PS11764909
Manufacturer #: W10823699
This surface element is made for under glass set-ups and supplies the heat to a cooking area on top of the range. It has an outside diameter of approximately 7 inches (1500 watts), and is a genuine OE...
$105.35
In Stock

Infinite Switch Knob - black
PartSelect #: PS11740815
Manufacturer #: WP31760601B
This infinite switch knob is just over two inches in diameter. It is all black in color and is made of plastic. This knob has light gray lettering denoting the off, low, medium low, medium, medium hig...
No Longer Available

Dual Radiant Element with Limiter
PartSelect #: PS11764926
Manufacturer #: W10823726
With the dual element you are able to adjust the size of the burner you want to use to match your pots/pans.
$151.04
In Stock

Surface Ribbon Element with Limiter - Small
PartSelect #: PS11741007
Manufacturer #: WP32082801
This is a 1200 watt / 240 volt surface element.
No Longer Available

ELMNT-SURF
PartSelect #: PS11764913
Manufacturer #: W10823708
This is a 2000 watt / 240 volt surface element.
$135.62
Special Order

Questions And Answers for AK2T30E2-P1131563NE
We're sorry, but our Q&A experts are temporarily unavailable.
Please check back later if you still haven't found the answer you need.
Common Symptoms of the AK2T30E2-P1131563NE
[Viewing 1 of 1]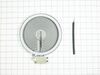


Keep searches simple. Use keywords, e.g. "leaking", "pump", "broken" or "fit".
Outer Heater ring not working on dual burner.
Turned off power to unit.
Tilted up Glass top and removed two screws holding rear hinges to range. Then I unplugged wire harness from lower range and placed the Glass top facing down on counter top with towel for cushion. Removed 1 screw holding center of burner to support frame, two alignment screws on perimeter, and two screws hol ... Read more ding support frame to glass top. This allowed me to slide out the old element with all wiring connections intact.
Placed the new assembly in same location under support frame, noting numbered positions of two alignment screws from old unit. This is necessary to properly align heater to surface glass. Replaced all screws connecting burner to frame. Then I removed each wire one-by-one from old unit, reconnecting to same location on new unit.
Replaced top in reverse order from removal. Powered on the circuit breaker and verified proper operation of dual unit with large/small selecttor switch. Total time to repair about 30 minutes.
Read less
Parts Used:
-
Mark from Richardson, TX
-
Difficulty Level:Really Easy
-
Total Repair Time:30 - 60 mins
-
Tools:Screw drivers
24 of 28 people
found this instruction helpful.
Was this instruction helpful to you?
Thank you for voting!
Inner burner of dual burner element burned out
Pulled stove out and unplugged it (energized wire at burner even with burner turned off) Removed screws to lift cook top Removed burner support brace Removed three screws to remove burner Removed connections from old burner, installed on new burner Replaced screws in burner to brace Replaced burner brace Lowered cook top and instal
... Read more
led screws Plugged in stove and pushed it into space
Read less
Parts Used:
-
Don from Red Wing, MN
-
Difficulty Level:A Bit Difficult
-
Total Repair Time:30 - 60 mins
-
Tools:Pliers, Screw drivers
9 of 10 people
found this instruction helpful.
Was this instruction helpful to you?
Thank you for voting!
The high ekement on a dual burner range top burned out
Turned off circuit breaker and unplugged. Opened oven door and removed 3 screws holding the range top to the range. Lifted top and proped open with a wooden block. Removed all 5 wires to the element and drew a diagram of where they came from noting the color code. Removed two screws holding the bar that supported the element
and d ... Read more ropped slightly while removing the two standoff screws holding the element in place.
slide the element out. The problem was that the element received from partselect.com did not physically match the terminals on the original. this required me drill out a brad on the terminal block cover to see how the terminal block was wired. I discovered that the different color wires on the old element went to physically different terminals on the new one. This was even though I had returned the first element received, got a new part no from matag and reordered.
there are tiny markings on the terminal block that helped show the way. Be sure to find them and rewire according to these markings. 1a 2a 1b 2b as the terminal locations may be different.
I am happy with the partselect,com and their attention to trying to get me the exact replacement.
Also happy with their return policy.
Read less
Parts Used:
-
Grace from Inverness, FL
-
Difficulty Level:Very Difficult
-
Total Repair Time:More than 2 hours
-
Tools:Pliers, Screw drivers
5 of 5 people
found this instruction helpful.
Was this instruction helpful to you?
Thank you for voting!