Your coupon for will be reflected when you check out!
✖
Your coupon for
✖
Hello!
You're visiting the PartSelect site in U.S.
Would you like to shop on the Canadian site?
Stay on this site
Go to Canadian site
✖
Model Number Locations
1Select Category Type
Select Category Type
2Select Product Type
Select Product Type
3Select {MODEL} Type
Select {MODEL} Type
Sample Model Number Tags
Model numbers can be made up of numbers (1005400, for example) or a combination of letters and numbers (LAT1000AAE). The model number will most likely appear on either a paper sticker or a metal plate. Your appliance's model number tag may look similar to the sample model number tags shown here (model number highlighted in yellow):
Model has been saved to My Models. If you're not signed in, your lists are available on this device and will expire within 30 days.
Model has been saved to My Models.
This refrigerator ice maker fill cup dispenses the water into the ice cube mold during the fill cycle. Replacing the water fill cup is a possible solution if you notice that the ice maker is leaking, ...
This is the replacement water tube kit for your refrigerator. This tubing is made of plastic, is 1/4 inch in diameter, and comes with 2 inserts. This tube may be longer than the original tube, and may...
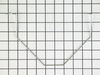
The icemaker shut off arm, used in a refrigerator, gives the icemaker a signal to stop making ice once the bin has a reached a certain limit. This helps monitor ice production. If your icemaker is not...
The ice bucket in your freezer catches and holds the ice when it is released by the icemaker. If your ice bucket is cracked or damaged, you may need to replace it to prevent a potential leak. This par...
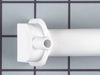
The compression nut is used as a connection between the water supply line and other components in your refrigerator such as your ice maker and your water dispenser. Tools required for this repair incl...
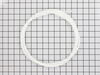
This is an authentic appliance part that is sourced directly from the genuine manufacturer. This ice stripper functions by stripping the ice maker mold of ice during the ejection cycle, after the wate...
This refrigerator ice maker fill tube is designed to channel water cleanly and accurately from the water inlet valve to the ice maker tray, supporting reliable ice production and preventing leaks insi...
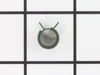
This is a speed lamp clip, and may also be known as the water line spring clamp. It is used in conjunction with your refrigerator. If you have a leak at your fill tub, this part may be the reason. The...
I removed the ice maker from the refrigerator, by removing one screw on the underside bracket and loosening the two screws at the top side, then lifting the ice maker off the loosened screws. I then unplugged the electrical harness that supplies power from the refrigerator to the ice maker. I then disassembled the ice maker by removing
... Read morethe front cover which is snapped in place, then removing two recessed screws at the front. I removed the broken part, I then reassembled the ice maker with the new part. I replaced the two recessed screws at the front and snapped on the cover. Then I reinstalled the ice maker in the refrigator by plugging in the harness, slipping the ice maker over the loosened screws in the refrigerator and replacing the screw that was removed from the underside bracket. Tightening all the screws completed the project.
Removed two screws that held cover plate. remove cover plate. Remove water hose, and clamp, by compressing clamp with pliers. Remove fill tube by pulling HARD, from back.
Replace fill tube, check to be sure that it entered ice maker properly. Replace hose and clamp. Replace cover and screws.
The tiny piece of plastic that holds the wire that shuts off the icemaker, broke early on with our fridge (after just a few months.) We superglued it, but last week it bit the dust for good.
Once I got this part, I removed the freezer door and trays, and pulled the icemaker out by removing 3 flathead screws and unplugging the c
... Read moreables. Laying in the freezer on the floor was a bit unconfortable, but not too bad.
Then I inspected the icemaker. There was no obvious way to remove the part without disassembling the front of the unit (where the motor is) to release the spindle and free the part, so I did that - 3 or 4 nuts was all that held it together. Once that was out, I removed the spindle, swapped out the part, and put it all back together and back in the freezer. Plugged it in and waited.
It took a while to start making ice. Like 5 hours. Now it's going pretty slow (much slower than before.) Haven't had time to look into it, but my suspicion is the rubber hose that feeds water into the icemaker is blocked with ice or kinked. In any case, we have ice now (but not a lot), and the unit shuts itself off properly. However, we went from having too much ice (thing never shut off) to too little (thing makes ice too slow), so I need to shoot for somewhere in the middle ;)