


81593 LG Dryer - Overview
Models starting with 81593
Click on the best match to narrow your results.
Keep searches simple, eg. "belt" or "pump".

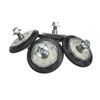
4 PACK ROLLER ASSEMBLY
PartSelect #: PS17269866
Manufacturer #: 4581EL2002L
This part is sold individually. The drum support roller is found in your dryer. It is used to hold the drum in place in the cabinet while letting the drum rotate on the support rollers. It is recommen...
$138.79
In Stock

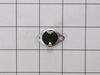
Moisture Sensor
PartSelect #: PS3529161
Manufacturer #: 6500EL3001A
The sensor controls the temperature in your dryer and will turn off once your clothes have reached the desired dryness level. If you notice that your dryer is not giving off enough heat to dry the clo...
$21.45
In Stock

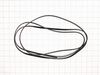
Dryer Drum Belt
PartSelect #: PS11705916
Manufacturer #: 4400EL2001F
The belt wraps the length of the dryer drum, secured by a tension pulley and then loops around the motor pulley. If you find that the drum is not turning properly or at all while your dryer is in succ...
$35.80
On Order

Dryer Thermistor
PartSelect #: PS3529026
Manufacturer #: 6323EL2001B
This dryer thermistor temperature sensor helps monitor and regulate the temperature inside a dryer. This part includes the wire harness. If your dryer overheats, does not produce enough heat, or takes...
$53.20
On Order

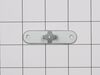
Blower Thermostat
PartSelect #: PS8747887
Manufacturer #: 6931EL3002M
The thermostat is a part for your dryer, and it is roughly 1 inch long by roughly 1.5 inches wide. The purpose of the thermostat is to measure the temperature of the air inside your dryer drum. As the...
$51.61
In Stock

Felt Seal
PartSelect #: PS3522851
Manufacturer #: 4036EL3001A
This genuine OEM felt gasket provides a cushioned seal between the inner tub of your electric dryer and the rear panel. It prevents your clothes from getting snagged and helps in heat retention. You w...
$45.29
In Stock

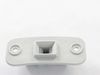
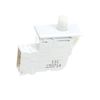
Safety Switch Assembly
PartSelect #: PS16551445
Manufacturer #: EBF61496102
Don't let your fresh fruits and veggies go to waste! The GE Crisper Drawer is here to help. Also known as a PAN ASM, this nifty drawer can expertly manage humidity levels, providing the ideal storage ...
$47.40
In Stock

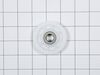
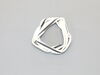
Pulley Idle
PartSelect #: PS3523032
Manufacturer #: 4560EL3001A
This genuine LG product is an Idle Pulley meticulously designed for LG electric dryers. It plays a crucial role in maintaining the correct tension on the drive belt, enabling it to spin the drum effec...
$30.53
In Stock


Dryer Leg
PartSelect #: PS3523560
Manufacturer #: 4778EL3001B
This plastic adjustable dryer leg is used to support the weight and adjust the height of your dryer to keep it level. To install the leg, tip the dryer back and screw it into the bottom of your dryer ...
$9.62
In Stock

Gasket
PartSelect #: PS3535212
Manufacturer #: MDS47263101
This door seal is a genuine replacement part for LG dryers. It is a gray, rubber seal that fits around the the opening of the dryer door. It is responsible for creating an airtight seal when the dryer...
$76.17
In Stock

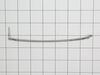
Baffle
PartSelect #: PS3522961
Manufacturer #: 4432EL1002A
Designed exclusively for your LG dryer, the Drum Baffle - Lifter is a premium, OEM (Original Equipment Manufacturer) component guaranteed for an exact fit and superior performance. This drum baffle li...
$47.40
Special Order
Exact Part matches for your search term
[Viewing 3 of 3]
Needle Bearing
This part number matches the current model number 81593
PartSelect #: PS9143922
Manufacturer #: 81593
$12.51
In Stock

Screw, Hex Hd. 5/16-24 X 5/8 In.
This part number matches the current model number 81593
PartSelect #: PS11988646
Manufacturer #: 81593
No Longer Available
Fireworks/Fourth Of July Template
This part number matches the current model number 81593
PartSelect #: PS16672714
Manufacturer #: 81593
$20.45
Special Order
Common Symptoms of models starting with 81593
[Viewing 7 of 7]Noisy
Fixed by
these parts
these parts
Show All
Not Heating
Fixed by
these parts
these parts

Show All
Drum Not Spinning
Fixed by
these parts
these parts
Show All
Door won’t close
Fixed by
these parts
these parts
Show All
Marks left on clothes
Fixed by
these parts
these parts
Show All
Leaking
Fixed by
these parts
these parts

Show All
Won’t Start
Fixed by
these parts
these parts
Show All


Keep searches simple. Use keywords, e.g. "leaking", "pump", "broken" or "fit".
Dryer making a thumping and squealing noise when running
Had to replace front drum support rollers. Removed screws underneath top in back that held bracket that keeps top in place. Slid top towards rear and lifted up. Removed 4 screws that hold plastic front panel in place (inside..2 on each corner) Unplugged front panel electric plugs to remove panel. Opened door..removed 2 screws at bottom of
... Read more
door opening. Removed screws on top of front panel. Unplugged door switch plug. Removed front panel. Removed right front roller with 9/16th wrench for nut. Adjustable for back of stud. Lifted up on drum to get roller out. Reversed to install. Left roller a bit harder to get to stud. Removed and installed same as right side. Did not attempt to replace rear rollers. Have them if needed but very much more involved to replace.
Read less
Parts Used:
-
Mark from WAVERLY, OH
-
Difficulty Level:Easy
-
Total Repair Time:30 - 60 mins
-
Tools:Screw drivers, Wrench (Adjustable), Wrench set
128 of 163 people
found this instruction helpful.
Was this instruction helpful to you?
Thank you for voting!
Screeching during operation
Found disassembly video and watched several times. Suspected that one of the drum wheels had seized up. Found extreme volume of lint and hair inside unit as well as a dryer sheet melted on top of heating unit. Front left drum wheel was worn down from lint and hair jamming its movement. Video made it easy, not a really complicated piec
... Read more
e of machinery. Replaced all 4 wheels due to normal wear on other three. Wanted to be sure drum evenly balanced on all 4. Parts came quickly and were easy to install. My sister and I did this together. Would not recommend doing it alone. Took time to vac and wipe down entire unit. Now it runs so quiet we have to look to see if it is operating. Got a brand new machine out of it, saved a couple of hundred dollars in repair bills, and found 11 cents inside the machine. For your own piece of mind, if you have had your dryer for several years, you need to open it up and clean it out. Its not hard... added note, we are both in our 60's... so if we can do it so can you.... Such a feeling of accomplishment, can't buy that in a store....
Read less
Parts Used:
-
CAROL from NAMPA, ID
-
Difficulty Level:Really Easy
-
Total Repair Time:More than 2 hours
-
Tools:Pliers, Screw drivers
64 of 94 people
found this instruction helpful.
Was this instruction helpful to you?
Thank you for voting!
Very noisy when running
We bought 2 roller wheels to replace the ones up front that turn the drum. We watched a video prior to ordering the parts, then followed along with it as we did the repair. It was really easy to complete, with the hardest part being getting some of the screws to loosen at first. Now it purrs like a kitten. We are so happy to have sile
... Read more
nces the racket. One wheel was completely worn away, with shreds of rubber sitting inside the cabinet.
Read less
Parts Used:
-
CAROLYN from LEBANON, TN
-
Difficulty Level:Easy
-
Total Repair Time:30 - 60 mins
-
Tools:Screw drivers, Socket set
17 of 22 people
found this instruction helpful.
Was this instruction helpful to you?
Thank you for voting!