Your coupon for will be reflected when you check out!
✖
Your coupon for
✖
Hello!
You're visiting the PartSelect site in U.S.
Would you like to shop on the Canadian site?
Stay on this site
Go to Canadian site
✖
Model Number Locations
1Select Category Type
Select Category Type
2Select Product Type
Select Product Type
3Select {MODEL} Type
Select {MODEL} Type
Sample Model Number Tags
Model numbers can be made up of numbers (1005400, for example) or a combination of letters and numbers (LAT1000AAE). The model number will most likely appear on either a paper sticker or a metal plate. Your appliance's model number tag may look similar to the sample model number tags shown here (model number highlighted in yellow):
Model has been saved to My Models. If you're not signed in, your lists are available on this device and will expire within 30 days.
Model has been saved to My Models.
The interior light in your refrigerator is controlled by a switch that is activated when the door is opened and closed. If your refrigerator light will not turn on, or stays on when the door is closed...
This refrigerator water filter is designed to improve the taste and odor of both water and ice by reducing a wide range of contaminants. Utilizing an activated carbon block filtration method, it effec...
This tray cover, also known as the front drawer cover, fits on the front of the bottom drawer in your refrigerator. It is made of plastic and is white and clear in color. The cover creates a seal in y...
The door stop, or door stopper, is used in refrigerators. This door stop helps keep the door in position and in balance. This part is attached to the bottom of the door and it keeps it from opening an...
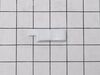
This is a genuine replacement switch. It is a push button style switch that is designed for use in your refrigerator. When the door of your appliance is opened the switch is released, and the light co...
This lamp cover is also commonly referred to as a light lens. This is a genuine replacement part. It is used in a refrigerator to cover the light bulb. It is made of clear plastic. It measures 14 inch...
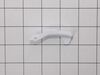
The purpose of the door latch cam is to keep the door latched when you shut it. If your door is not staying shut, you may need to replace the door latch cam. This part is made of white plastic and is ...
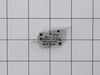
This is a micro switch for various models of LG refrigerators. This switch is responsible for turning the ice dispenser on and off within the freezer compartment of the fridge. If this switch is damag...
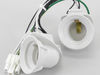
Illuminate your LG refrigerator with this genuine light assembly housing cover. Designed with precision, this component not only houses but also safeguards the light bulb in your appliance. For your s...
Introducing the reliable LG Refrigerator Compressor Start Relay Thermistor Assembly. This assembly is designed specifically for some models of LG fridges and is critical for maintaining your refrigera...
This refrigerator/freezer problem had been escalating for almost a year, requiring me to frequently knock the ice buildup free with a rubber mallet. I finally decided to try to identify the problem by removing the freezer door and all of the shelves and shelf tracks (easily removed with only a phillips screwdriver). Then I removed the bac
... Read morek plastic panel to expose the cooling coils, which were partially encased in ice. I deduced that the evaporator fan motor was failing, which blows air over the freezer cooling coils and forces the cool air up into the upper refrigerator section (which was not staying cold). I then found and ordered the fan motor from part select. Their search function and exploded drawing schematics made it easy to identify the part and part number. It seems the original part number had been superceded with a new number, which I ordered. Once it arrived after about a week, I transferred the fan blades from the old motor to the new fan motor, and after completely drying out the freezer compartment, I reinstalled all of the parts and plugged in the unit and waited. By the next day, the refrigerator was operating at peak efficiency, and the ice buildup in the freezer has not returned. I was very close to scrapping the entire refrigerator as junk, but with a little diagnostic effort and about $110 for the new motor, I have a fully functioning refrigerator again. Thanks to Part Select for a great experience.
Video makes it look easy. Kenmore refrigerator does not have "groove" along the right hand side of switch that allows for pushing down on release. Used a thin screwdriver to get under to push while holding switch edge with pliers. Kept slipping. Tape sides to avoid scratching inside of refrigerator.
Turn off power, remove upper and lower drawers (may need to open upper refrigerator doors to remove large freezer bin,) remove drawer supports (upper and lower), remove rear freezer panel (trick is to loosen 4 screws on fan bumpout to get the panel to come free from the freezer side wall), test thermistor with multimeter (should have cont
... Read moreinuity or near zero resistance across 2 orange fuse wires) before cutting zip ties, cut zip ties holding Thermistor in place, remove old Thermistor, install new Thermistor, install new zip ties, replace rear freezer panel, install upper and lower drawer supports, install drawers, turn on power, should be fixed if error code doesn't return after 6 hours.