


79041043801 Kenmore Range - Overview
Sections of the 79041043801
[Viewing 5 of 5]
Keep searches simple, eg. "belt" or "pump".

Temperature Sensor
PartSelect #: PS820208
Manufacturer #: 316217002
The oven temperature sensor for your range may also be called a probe. The quick connect on this part may differ than your original piece. If the temperature sensor does not fit you will have to cut o...
$58.09
In Stock

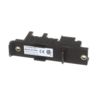
Main Terminal Block Kit
PartSelect #: PS471605
Manufacturer #: 5304409888
Terminal block kits are also known as terminal boards, or terminal strips, and they are found in a wide variety of household appliances. Most often in ranges, wall ovens, and dryers. This kit attaches...
$37.03
In Stock

GLASS
PartSelect #: PS11728351
Manufacturer #: 5304503232
This tempered glass is supplied by the original manufacturer and measures 20 inches by 13 inches. It is an inner door glass, designed for use in ranges/ovens and has several purposes which include pro...
$81.50
In Stock


Igniter/Orifice Mounting Screw
PartSelect #: PS440022
Manufacturer #: 316240600
This part is the igniter/orifice mounting screw for your cooktop or range. It is approximately ½ an inch in length and is made of metal. The mounting screw connects the orifice to the cooktop. If the ...
$19.90
In Stock


Range Rack
PartSelect #: PS3495822
Manufacturer #: 318262516
Meet the 2 Freezer Ice Bucket, your at-home cooling solution. This frid2 replacement part is more than just an add-on?it's the key to always having fresh ice cubes at your disposal for those scorching...
No Longer Available


Outer Drawer Glide
PartSelect #: PS977459
Manufacturer #: 316105501
As per the factory, the original part was 19 3/4 inches and the new substituted part is 16 1/4 inches. According to the factory, this part will still work with your appliance.
$72.37
In Stock

Burner Head
PartSelect #: PS2350723
Manufacturer #: 316206401
This burner head is used on gas stovetops. It is located underneath the burner cap.
No Longer Available

Oven Door Light Switch
PartSelect #: PS1146808
Manufacturer #: 316445501
This oven door light switch signals the light to turn off when the oven door closes. If your light switch is defective or you smell a burning odor, make sure to check the switch and replace it. The to...
$72.37
In Stock

Manuals & Care Guides for 79041043801
Click to downloadQuestions And Answers for 79041043801
We're sorry, but our Q&A experts are temporarily unavailable.
Please check back later if you still haven't found the answer you need.
Common Symptoms of the 79041043801
[Viewing 7 of 7]Little to no heat when baking
Fixed by
these parts
these parts


Show All
Oven is too hot
Fixed by
these parts
these parts
Show All
Will Not Start
Fixed by
these parts
these parts
Show All
Element will not heat
Fixed by
these parts
these parts
Show All
Oven not heating evenly
Fixed by
these parts
these parts
Show All
Little to no heat when broiling
Fixed by
these parts
these parts
Show All
Gas igniter glows, but will not light
Fixed by
these parts
these parts
Show All


Keep searches simple. Use keywords, e.g. "leaking", "pump", "broken" or "fit".
Oven not heating to desired temperature
Replaced clock control by removing surface burner control knobs and plastic nuts, and then the cover over the oven control. Two screw hold the clock in place, after removal and disconnecting the plug-in you can reinstall the new clock control. The Heat Sensor inside the oven will also need to be replaced. It is located inside the oven
... Read more
and attached with two screws; the back of the oven will need to be removed to unplug. Reverse removal procedure and turn the power back on to the stove.
Read less
Parts Used:
-
Dan from Bellevue, ID
-
Difficulty Level:Easy
-
Total Repair Time:15 - 30 mins
-
Tools:Screw drivers
155 of 241 people
found this instruction helpful.
Was this instruction helpful to you?
Thank you for voting!
Cord was not tightened enough by delivery crew.
PF alarm appeared on display. Noticed clicking when cord was moved. Had arced for some time and melted original block. New part slightly different. Only has 3 lugs, old one had six. Stack using washers provided. Take note of colors before disassembly. Use caution while working through access opening. The edges are sharp. Only tools neede
... Read more
d are phillips screwdriver, deep socket for lug nuts. Nut driver optional. Hope this is helpful.
Read less
Parts Used:
-
Timothy from Spring Valley, AL
-
Difficulty Level:Really Easy
-
Total Repair Time:15 - 30 mins
-
Tools:Screw drivers, Socket set
107 of 171 people
found this instruction helpful.
Was this instruction helpful to you?
Thank you for voting!
Cracked oven door inner glass
Repair was quite easy, as long as you have the instructions for removing the door. The screws that hold the bottom of the door to the fixed hinge are placed into the side of the hinge assembly after removal; this holds the door at a 45 degree angle for easy removal. After that, just place the door on a flat surface and dismantle the door
... Read more
from the inside. The inner glass is contained in a metal frame with another piece of glass; this frame comes apart easily using the clips in each side. The door assembles easily after the glass is replaced; just take your time and give yourself enough room to lay out the parts as you go. Good luck!
Read less
Parts Used:
-
Mitch from Fernandina Beach, FL
-
Difficulty Level:Easy
-
Total Repair Time:15 - 30 mins
-
Tools:Screw drivers
75 of 131 people
found this instruction helpful.
Was this instruction helpful to you?
Thank you for voting!