


6072 Kenmore Food Waste Disposer - Overview
Sections of the 6072
[Viewing 1 of 1]
Keep searches simple, eg. "belt" or "pump".

Leveling Foot
PartSelect #: PS1609293
Manufacturer #: 49621
If your washer shakes or vibrates loudly when it reaches its max speed, check that the leveling legs are even. To ensure that the washer is firmly on the ground using all four legs, adjust the legs so...
$6.25
In Stock

Disposal Stopper/Starter
PartSelect #: PS357467
Manufacturer #: 4211474
This is a garbage disposal start and stopper assembly. Also known as an Actuator.
No Longer Available


Exact Part matches for your search term
[Viewing 1 of 1]
Bracket
This part number matches the current model number 6072
PartSelect #: PS12477054
Manufacturer #: 6072
No Longer Available
Questions And Answers for 6072
We're sorry, but our Q&A experts are temporarily unavailable.
Please check back later if you still haven't found the answer you need.
Common Symptoms of the 6072
[Viewing 1 of 1]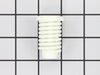

Keep searches simple. Use keywords, e.g. "leaking", "pump", "broken" or "fit".
No leveling feet on dryer.
This could not have been easier. The hardest part was tipping the dryer over on its' side.
Instructions:
1. Tip dryer over onto a non-scratch surface. I used a tarp on the floor.
Insert leveling foot into the foot opening on the bottom of the dryer &
screw in with fingers until it is difficult to turn.
2. Use t ... Read more he adjustable wrench on the hexed foot (not the threads) to adjust to the desired level.
3. Tip dryer upright taking care not to exert pressure on the feet closest to floor. I used a folded-up tarp under the bottom edge of the dryer while lifting it to the upright position.
4. Use a level, back to front & side to side, to determine if feet need further adjustment.
5. Adjustments can be made with the dryer in the upright position, using the adjustable wrench on the hexed foot.
Read less
Parts Used:
-
Bobbie from BEND, OR
-
Difficulty Level:Very Easy
-
Total Repair Time:Less than 15 mins
-
Tools:Wrench (Adjustable)
2 of 2 people
found this instruction helpful.
Was this instruction helpful to you?
Thank you for voting!
ice tray was broken
This was by far so easy the instruction Partselect gave me where right on step by step. a repair man was going to charge 75$ just to come out 9$ from partselect. Thank you very much Mike chaplin
Parts Used:
-
mike from fitchburg, MA
-
Difficulty Level:Really Easy
-
Total Repair Time:Less than 15 mins
-
Tools:Screw drivers
Was this instruction helpful to you?
Thank you for voting!
The leveling foot on my dryer broke.
We only had to tilt the dryer enough to be able to screw the leveling leg in place.The only hard part was holding the dryer steady to screw in the leveling foot.
Parts Used:
-
Diana from Clifton, NJ
-
Difficulty Level:Really Easy
-
Total Repair Time:Less than 15 mins
Was this instruction helpful to you?
Thank you for voting!