Your coupon for will be reflected when you check out!
✖
Your coupon for
✖
Hello!
You're visiting the PartSelect site in U.S.
Would you like to shop on the Canadian site?
Stay on this site
Go to Canadian site
✖
Model Number Locations
1Select Category Type
Select Category Type
2Select Product Type
Select Product Type
3Select {MODEL} Type
Select {MODEL} Type
Sample Model Number Tags
Model numbers can be made up of numbers (1005400, for example) or a combination of letters and numbers (LAT1000AAE). The model number will most likely appear on either a paper sticker or a metal plate. Your appliance's model number tag may look similar to the sample model number tags shown here (model number highlighted in yellow):
Model has been saved to My Models. If you're not signed in, your lists are available on this device and will expire within 30 days.
Model has been saved to My Models.
A carburetor basically consists of an open pipe through which the air passes into the inlet manifold of the engine. The pipe is in the form of a Venturi: it narrows in section and then widens again, ...
Fuel tanks are responsible for storing and supplying fuel, like gasoline, for an engine. This fuel tank assembly is designed for and compatible with various models of trimmers and includes the plastic...
This is an authentic Craftsman replacement part that has been sourced from the original manufacturer to be used with trimmers and blowers. The gasket is used to seal the connection between the carbure...
This clutch assembly is a genuine OEM replacement kit for outdoor lawn equipment. The kit includes the clutch drum, clutch, clutch washer, and screw. The clutch assembly transfers power from the engin...
This fuel tank cap fits on top of the fuel tank in your lawn equipment. It prevents gasoline from spilling out and keeps moisture and dirt from entering the tank. If the cap is damaged, it will be vis...
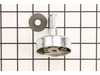
This is a manufacturer approved O-Ring designed for lawn and garden equipment. This is the O-Ring that provides an Air Tight seal between Carburetor and Cylinder Head. If doing maintenance on carburet...
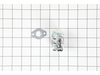
This is a genuine anti-rotation screw from the Ryobi manufacturer. The metal screw is compatible with many lawn and garden trimmers. This item works to help secure the clutch cover assembly. This part...
This is an OEM insulator assembly that is used to protect the carburetor from engine heat and features various seals and hardware made of plastic, steel and rubber. It fits in between the carburetor a...
This is a genuine OEM sourced part that is intended to be used with gas-powered trimmers from Troy-Bilt and Cub Cadet. The drive shaft is used to link the upper drive shaft and the gearcase/cutter hea...
This is a genuine replacement part manufactured for use with gas-powered lawn and garden equipment. The insulator o-ring is used to form a seal between the insulator assembly and the cylinder. This o-...
This is an authentic part which is sourced from original equipment manufacturer. It is generally used on handheld trimmers/edgers. This nut is designed to secure cutting blade to the trimmer shaft. Pl...
$14.96
In Stock
Order now and your part arrives by Mar 19
Questions And Answers for 41ADZ22C912
Be the first to ask our experts a question about this model!
✖
Ask a Question
Ask our experts a question on this model and we'll respond as soon as we can.
emptied fuel from tank. pulled off the 2 fuel lines from the carburetor.opened the air cleaner door. removed the 2 torque screws that hold on the carburetor. removed the carburetor and air cleaner gasket. installed new carburetor and gasket and put back and tightened the 2 torque screws. closed air cleaner door and pushed the fuel lines o
... Read morento the new carburetor.put some fuel in the tank. started the trimmer. runs great.
The replacement of the carburetor, O-ring, and gasket was simple. I removed 2 screws that held the air cleaner and carburetor in place, swapped them out, and replaced the screws. What took longest was finding a piece of fuel line after breaking one of them. It was brittle after hanging in my garage for several years. I found some in my
... Read more garage and replaced it. It took a few pulls to get it started, but ran very smooth.
Additional information: rather than mixing my fuel, I purchased 40:1 pre-mix fuel to prevent gunking up the carburetor in the future. I use it in my other trimmer and have not had any issues.
Removed 2 screws securing the air cleaner and carburetor to the engine using a T25 Torx driver. then removed the throttle cable from the carb.Then removed the o ring gasket from the engine and replaced with a new one and replaced the carb etc. Primed it and fired it up.Runs just like new.


 – Part Number: 753-06189")