Your coupon for will be reflected when you check out!
✖
Your coupon for
✖
Hello!
You're visiting the PartSelect site in U.S.
Would you like to shop on the Canadian site?
Stay on this site
Go to Canadian site
✖
Model Number Locations
1Select Category Type
Select Category Type
2Select Product Type
Select Product Type
3Select {MODEL} Type
Select {MODEL} Type
Sample Model Number Tags
Model numbers can be made up of numbers (1005400, for example) or a combination of letters and numbers (LAT1000AAE). The model number will most likely appear on either a paper sticker or a metal plate. Your appliance's model number tag may look similar to the sample model number tags shown here (model number highlighted in yellow):
Model has been saved to My Models. If you're not signed in, your lists are available on this device and will expire within 30 days.
Model has been saved to My Models.
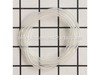
This is the replacement fuel line 25 Inch for several OPE products that use small engines. The fuel line carries fuel from the tank to the carburetor. Over time, the fuel line can become badly clogged...
This Genuine OEM fuel filter is designed to maintain the performance and longevity of your equipment by preventing dirt and debris from entering the carburetor. Located inside the fuel tank, this esse...
This is the Genuine Craftsman replacement part. It is made out of Flexible Rubber and is Sold Individually. The purpose of the 530069216 Tank Purge Line is to return the excess fuel that is in the car...
This primer bulb, also known as a purge bulb, is used to push more fuel from the fuel tank into the carburetor of your small engine equipment, to help the engine start easier. Over time and through ex...
This is a genuine OEM approved replacement starter spring is specially designed for use with gandheld gas powered blowers and trimmers. The purpose of this spring is to retract the starter assembly on...
This is a standard hardware which has multiple applications based on your tool. It is sourced from original equipment manufacturer for use with a variety of power equipment. Please refer to diagrams f...
Does your Weber grill need a new lid? You're at the right place! This replacement lid, a true match to Weber's high standards, fits like a glove on models with a 22.5-inch diameter grill. Crafted from...
This genuine OEM sourced replacement carburetor is specially designed for use with Craftsman handheld trimmers. The purpose of this part is to mix the air and the gas before the combustible mix goes t...
This replacement air filter is supplied by the original equipment manufacturer for use with Craftsman trimmers. The purpose of this component is to filter out dust and other harmful contaminants from ...
This replacement switch is a high quality item that is supplied from original equipment manufacturer for use with handheld string trimmers. It is the main switch that allows user to turn the equipment...
This replacement screw is a high quality hardware that is designed for use with Paramount, Poulan and Weed Eater power equipment. It has multiple applications depending on your equipment, please make ...
This is a genuine manufacturer sourced replacement throttle cable assembly which is specially made for use with Weed Eater and Poulan handheld trimmers and pruners. The throttle cable is connected to ...
1) While still attached to the fuel tank, I first sized up the old fuel lines with the newer fuel lines. 2) With a pair of needle nose players, I then removed the old dry rotted fuel ?? lines, from the fuel tank. 3) I cleaned the fuel tank and around the carburetor area, to insure that there was no debris, that could possibly fa
... Read morell into the path of the new fuel lines installation. 4) I then installed the smaller one of the fuel lines, so that it would be out of the way, of the larger fuel line. I Pulled the fuel line through the smaller hole in the fuel tank, with needle nose players. I pulled the smaller fuel line out through the fuel tank filler hole, attached the fuel filter to the smaller fuel line. I Made sure that the fuel filter was extended to the furthest end of the fuel tank bottom. Six inches in all. I then attached the smaller fuel line to the carburetor. 5) I Installed the larger fuel line, followed the same procedures as the smaller fuel line. 6) Both fuel lines where cut on an angle for easy installation. No lubricant was necessary. 7) I filled up the fuel tank with fresh fuel and oil, new air filter and spark plug. It started on the first pull. Amazing.
To start, remove the plastic carburetor grill. DO NOT remove the carburetor. The fuel line has to be sliced down to fit through the tank hole and get it in far enough up into the tank to grab with needle nose pliers.( need long needle nose pliers which I didn't have) I placed about six inches of the plastic tubing in the jaws of vice so t
... Read morehat half of the tube was squeezed in the vice jaws. I then used a razor blade to shave off the exposed tube. I slipped the shaved end of the tube up through the tank hole far enough to grab with long tweezers and pulled it up to where I could grab it in the tank with needle nose pliers. I put light lube oil on the remaining tubing and pulled it through. It takes a steady firm pull to pull it in. Install the filter and pull the tube back down into the tank. I also used a small diameter drill bit and with my fingers slightly reamed the tube ends to ease the tube over the filter and carburetor nipples. To prime the engine, spray starting fluid into the carburetor and start. Repeat until the engine will run on fuel. It took me hours to figure this out, but will take less than an hour with this method.
Seven screw, three case cover, two air cleaner, two carb mounting, pulled carb, drained tank, pulled old fuel line, treaded new one in, wire to thread, thread to angle cut fuel line. Reassemble, test, sharpen chain, retest…not exactly a doityourselfer, graduate degree in mechanical/industrial engineering and former medium/heavy mechanica
... Read morel. Get fuel line on carb prior to reassembly, line may need some stretching with a tapered punch.


 – Part Number: 530069247")


")

