


2784258690 Kenmore Wall Oven - Overview
Sections of the 2784258690
[Viewing 6 of 6]
Keep searches simple, eg. "belt" or "pump".

Light Bulb - 40W
PartSelect #: PS217532
Manufacturer #: 40A15
This 40-Watt light bulb is sold individually.
It is specially designed to withstand extreme temperatures, so this bulb is compatible with a variety of appliance types including refrigerators, ranges,...
$19.90
In Stock

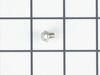
Ignitor Mounting Screw
PartSelect #: PS234519
Manufacturer #: WB1X1293
Sold Individually.
$15.68
In Stock

Broiler Pan - Large
PartSelect #: PS1517612
Manufacturer #: WB48X10056
This large broiler pan is found in the bottom of your oven and is used to catch drippings from broiling foods. This part includes the grate and bottom pan and is made of porcelain. The grate measures ...
$42.18
In Stock


Bake Element
PartSelect #: PS249437
Manufacturer #: WB44X238
Enhance your cooking experience with the GE Bake Element. This genuine replacement part was designed specifically for GE Range/Stove/Ovens, providing an authentic and reliable part for your cooking ap...
$72.37
In Stock

Door Gasket
PartSelect #: PS244569
Manufacturer #: WB32K5038
This gasket seals the oven door.
$121.72
In Stock


Questions And Answers for 2784258690
We're sorry, but our Q&A experts are temporarily unavailable.
Please check back later if you still haven't found the answer you need.
Common Symptoms of the 2784258690
[Viewing 3 of 3]Little to no heat when baking
Fixed by
these parts
these parts

Show All
Little to no heat when broiling
Fixed by
these parts
these parts

Show All
Element will not heat
Fixed by
these parts
these parts
Show All
Keep searches simple. Use keywords, e.g. "leaking", "pump", "broken" or "fit".
The oven door gasked had became hard preventing the door from closing properly.
First I removed the oven door from the appliance. Then I placed it on a table and removed the screws from around the edges. First I removed an aluminum heat shield. Then I removed the first of three heat shielding glass viewing panels, followed by the second one by removing even more screws. I carefuly laid the parts out in the oreder
... Read more
that I remove them along with their screws. Next I removed the large heat shielding aluminum plate that held the first two glass heat shields. Then removed a layer of insulation. Then I was down to the sheel steal plate that holds the gasket. As a precaution I removed the thick pyrex glass heat shilding viewing panel. Lastly the plate that held the door seal was removed. After removing the old gasket, I carefully placed the new oven door gasket in place. After cleaning all the parts that had been removed, I replaced them one at a time in reverse order. Most of my time was spent cleaning. How ever I was especially impressed with the good condition of the oven door after 20 years of approximately every other day oven use. Thanks
Read less
Parts Used:
-
James from Pittsford, NY
-
Difficulty Level:Easy
-
Total Repair Time:1- 2 hours
-
Tools:Nutdriver, Screw drivers
24 of 33 people
found this instruction helpful.
Was this instruction helpful to you?
Thank you for voting!
Interior light needed replaced
Unplugged the appliance for safety. Removed two 1/4" screws that held the assembly in place. Carefully removed the wire guard that retains the glass shield. Unscrewed old light bulb and replaced with new part. Reversed the steps after cleaning glass cover.
Parts Used:

-
Leo from TWIN FALLS, ID
-
Difficulty Level:Really Easy
-
Total Repair Time:Less than 15 mins
-
Tools:Nutdriver
22 of 43 people
found this instruction helpful.
Was this instruction helpful to you?
Thank you for voting!
Burned out bake element
-
Michael from Streamwood, IL
-
Difficulty Level:Really Easy
-
Total Repair Time:Less than 15 mins
-
Tools:Nutdriver
9 of 11 people
found this instruction helpful.
Was this instruction helpful to you?
Thank you for voting!