Your coupon for will be reflected when you check out!
✖
Your coupon for
✖
Hello!
You're visiting the PartSelect site in U.S.
Would you like to shop on the Canadian site?
Stay on this site
Go to Canadian site
✖
Model Number Locations
1Select Category Type
Select Category Type
2Select Product Type
Select Product Type
3Select {MODEL} Type
Select {MODEL} Type
Sample Model Number Tags
Model numbers can be made up of numbers (1005400, for example) or a combination of letters and numbers (LAT1000AAE). The model number will most likely appear on either a paper sticker or a metal plate. Your appliance's model number tag may look similar to the sample model number tags shown here (model number highlighted in yellow):
Model has been saved to My Models. If you're not signed in, your lists are available on this device and will expire within 30 days.
Model has been saved to My Models.
This screw is used in refrigerators. The screw can be loosened or tightened with a Phillips-head or square-head screwdriver. This screw is used to secure the refrigerator handle to the refrigerator do...
This refrigerator ice maker assembly includes the ice mold and integrated control mechanism responsible for freezing water and dispensing ice automatically. Designed for compatibility with select mode...
This part could be found underneath a fridge, dryer, or freezer. The original foot may be cracked, broken, or perhaps missing altogether. If you notice the appliance is uneven to the floor or wobbling...
Designed to support proper door alignment and sealing, this hinge mullion flipper closes the gap between refrigerator doors, helping to maintain optimal cooling performance. It plays a key role in red...
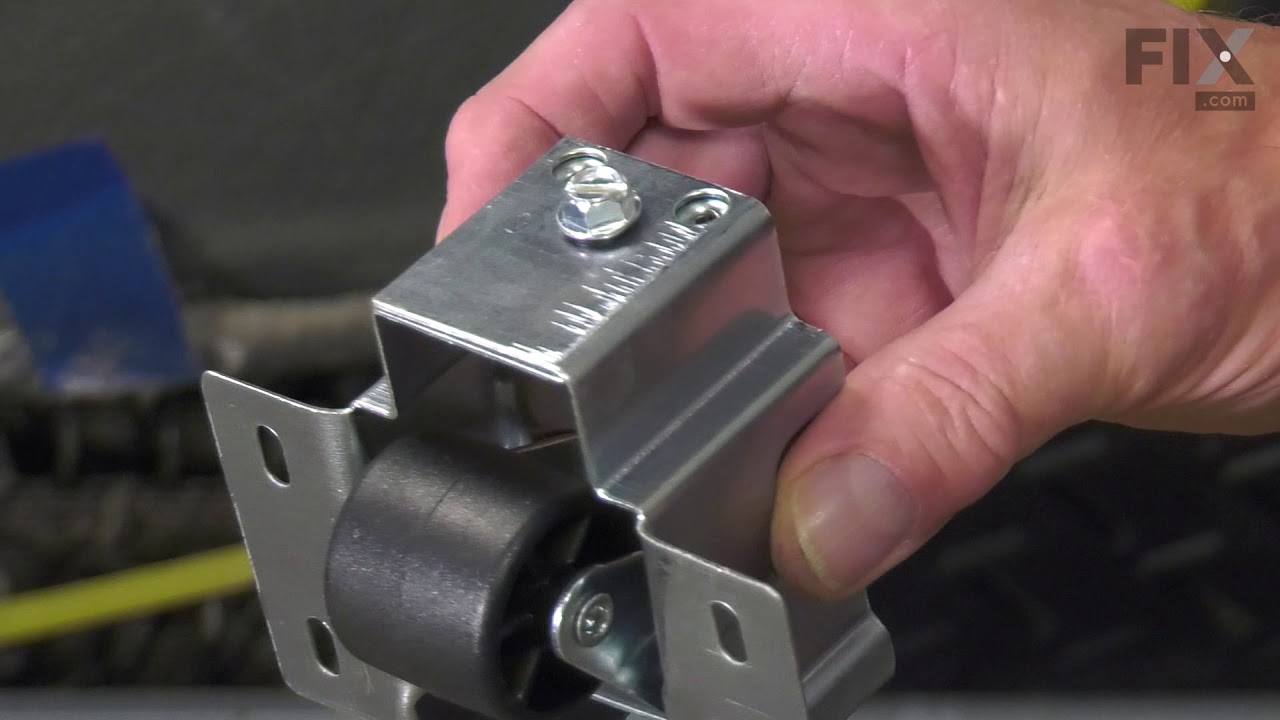
This refrigerator front roller assembly is designed to support the appliance and allow it to move smoothly for cleaning, maintenance, or repositioning. Built from durable metal and heavy-duty plastic,...
This refrigerator user control and display board serves as the main interface for managing dispenser functions, including ice and water dispensing, temperature adjustments, and system settings. Design...
Unveiling the Frigidaire Crisper Pan Support for the right side, a necessary component for your refrigerator's optimal operation. This genuine OEM product is designed to maintain equilibrium for the c...
Frigidaire ensures the longevity of your refrigerator with the genuine OEM Crisper Pan Support. Crafted exclusively to amplify the function and longevity of specific Frigidaire, Electrolux, White West...
$33.69
In Stock
Order now and your part arrives by Jun 4
Questions And Answers for 25370319212
Be the first to ask our experts a question about this model!
✖
Ask a Question
Ask our experts a question on this model and we'll respond as soon as we can.
Simple three steps... 1) There's an front section to the ice-maker to take off. One Phillips screw is on the side, one screw is underneath near the inside of the refrigerator wall. Just unscrew and store. 2) There's a small plastic unit just inside the ice maker to take out. It's held in by a small nut that requires about a 4" extension
... Read more to reach. (You may be able to unscrew the nut with small needle-nose pliers). Just unscrew and take out the unit - the unit functions just to keep the ice maker wiring in place. 3) The wiring looks a mess, but there's just one wiring connector to the ice maker assembly. Unsnap it. The ice maker is not screwed in, it just slides in -- reach in and pull the assembly straight out; when it stops, lower it a bit and it will come free. Reverse the instructions to install the new unit.
We replaced the damper, but it didn't fix the problem. We then purchased and replaced the thermistor. (We had previously replaced the defrost thermostat). The refrigerator side is now cooling better, but not enough. The damper doesn't seem to be opening. So we have now unplugged the damper and left the opening between the refrigerato
... Read morer propped open and the refrigerator side is now cool enough. (We had previously tried keeping the damper open before we replaced the thermistor and the refrigerator didn't cool off. So the thermistor did fix something, but the damper doesn't seem to have been the problem).
First: I could not watch any videos. Big downer. Read the reviews and read a post about “three screws”. Opened the freezer and emptied everything in it. Remove the bin. Two screws are on the left side. They go into the side wall. Here’s where things get weird. The plastic “box” holds the “ice making assembly”. That box
... Read more is attached by FOUR slots. You will need to remove the wire rack below the frame. There’s a plastic spacer on the left side with a slot on it. You can pull it of with your fingers when you rotate it. Slide the rack to the left and pull down the rack from the RIGHT side holes. You have move the box toward you about a inch, then it drops down. Now, there is a electrical connection from the box to the rear of the refrigerator wall. You need a small screwdriver to lift the tab on the TOP of the connector to release it. Once that is done, slide the box forward and put it in the sink. While all this is happening, the freezer is thawing out. Once you remove the box, you will get error codes on the digital display. This is a good thing. There are two “square head’” screws that you have to remove to separate the TWO parts that make the box. Slide the outer trim towards you. The icemaker assembly slides into four slots. You put the new wires in the same place as the one you removed. Put everything back together the opposite of the removal. Now for the secret. All that food you removed? Put it back in until you can slide the box into place. Then you plug the connector in. The box should be sitting on the food. THIS IS THE SECRET. The ice maker has two options. Cubed or Crushed. There are two components that make them happen. On the left side there is a slot with a gray lever the moves up an down. There is an piece of aluminum on the right side the drives the screw in the box. Rotate the screw drive to 45 degrees. THIS IS THE SECRET. On the left side of the box is a rod that is spring loaded and has a bent end. It’s about “timing”. Find a piece of “kite string”. I used the string from the yellow energy tag that came with the fridge. The box is sitting on the frozen food. The wire in the back is connected. Loop the string around the lever AND PULL UP. Slide the whole thing into place using the slots. When it’s in place, let go of the string. Put the two screws back in.
FINAL. You have to PRESS AND HOLD the IceMaker button to reset. You’ll get ice cubes in a couple of hours. Through the first 24 hrs away. You’re welcom.