


24C - Overview
Models starting with 24C
Click on the best match to narrow your results.
- 24C (TYPE 2) Husqvarna Trimmer (Husqvarna String Trimmer Model 24C/TYPE 2 (24C/TYPE2) Parts)
- 24C (2003-01) Husqvarna Trimmer (Trimmer)
- 24C (2004-01) Husqvarna Trimmer (Trimmer)
- 24C (2005-02) Husqvarna Trimmer (Trimmer)
- 24C (TYPE 1) Husqvarna Trimmer (Husqvarna String Trimmer Model 24C/TYPE 1 (24C/TYPE1) Parts)
- 24C (20030100001-20040100000) Husqvarna Edger (24 C (20030100001-20040100000))
- 24C (20050600001-Current) Husqvarna Edger (24 C (20050600001-Current))
- 24C (20040100001-20050600000) Husqvarna Edger (24 C (20040100001-20050600000))
- 24C-060F063 (2004) Troy-Bilt Log Splitter (Chipper)
- 24C3SS (P9872901R) Amana Air Conditioner
- 24C3SS (P1101101R) Amana Air Conditioner (Room)
- 24C3SS P1101101R Amana Air Conditioner (Amana Air Conditioner Model 24C3SS P1101101R (24C3SSP1101101R) Parts)
- 24C3SS P9872901R Amana Air Conditioner (Amana Air Conditioner Model 24C3SS P9872901R (24C3SSP9872901R) Parts)
- 24C3SSP1101101R Amana Air Conditioner (Amana Air Conditioner Model 24C3SSP1101101R Parts)
- 24C3SSP9872901R Amana Air Conditioner (Amana Air Conditioner Model 24C3SSP9872901R Parts)
- 24CA-6CKXWM7 Magic Chef Range (Magic Chef Range/Stove/Oven Model 24CA-6CKXWM7 (24CA6CKXWM7, 24CA 6CKXWM7) Parts)
- 24CB9 Waring Blender
- 24CB9E Waring Blender
- 24CBT Waring Blender
- 24CBT3 Waring Blender
- 24CF50MX783 (2015) MTD Log Splitter (Log Splitter)
- 24CF50MX783 MTD Log Splitter (MTD Log Splitter Model 24CF50MX783 Parts)
- 24CF572B711 ( TB27LS 2017 ) Troy-Bilt Log Splitter (Log Splitter)
- 24CF572B711 ( TB27LS 2012 ) Troy-Bilt Log Splitter (Tb27ls 24cf572b711 (2012) 24cf572b711 Tb27ls (2012))
- 24CF572B711 ( TB27LS 2013 ) Troy-Bilt Log Splitter (Tb27ls 24cf572b711 (2013) 24cf572b711 Tb27ls (2013))
- 24CF572B711 ( TB27LS 2016 ) Troy-Bilt Log Splitter (Tb27ls 24cf572b711 (2016))
- 24CF572B711 ( TB27LS 2014 ) Troy-Bilt Log Splitter (Tb27ls 24cf572b711 (2014) 24cf572b711 Tb27ls (2014))
- 24CF572B711 ( TB27LS 2015 ) Troy-Bilt Log Splitter (Tb27ls 24cf572b711 (2015) 24cf572b711 Tb27ls (2015))
- 24CF572B766 ( TB27LS 2015 ) Troy-Bilt Log Splitter (Tb27ls 24cf572b766 (2015) 24cf572b766 Tb27ls (2015))
- 24CF572B766 ( TB27LS 2013 ) Troy-Bilt Log Splitter (Tb27ls 24cf572b766 (2013) 24cf572b766 Tb27ls (2013))
- 24CG57M1766 ( TB27LS 2015 ) Troy-Bilt Log Splitter (Tb27ls 24cg57m1766 (2015) 24cg57m1766 Tb27ls (2015))
- 24CGMCWBN1 Tappan Range (Gas)
- 24CPMCWBN1 Tappan Range (Gas)
- 24CPMCWBN2 Tappan Range (Gas)
Keep searches simple, eg. "belt" or "pump".

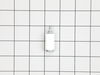
Flat Style Oven Igniter
PartSelect #: PS470129
Manufacturer #: 5303935066
This is a flat style oven igniter used to light the oven burner in a gas range. When the element in this igniter glows white hot, the gas is released from the safety valves, which lights the oven burn...
$45.29
In Stock

Flat Style Oven Igniter Kit
PartSelect #: PS1573892
Manufacturer #: 12400035
The flat style oven igniter kit is used in gas ovens and ranges. It is what provides the heat needed to open the gas valve, and it ignites fuel for the burner assembly. This part can be used for both ...
$50.56
In Stock

Dryer Screw
PartSelect #: PS11746840
Manufacturer #: WP90767
This screw is sold individually.
$7.47
In Stock

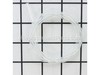
2 Piece Broiler Pan
PartSelect #: PS971245
Manufacturer #: 4396923
This is cookware designed for use in your range or oven. It is a two-piece dish that is used to grill or cook food while the broil function is on, meaning it can withstand high temperatures. This set ...
$49.50
In Stock
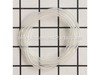
 – Part Number: 530069247")
Fuel Line (25" Length)
PartSelect #: PS9008183
Manufacturer #: 530069247
This is the replacement fuel line 25 Inch for several OPE products that use small engines. The fuel line carries fuel from the tank to the carburetor. Over time, the fuel line can become badly clogged...
$12.20
In Stock

Engine Fuel Filter
PartSelect #: PS9285148
Manufacturer #: 530095646
This Genuine OEM fuel filter is designed to maintain the performance and longevity of your equipment by preventing dirt and debris from entering the carburetor. Located inside the fuel tank, this esse...
$9.16
In Stock

Clock Knob
PartSelect #: PS11744673
Manufacturer #: WP7711P466-60
This clock knob is just under an inch long. It is black in color and is made of plastic. There is a chrome disc of decoration on its top.
No Longer Available

Purge Line
PartSelect #: PS9008180
Manufacturer #: 530069216
This is the Genuine Craftsman replacement part. It is made out of Flexible Rubber and is Sold Individually. The purpose of the 530069216 Tank Purge Line is to return the excess fuel that is in the car...
$18.34
In Stock

Washer Screw 818 X 1/2
PartSelect #: PS11741443
Manufacturer #: WP3390631
This screw is sold individually.
$7.47
In Stock


Range Hex Nut
PartSelect #: PS11742711
Manufacturer #: WP488130
This hex nut is an authentic Whirlpool part that is sourced directly from the original equipment manufacturer, and will fit a variety of appliances including ovens, microwaves, refrigerators, air cond...
$8.55
In Stock

Common Symptoms of models starting with 24C
[Viewing 9 of 9]Gas igniter glows, but will not light
Fixed by
these parts
these parts


Show All
Will Not Start
Fixed by
these parts
these parts
Show All
Little to no heat when baking
Fixed by
these parts
these parts
Show All
Element will not heat
Fixed by
these parts
these parts
Show All
Gas smell
Fixed by
these parts
these parts
Show All
Oven not heating evenly
Fixed by
these parts
these parts
Show All
Door won’t close
Fixed by
these parts
these parts


Show All
Engine stops after a few seconds or minutes
Fixed by
these parts
these parts
Show All
Little to no heat when broiling
Fixed by
these parts
these parts
Show All


Keep searches simple. Use keywords, e.g. "leaking", "pump", "broken" or "fit".
Oven quit heating.
After reading up on the problem of the gas oven not lighting I decided I needed to install a new igniter. I had read where some people just pulled a panel off the back and installed a new one.. yeah, no such luck with this model so I had to crawl into the broiler drawer space [which I had to clean out first]. Note, if you wear trifocal g
... Read more
lasses you might as well close your eyes and replace it by feel because there is no way to tilt your head back enough to see what you are doing and still get both arms and your chest in a broiler. Also be sure to remove all cats and dogs from the area before starting. They seem to think they can help or it's a game of hide and seek and they want to hide with you.. they were no help at all.
Other than that, it was quite easy.
Other than that, it was quite easy.
Read less
Parts Used:
-
John from Darlington, SC
-
Difficulty Level:Easy
-
Total Repair Time:15 - 30 mins
-
Tools:Nutdriver
570 of 626 people
found this instruction helpful.
Was this instruction helpful to you?
Thank you for voting!
Oven would not work but the Broiler did
The oven had been working intermittently for a while and after repeated threats of starvation from my spouse I finally took a look even though it was summer and the grill was working fine. The Igniter would glow red when the oven was turned on but the gas would not flow to it no matter what the temperature setting. I searched online and f
... Read more
ound this site that explained it was possible for the igniter to glow but if it was not drawing the correct amperage (because its resistance was too high) then the main brain would not allow the gas valve to open. So I took a look at the broiler and it had the same igniter. I measure the resistance of both of them and the oven igniters resistance was higher (don't rememeber the reading) then I moved the Igniter from the broiler to the oven and the oven worked from there it was just a matter of ordering the part. End of story except for I am still doing all the cooking on the barbecue outside.
Read less
Parts Used:
-
James from Ferndale, MI
-
Difficulty Level:A Bit Difficult
-
Total Repair Time:15 - 30 mins
-
Tools:Nutdriver, Screw drivers, Socket set
337 of 374 people
found this instruction helpful.
Was this instruction helpful to you?
Thank you for voting!
Oven was difficult to light, then stopped lighting altogether
1. Turned off circuit breaker to stove
2. Removed the two screws holding down the floor of the oven (screws are at back.), and then lifted it out.
3. Removed the nut holding down the flame guard, and lifted it off.
4. Opened the bottom drawer.
5. Removed the protective cover in the back left of the oven at the bottom, ... Read more first removing the one screw at the bottom that holds it. This reveals a white plug, presumably going to a fuse.
6. Disconnected the white plastic connector, lifting its front tab to release it.
7. The igniter wires go to two lugs that attach at the floor of the oven at the back (one goes via the now free white connector). Slide back the plastic lug covers and use pliers to pull off the lugs. Note that the wider one (on the right) goes to the top of the igniter, while the narrower one (on the left) goes to the bottom of the igniter via the white plastic connector.
8. Removed the two bolts holding the igniter.
9. At this point, the igniter comes out. Nice, since it means you can work on the wires in comfort.
10. Slide the flame retardant sleeves away from the igniter. I found in-line connections about 1.5 inches from the igniter, and cut the wires next to these (on the side away from the igniter, of course.), and stripped the final 3/8 inch. Shorten the wires on the replacement igniter so that they are 3 or 4 inches long, slide on the flame retardant sleeves, then strip the final 3/8ths inch. Use the provided caps to connect the wires. Bottom wire goes to the plastic connector, top wire goes to the wide lug.
11. Install the new igniter by connecting the lugs, sliding on their protective plastic sleeves, reconnecting the white plastic connector, screwing in the two igniter mounting screws, and reinstalling the corner cover. Put back the flame shield and floor of the oven. Turn on the circuit breaker, and it works!
Read less
Parts Used:
-
Ritchie from Ithaca, NY
-
Difficulty Level:A Bit Difficult
-
Total Repair Time:15 - 30 mins
-
Tools:Nutdriver, Pliers, Screw drivers
282 of 368 people
found this instruction helpful.
Was this instruction helpful to you?
Thank you for voting!