


1872 - Overview
Models starting with 1872
Click on the best match to narrow your results.
- 1872 Cub Cadet Lawn Mower (Cub Cadet Lawn Mower Model 1872 Parts)
- 1872 (2072-756300-799999-147730100-148720100-148730100-149720100-149730100) Cub Cadet Lawn Tractor (1872 And 2072 S/N 756, 300 - 799, 999 147-730-100 148-720-100 148-730-100 149-720-100 149-730-100 1872 S/N 756, 300 - 799, 999 2072 S/N 756, 300 - 799, 999)
- 1872-0 Briggs and Stratton Generator (1872-0 - Promax 9000)
- 18721-01 (DC25) Dyson Upright Vacuum (Support For Your Dyson Dc25 Upright Vacuum)
- 187215 Jet Hoist & Winch (1-1/2 Ton 5 Foot Lift And Overload Protection)
- 187217 Jet Hoist & Winch (1-1/2 Ton 15 Foot Lift And Overload Protection)
- 1872W0A Roper Range (Gas)
- 1872W1A Roper Range (Gas)
Keep searches simple, eg. "belt" or "pump".

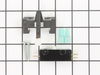
Lid Switch
PartSelect #: PS11723153
Manufacturer #: W10820036
This washer/dryer lid or door switch kit serves as a critical safety component, designed to prevent the appliance from operating when the lid or door is open. It ensures that the washer does not fill ...
$22.52
In Stock

Delta Frame Surface Unit - 6 Inch
PartSelect #: PS11757480
Manufacturer #: WPY04100165
This is a delta frame surface unit, also known as coil element, for a stove, range, or oven. It is a 6-inch surface burner with a reinforced delta frame that carries 1250 watts and 240 volts. The burn...
$52.67
In Stock

Range Hex Nut
PartSelect #: PS11738304
Manufacturer #: WP112432
This 10-32-inch hex nut works with multiple appliances in your home as a fastener. This specific model is sold individually. Hex nuts usually have 6 even sides and together they are used with bolts an...
$7.47
In Stock

Carriage Bolt 5/16-18 x 3/4" Lg.
PartSelect #: PS9298671
Manufacturer #: 710-0451
This carriage bolt measures 5/16-18 x .75 and fastens two parts in your machine together. It has a round domed head and a square underside so the bolt does not rotate once it has been secured into pla...
$6.40
In Stock

Broil Element
PartSelect #: PS340509
Manufacturer #: 326795
This is a five-loop broil element for an oven, range, or stove. It is approximately 11-3/4 inches wide and 18-5/8 inches long with approximately 11-3/4 inches between terminal connections. It features...
No Longer Available


Wsh, Bell., .34 x .872 x .06
PartSelect #: PS9118681
Manufacturer #: 736-0242
Sourced directly from the original manufacturer, this Bell Washer is made of gold-colored metal and is sold individually, not as part of a kit or assembly. It is used to provide spacing between variou...
$6.74
In Stock

Blower Belt
PartSelect #: PS11743766
Manufacturer #: WP691371
This dryer blower belt is designed to connect the motor to the blower wheel in compatible Whirlpool dryers, enabling proper air circulation during the drying cycle. Manufactured to OEM specifications,...
$55.29
In Stock

Washer-lock 5/16
PartSelect #: PS9311087
Manufacturer #: 936-0119
This Washer-Lock 5/16 is a silver, metal part that is sold individually and comes direct from the manufacturer. With a 5/16 Inch Interior Diameter and 1/2 Inch Outside Diameter, it is used to prevent ...
$6.57
In Stock

Lawn Mower Air Valve
PartSelect #: PS9311038
Manufacturer #: 934-0255
The air valve attaches to the wheel and is made of a durable material. This is a genuine MTD, Ryobi, Yard Machines, Bolens, Troy-Bilt, and Yard Man part sourced directly from the manufacturer for use ...
$6.40
In Stock

Nut-lug 7/16-14
PartSelect #: PS9093658
Manufacturer #: 712-3050
This is an authentic replacement part that has been OEM sourced to be used with riding lawnmowers from MTD, Yard Machines, Bolens, and Yard-Man. The lug nut is used to secure the mower\\\'s wheel asse...
$14.08
In Stock

Fitting-grease
PartSelect #: PS9175924
Manufacturer #: 937-3000
This is a genuine OEM lube fitting part made for use with various outdoor lawn equipment models and measures 3/16-inch wide. Sold as an individual part, this grease/lube fitting is made of metal and i...
$7.25
In Stock
Exact Part matches for your search term
[Viewing 3 of 3] (INCL. FIVE #9780) – Part Number: 1872")
COVER-W/SCRS(TLR) (INCL. FIVE #9780)
This part number matches the current model number 1872
PartSelect #: PS9449749
Manufacturer #: 1872
No Longer Available
Bag
This part number matches the current model number 1872
PartSelect #: PS12423619
Manufacturer #: 1872
No Longer Available
Bag
This part number matches the current model number 1872
PartSelect #: PS16981025
Manufacturer #: 1872
No Longer Available
Common Symptoms of models starting with 1872
[Viewing 5 of 5]Element will not heat
Fixed by
these parts
these parts

Show All
Will Not Start
Fixed by
these parts
these parts
Show All
Will not drain
Fixed by
these parts
these parts
Show All
Will not agitate
Fixed by
these parts
these parts
Show All
Won’t Start
Fixed by
these parts
these parts
Show All

Keep searches simple. Use keywords, e.g. "leaking", "pump", "broken" or "fit".
Lid closes, switch wouldn't turn on machine.
Used toothpick for a year to push switch acctuator far enough to engage switch. Broke my foot and found time to order part thru PartSelect. Went from cast to boot and received part 2 days after ordered. Had difficulty with foot and getting to switch. Went back into PartSelect and figured out how to dis-assemmble panels thru the diagrams.
... Read more
Time on my job doesn't, just that their service and expertise that is available to everyone is there to use. Broken bones or not, I will always get my parts and advice from PartSelect. Thanks to PartSelect.
Read less
Parts Used:
-
Kenneth from Wilmington, IL
-
Difficulty Level:Easy
-
Total Repair Time:1- 2 hours
-
Tools:Nutdriver, Screw drivers, Socket set
31 of 47 people
found this instruction helpful.
Was this instruction helpful to you?
Thank you for voting!
Washer would fill up, wash, then stop
I deduced the lid switch was the problem.
I removed the two screws holding the control panel on. Pulled the control panel back.
Disconnected the ground wire of the lid switch.
removed the two top clamps that hold the panel to the top of the machine.
Pulled back the casing (outside of the washer) and placed ... Read more it on it's side on the floor. Here I could reach the switch. Removed old, installed new and reversed the process.
The part that gave me the biggest problem was setting the casing back on to the frame. You have to slide the front part in at the bottome, then lean back the rest of it.
Read less
Parts Used:
-
Glen from Plano, TX
-
Difficulty Level:A Bit Difficult
-
Total Repair Time:30 - 60 mins
-
Tools:Screw drivers
22 of 31 people
found this instruction helpful.
Was this instruction helpful to you?
Thank you for voting!
Washer will agitate, but won't spin
I ordered the switch, which is what most people told me the problem was. I didn't have a multimeter, so I couldn't test the current one.
I removed the two screws from above the lid switch, removed the control panel screws on either side, and used a flat screwdriver to pry the top off by popping the clips.
The swit ... Read more ch was easy to reach, and I compared the old and new switch after removing the paddle assembly. The new switch has three prongs, whereas my old one had two, so I put the gray wire terminal onto the bottom prong. I set everything down, plugged it in, and tested it, but still no spin cycle.
After some further research, I realized the problem was with the spin solenoid under the washer, or the red wire that leaves the lid switch and goes to the spin solenoid, also called a wig-wag solenoid. (This is a belt driven model, not direct drive.) It's not too common that the solenoids fail, but it is rather common that the wires break inside the insulation on this model.
Moral of the story is always ohm through the switches and wires before ordering replacement parts. (Remember, never ohm through a live circuit.)
Read less
Parts Used:
-
Mandie from Lewisville, NC
-
Difficulty Level:Really Easy
-
Total Repair Time:Less than 15 mins
-
Tools:Screw drivers
18 of 24 people
found this instruction helpful.
Was this instruction helpful to you?
Thank you for voting!