Your coupon for will be reflected when you check out!
✖
Your coupon for
✖
Hello!
You're visiting the PartSelect site in U.S.
Would you like to shop on the Canadian site?
Stay on this site
Go to Canadian site
✖
Model Number Locations
1Select Category Type
Select Category Type
2Select Product Type
Select Product Type
3Select {MODEL} Type
Select {MODEL} Type
Sample Model Number Tags
Model numbers can be made up of numbers (1005400, for example) or a combination of letters and numbers (LAT1000AAE). The model number will most likely appear on either a paper sticker or a metal plate. Your appliance's model number tag may look similar to the sample model number tags shown here (model number highlighted in yellow):
Model has been saved to My Models. If you're not signed in, your lists are available on this device and will expire within 30 days.
Model has been saved to My Models.
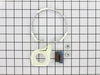
This kit is used for replacing the agitator directional cogs (Agitator Dogs, Agitator Repair Kit, Washer Agitator Dogs, Agitator Dog Ears). The agitator is what creates the thrusting motion in your wa...
The drum support roller kit allows the dryer to tumble properly by supporting the drum cylinder. The kit includes two drum rollers, four tri-rings, and one palnut (or retaining washer). The kit does n...
If you notice that your dryer is noisy or will not tumble, you may need to replace the tri ring. This part is triangular, and is less than an inch in size. Tri rings can be found both on the idler pul...
This is an inner cap seal, but may also be known as an O-ring, and it is a part for your washing machine. Some symptoms replacing this part will fix include: leaking from your appliance, uncontrollabl...
This lint filter helps keep your dryer running safely and efficiently by catching lint and fibers from clothes. It has a unique kidney shape and fits securely with four metal clips. Made from strong s...
This is foam seal for your dryer. It forms a seal to prevent air from escaping the rear of the dryer drum and the lint duct. This model comes with adhesive backing and is located in between the lint c...
This part may also be referred to as a main outer tub seal. This part prevents leaking from the bottom of the tub. The gasket is approximately 2 inches in diameter to the outer edge, black in color, a...
Cycling themostats continually cycle the heating element off and on to maintain a constant inner temperature within the dryer. This particular cycling thermostat can be adjusted between 135 and 155 de...
$48.45
In Stock
Order now and your part arrives by Apr 23
Questions And Answers for 11088732798
Be the first to ask our experts a question about this model!
✖
Ask a Question
Ask our experts a question on this model and we'll respond as soon as we can.
First pry off the cap of the agitator. Then using a socket remove the bolt that holds the plastic cup in place. Remove this cup by prying it loose from the two tabs that hold it in place. Once this cup is removed you can get to the broken cogs. Slip the new cogs into the underside of the cup, and slide the cup back down in the a
... Read moregitator housing using the slots on the side for a guide. (You may want to remove the entire agitator and assemble everything upside down, then flip it all back over to mount, so the cogs don't fall out). Tighten the bolt, snap the cap back in place on top of the agitator and your'e done. Easy repair.
pull off softner dispenser, pop off agitator cap by inserting straight screw driver into small slot, remove bolt inside agitator with socket wrench and long extension, pull agitator straight up off shaft, place agitator on floor, with feet holding bottom half pull top half apart from bottom half by pulling straight up, note direction of o
... Read moreld cogs remove and replace with new, reassemble
To replace gearcase seals, first disconnect the power cord. Turn off water supply and remove water inlet hoses at washer (safety first). You may want to have a bucket available to catch water that will drain out of the hot/cold and drain hoses. Next, remove top agitator cap, seal and (7/16”) bolt (see diagrams on PartSelect). This will al
... Read morelow the top agitator and cogs to be removed. Grab the bottom agitator and rock it back and forth until it can be removed. Suggestion: now is a good time to remove and clean the old soap and junk from drain holes in the top agitator and any junk that may be under the lower agitator. Lay the washer on its right side. You will now have access to the motor, pump, hoses clutch and gearcase. Place a couple of 2X4X(5?) blocks under the tub to support it. Remove the electrical connector from the motor (this is clipped into place) and the two wires that go to the capacitor on the motor.(TIP: don’t put your finger across these terminals, SHOCK HAZARD) Remove the hose clamps and hoses, the two screws (5/16”) on each strap that holds the motor in place, you may have to use a screw driver to pop the straps off the motor. Remove the motor and pump by pushing the tub to the left and move the motor and pump to the right to clear the coupling. If you have not replaced the drive coupling, now would be a good time to order and replace. With the motor out of the way, remove the three (½”) bolts holding the gearcase to the chassis and pull to remove gearcase and shaft. If you are only replacing the drive shaft seal, you do not need to open the gearcase case. Stand the gearcase so the input shaft is facing up, or what fluid is left in the gearcase will come out. One question I see a lot is how do you remove the seal. One, buy a real expensive tool that you will only use once, or take a screwdriver with about a ¼” blade, stick it between the shaft and the seal, gently leverage the seal out while going around the shaft. After the seal is removed, oil can be added thru the seal hole. Understand that different oils are designed for different applications. That said, I used 90 weight gear oil from the local auto parts store, you can add it thru the seal hole. To install the seal, lightly tape it into the seal cavity, then use a socket that is close to the diameter of the seal and gently drive it in. If you have to replace the top case seal, it will require you to take the gearcase apart. The advantage of this is, if you have an older washer, you can clean out the contaminated oil and sludge and check for wear on the parts, and replace as needed from PartSelect. Here’s a suggestion: if you have a digital camera, take pictures, this will really help when you put things back together. Now look at the diagram that is provide by PartSelect, remove the clutch, remove the bolts on the top cover, try to keep it level or you may have a mess on your hands. Lift the cover up over the shaft. I found the top case seal very stubborn to remove. Using a small screwdriver, get between the case and the seal and gently pry it out. Replace the seal, again, by using a socket and gently taping into place. There is also a seal at the top of the drive gear that you may want to replace to keep the oil from going up into the clutch. Now its time to clean all of the years of gunk out of the case and gears. When you are ready, fill the bottom half of the gearcase with oil, about half a quart. To seal the case, I used a ultra blue silicone gasket sealer in a tube from my local auto parts store or sealant can be purchased from PartSelect. I used it on the top half of the gearcase case. Slide the top case over the shaft and evenly tighten the bolts. Reinstall the clutch to the gearcase shaft and install into the washer. I found that the motor bearings needed to be lubed, so I used white lithium grease in an aerosol can. Reinstall motor and don’t forget to put the electrical plug back into the motor and the wires that go to the capacitor and pump h


 Diagram and Parts List for Kenmore Washer Dryer Combo")